Received an invoice from the shop today.
Here is a list of work performed.
And keep in mind, this was a good looking DRIVEABLE, RUNNING, RUST FREE vehicle. It came with very limited service and repair history. Its previous owner had some stuff done, but seemed to be on a budget.
See a "before" photo on post #544 of this thread.
I asked for a reliable and safe unit, without major leaks.
More to the point, I want to drive it, not fix it, so I asked that the major systems be inspected and worked on as necessary.
So far, costs have been what I was quoted, with the exception of the unexpected costs of a new wiring harness and the replacement of the fuel tank well.
Once preliminary work was underway, I decided to have it refinished in USAF Strata Blue, no doubt adding to the amount of disassembly (not to mention eventual paint) required. And as common to USAF Jeeps of the period, the Under hood area will be left OD/green. Surprisingly, the finish in there was recent and will be left as is.
Vehicle Assessment from shop:
Test drove vehicle for 20 miles before initial diagnosis:
Engine starts, runs, and accelerates nominally and operates at correct temperature & oil pressure.
Transmission, transfer case, and drive train function nominally.
Steering is a bit lose; suspension appears to be tight.
Service brakes operate nominally, and do not pull upon hard application…but requires more pedal pressure than standard.
Parking brake operates correctly and holds.
Lighting operates correctly and generator charges at 26.7VDC at engine idle.
Front engine main seal is for sure leaking, (Class II: entire drive train underneath is wet…possibly because of this…?), valve cover gasket is leaking.
Wiring harness is old and insulation is crumbling, no apparent shorts detected.
Front & rear axle pinion seals are leaking, front diff cover gasket is leaking. (Class II)
Transfer case gaskets & seals are leaking. (Class I)
Rear body panel pushed in by < 1/2" due to Jerry can holder being pushed into body by careless backing. Will pull out with Ports Power, no new panels necessary.
Appears to be all original body panels. Jerry can holder is thin metal reproduction.
All lights work.
Two gauges inop.
Speedometer plastic lens crazed by age.
Batteries are recent.
Spark plugs and wires are good.
Steering wheel cracked and bent.
Canvas seat covers are recent. New top not installed but included .
Work Performed:
-Pulled vehicle in shop and removed hood, windshield, seats, jerry can & bracket, spare tire, front bumper rope, and battery cover.
-Removed cushions from seat frames.
-Cleaned out toolbox & glovebox, put all removed items in temp storage.
-Drained block and radiator, removed radiator hoses, removed fan shroud & radiator.
-Drained fuel tank, removed mounting strap & fuel line, removed fuel tank, cleaned out tank well.
-Removed battery cables & mounting brackets, removed batteries, removed trays & drain hose assemblies, cleaned out battery box.
-Removed instrument panel, removed ignition switch, heater switch, and light switch.
-Removed under dash primary & secondary wiring harness,
-Removed headlights, BO marker lights, and related wiring harnesses.
-Removed grill assembly.
-Removed rear lighting access cover, removed rear lights & trailer plug.
-Removed reflectors & antenna bracket.
-Removed chassis & engine wiring harness.
-Removed transmission tunnel cover and floor access pan.
-Pulled vehicle back outside, put on stands, removed wheels & drums, steam cleaned engine, chassis, brakes, and running gear.
-Put back on wheels, removed off stands, pulled back in shop, put back on stands, removed wheels again.
-Removed fan, water pump, starter, generator, distributor, fuel pump, & carburetor off engine.
-Removed front & rear driveshaft.
-Removed clutch linkage, bell crank, & parking brake lever.
-Removed transmission shift tower, shift levers, & speedo cable from transferase.
-Removed engine & transmission.
-Removed front axle ball wipe seals, steering tie-rods, drag link, bell crank, & pitman arm.
-Removed steering wheel & box assembly.
-Disassembled, cleaned, inspected, rebuilt & painted steering box steering box.
-Cleaned front axle trunnions and installed new ball wipe seals.
-Removed front & rear axle hubs, cleaned, inspected, & painted.
-Removed front & rear axle input yokes & pinion seals.
-Cleaned, painted, installed seal repair kits on axle yokes.
-Installed new front & rear axle pinion seals, re-installed yokes
-Removed service brake components, backing plates, and master cylinder.
-Rebuilt brake master & wheel cylinders.
-Cleaned & painted brake backing plates.
-Reassembled refurbished front brake components, repacked hub bearings, replaced hub front seals, installed hubs & drums.
-Blead & adjusted service brake system.
-Cleaned, prepped, & repainted generator, starter, distributor, and other engine parts.
-Replaced front & rear main seal on engine.
-Adjusted valves & oil pump timing.
-Replaced valve & side cover gaskets.
-Cleaned, prepped, and repainted engine block.
-Resurfaced flywheel/pressure plate, cleaned, prepped & painted backing plate, flywheel, & clutch assembly.
-Cleaned, prepped, painted, & installed seal repair kits on transfer case output yokes.
-Cleaned, prepped, painted, and resealed transmission/transfer case assembly.
-Cleaned & pained trans crossmember & bell housing.
-Replaced front axle ball wipes.
-Replaced worn front left outer tie-rod ends.
-Replaced steering bell crank pin, bearings, & seal.
-Installed new drag-link components, mounted & adjusted assembly.
-Installed new tie-rod end dust boots.
-Adjusted front axle wheel toe-in.
-Installed flywheel & clutch assembly with new disk.
-Re-installed transmission/t-case assembly, bellhousing, clutch release bearing & fork assembly.
-Refurbished & re-installed clutch bell-crank tube & linkage assembly.
-Installed engine & mounts.
-Re-installed exhaust manifold on engine, re-attached exhaust header pipe.
-Cleaned fuel pump & repaired stripped assembly screw.
-Installed carburetor, fuel pump, fuel line, & fuel filter.
-Installed engine PCV system, fittings, & lines.
-Cleaned & painted air cleaner assembly & mounted.
-Cleaned & painted engine oil filter assembly, mounted unit, fabricated & ran filter oil lines.
-Installed generator, starter, distributor, plugs & wires, water pump, belts & colling fan.
-Fabricated & installed distributor vent system, installed cross-over tube assembly from carb to filter.
-Drilled new holes in firewall at correct locations, installed heater fittings & hoses.
-Replaced throttle cable with longer unit, mounted throttle & choke cables.
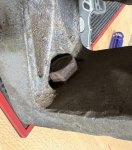
-Removed rusted-out tank floor well, prepped tub, welded in replacement well, cleaned, prepped & painted.
-Welded over old antenna mount holes on left rear quarter panel, grounded flush & primed.
-Straightened-out pushed-in right rear crossmember & bumperette assemblies.
-Pushed-out dented-in rear panel at fuel can mount, mounted jerry can bracket.
-Capped gun pedestal mount holes with elevator bolts.
-Removed non original decals & markings off tub, front fender, rear bumperettes.
-Refilled all gear boxes with lube.
-Boiled out, cleaned, prepped, and painted radiator.
-Painted small parts strata blue & inside front grill.
-Installed front turn signal marker lights in grill.
-Re-installed front grill, radiator, and shroud.
-Installed radiator & bypass hoses.
-Remounted tires and adjusted front toe-in.
-Cleaned-out, prepped, and re-coated inside of battery box
-Chased tapped all floor tunnel cover blind nuts
-Installed floor pans & trans covers.
-Installed pedals & linkages.
-Adjusted clutch, brake & throttle pedal.
-Moved main battery disconnect position, fabricated & routed new battery cables
-Cleaned, prepped & painted battery trays.
-Routed drain tubes, mounted battery box trays, and installed batteries.
-Refurbished rear trailer plug, headlight dimmer switch, horn switch, and front black-out headlamp wires & connectors.
-Installed horn switch, rear trailer plug assembly, and dimmer switch.
-Installed rear tail/brake lights & ran rear turn signal harness.
-Reinstalled jerry can bracket w/correct spacing.
If nothing else, the list shows the amount of work necessary to get a nice Jeep.
The list is long, but the labor bill isn't outrageous, showing the simplicity of the vehicle and the competency and Jeep/MV experience of the man doing the work.
Okay, the labor bill will seem high to you guys who know what you are doing, have the tools and could do this in your sleep.
")
And remember, this was a running, and largely rust free vehicle!
If anyone is interested, I can post the parts section of the invoice as well.
The work is nearly done, all that remains now is the paint and final reassembly.
Soon at car shows when I'm asked if I did the work, I'll give my standard reply..
"No, but I personally wrote every check".