• Steel Soldiers now has a few new forums, read more about it at: New Munitions Forums!

  • Microsoft MSN, Live, Hotmail, Outlook email users may not be receiving emails. We are working to resolve this issue. Please add support@steelsoldiers.com to your trusted contacts.

XM1027 - CUCV Crew Cab Build

tim292stro

Well-known member
2,118
40
48
Location
S.F. Bay Area/California
Yes, I have vast experience with Peltiers. IMHO, they suck for high powered cooling :). A CCD will probably dissipate ~15-20Watts if it's a big imager like the EM-CCDs used for life science and other interests, a Peltier can handle that because it takes about 150-200% of the power of the device being cooled with a Peltier to suck the heat out of it. That would mean I'd need a 750-1kW Peltier to cool a single 500Watt LED, not energy efficient, and when we're talking about these levels of power, 150-200% waste is a lot... The transfer of heat in a Peltier is also not 100% efficient (in fact it usually less than 10% efficient, read here for example), that means the Peltier will self heat more than it moves heat, which is more heat to remove in total. The other problem is the Peltier only moves the heat about 5-10mm (the thickness of the element), then it needs either a heat sink or some other medium to transfer heat to or it will burn up - I'm already packaging constrained with the auxiliary headlight since I want to keep the physical appearance unaltered, I need most of that space for optics since I'm trying to make a spot-light out of a Lambertian emitter. And the final problem is the maximum T-delta allowed across a Peltier is about 68°C, any higher temperature difference and the Peltier cracks and stops cooling - the LED will get to 125°C before damage is done, but left un-cooled it will literally melt down and catch fire.

The end result is that water cooling is simply a matter of moving the volume of water through a cooling block fast enough to take away the heat, and then letting it sit in a radiator-cooler long enough to get rid of the heat to ambient air. The work becomes modelling the thermal design of the cooling block and picking a radiator that can reject as much or more heat than I'd need to in the worst case, then a pump to circulate the volume.

Some of the coolest stuff I'll be doing here is reducing the thermal resistance of the LED-to-water-block interface. I could use thermal paste and screw it down, but I wanted a fully molecular bond between the LED copper heat spreader, and the copper water block - so I first looked at Electron Beam Welding, and finally landed on thin-film low-thermal-pulse micro-thermite welding (trade name "NanoFoil"):


This allows me to eliminate the need for screws, which makes it possible to move the cooling water closer to the back of the LED. This leads to less machining, less mechanical complexity, less likelihood of leaks, and higher thermal transfer efficiency. Incidentally it also lets me do it myself instead of relying on the skill of a shop somewhere else in the country that hasn't done this before, that might damage a $200 LED if they mess up.
 
Last edited:

Another Ahab

Well-known member
17,988
4,527
113
Location
Alexandria, VA
Yes, I have vast experience with Peltiers.

Some of the coolest stuff I'll be doing here is reducing the thermal resistance of the LED-to-water-block interface. I could use thermal paste and screw it down, but I wanted a fully molecular bond between the LED copper heat spreader, and the copper water block - so I first looked at Electron Beam Welding, and finally landed on thin-film low-thermal-pulse micro-thermite welding (trade name "NanoFoil"):
Day-Yum, Tim; I'm thinking maybe landing that probe on the asteroid the other day was simpler than the stuff you're talking about here. Very cool!
 
Last edited:

llong66

New member
453
2
0
Location
kokomo, In
Wow Tim, sounds like you know MUCH more about peltiers with high power applications than I do! My use was quite a few years ago as far as the tech world goes, .25-,5 MP CCD units so we are truly talking apples and oranges! We were mainly trying to keep the CCDs cool to limit thermal noise which is important in astro work. Sorry my idea was not of more help! Good luck and I look forward to seeing how it all works for you!

Greg
 
Last edited:

tim292stro

Well-known member
2,118
40
48
Location
S.F. Bay Area/California
No worries, thanks for the suggestion - I did look at all options, the thermal solution has been coming into focus over the last two months or so. Peltiers have their place, but the power cutoff is around 150-250 watts. Even at that power level it's beat by other cooling methods, like heat pipes and vapor chambers.
 

tim292stro

Well-known member
2,118
40
48
Location
S.F. Bay Area/California
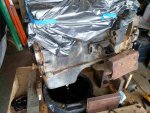
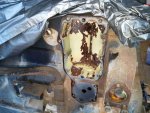
Working on the engine some more today, first part was draining the oil (black!!) and removing the filter:
1116141208a.jpg

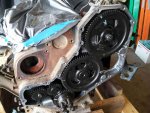
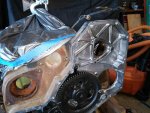
Then I pulled the gear train cover:
1116141230.jpg

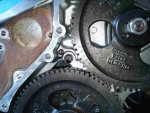
This is one of the things that destroys early (pre-'97.5) Cummins 5.9L 6BT engines and is one of the big reasons I decided to tear to engine down to check. It's called the Killer-Dowel-Pin (just slightly up and to the left of the bolt inside the gear cover), and on this engine no one has done a fix to ensure it doesn't fall into the gears:
1116141230a.jpg

This pin in used to locate the gear train housing since the Injector Pump mounts to the housing, it is needed to ensure the proper gear lash but it has a history of vibrating out over several years, due to the fact that it's a diesel. If it does so, one of THREE things happens:
  1. It drops onto the gear and gets shot out the side of the aluminum gear housing - this causes a massive loss of oil and much smoking, but doesn't kill your engine so much as leave you calling for a tow.
  2. It get sucked into the gear, breaking teeth, or tweaking the cam-shaft causing the cam shaft to loose sync with the crank - this causes valves to be pushed out at the wrong time leading to valves running into the top of the piston, potentially bent piston rods, bent/broken valves and general self destruction.
  3. [EDIT:] You have a solid in with GOD and he sends down his angels to ensure that the KDP barely slips between the face of the gear and the cover, all the way down into the oil-pan without ever brushing a gear tooth - and you continue to run your engine without any knowledge that you have cleared that debt. It rarely happens this way, read into that as you may... :) [/EDIT]

The simple fix is to put a washer with a "finger" that covers the KDP hole under the gear case bolt right next to it - there are kits for this.

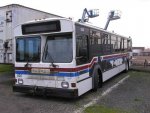
Took a break to walk the kids while my wife went and got a massage, found a military vehicle in my parent's neighbourhood.
 
Last edited:

tim292stro

Well-known member
2,118
40
48
Location
S.F. Bay Area/California
Second half of today, almost have it down to components... Wife came back home refreshed, took the oldest kid and Grandpa came back and took the youngest.

I pulled the oil pump and Injector Pump, had to go borrow a gear puller from Autozone:
1116141600.jpg

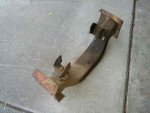
Pulled the old Dodge RAM cross-member:
1116141603.jpg
1116141603a.jpg
1116141603b.jpg

Pulled the oil filter, oil filter housing, and oil cooler, looks like the antifreeze was change as infrequently as the oil...:
1116141610.jpg

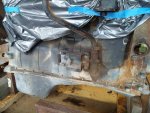
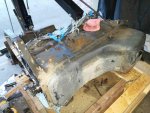
Then started flipping the engine so I could pull the oil pan:
1116141632.jpg

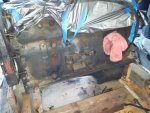
Then finished flipping the engine:
1116141701.jpg

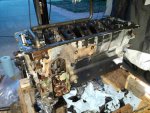
Ran out of light, and diner arrived so it was time to call it a day. I only need to remove the cam shaft, the tappets, and the gear-train housing. I need to flip the block so that I can pull the cam shaft without the floating tappets binding up the shaft - gravity keeps them on the cam shaft when it right side up, and thus keeps them off the cam shaft when flipped. Since I don't have an engine stand that can take the weight of a Cummins, so I have to do it slowly and carefully with a hoist. Did this by myself except for a few moments of help from my dad.

Once I get the cam shaft and tappets out it's machine shop time. [thumbzup]
 

tim292stro

Well-known member
2,118
40
48
Location
S.F. Bay Area/California
So... one of the reasons I'm spending a lot of time making sure everything is "right" on my daily driver's is that I put a fair amount of miles on my vehicles. Things need to last for a long time, which is why I'm putting in an engine that's good for 500K-miles between rebuilds, a transmission that's good for 250K-miles between rebuilds if the vehicle weighs 3x what this truck will at max load, and axles that are over-rated for the use case.

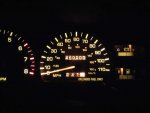
Case in point about the mileage, my little beater Toyota Pickup (seen in many photos of me picking stuff up) just rolled 450K last night. I do about 25K a year on average (over 15 years), and I'd like to do more so that we can visit the in-laws in the mid-west bi-annually.

1203142013a.jpg

Yes, I was stopped in a parking lot when I took this picture, note the speedometer is at "0"... [thumbzup]

If all goes well, I should be able to see this number on the new truck in about 12-15 years. ;)
 

Another Ahab

Well-known member
17,988
4,527
113
Location
Alexandria, VA
That's Boss!

Case in point about the mileage, my little beater Toyota Pickup (seen in many photos of me picking stuff up) just rolled 450K last night. I do about 25K a year on average (over 15 years), and I'd like to do more so that we can visit the in-laws in the mid-west bi-annually.
champagne.jpg
 

tim292stro

Well-known member
2,118
40
48
Location
S.F. Bay Area/California
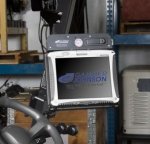
My name is Tim, I have a problem... I'm addicted to ToughBooks (more evidence here :shock:).

I recently picked up 5 docking stations for CF-19Mk3, convertible ToughBooks, and a pair of CF-19Mk3's. Each seat is getting its own...
CF19_mount_tablet_mode.jpg

GamberJohnson makes the military mount for this model, and there's no way I'm dropping the $3,500 EACH for the mount only...
View attachment CF19_Military_Mount.pdf
So I'm taking the 5x $25 Ledco mounts I bought and repackaging them to look/function like the more expensive/accurate version plus some added capabilities/functionality...

The ToughVoIP phone deal fell through, so I'm going to make these "stations" the intercom device by running Linphone in command line mode, and providing standard MIL connections for the respective headsets/speaker+handset. For what I was going to have to spend on ONE ToughVoIP phone which only functions for intercom/radio, I am getting FIVE full touch-screen computers (think Blue Force Tracker). I will do a lightweight Linux on these so they boot wicked-fast, and basically run it in a Kiosk mode when docked (turns into a full Linux PC when removed).


Engine is still not off to the machine shop - holidays and an illness, and now funding (due to illness) kept me out of this for the last two months. I'll pick it up again here soon, work is about to come to a screeching halt, so I'll have more time.

Also it looks like I'm going to have to pay to have a shop do the stretch, none of the 5 I've talked to are comfortable with the inspect/certify method - looks like a California business liability issue... (bummer)
 
Last edited:

tim292stro

Well-known member
2,118
40
48
Location
S.F. Bay Area/California
This project is not dead, just haven't been talking about it. After getting the engine torn down, I was looking to move it to the local shop I had talked to in order to get the block checked out and any work done on it which was required. Shock of shocks... in the 6 months since I had last talked to the shop, the owner had died and the shop closed. I didn't even know it.

In the last few weeks, my dad put me in touch with a mechanic he used to work with an a water/sewage plant, this guy used to do tractor pulls using trucks based on this engine. He knows of a few good shops, most of them are a bit of a drive away, but he offered a cherry on top - I can do the rebuild at his race shop after the block is serviced, and he can watch over to double check my work, and step in if I get into trouble. Awesome!! My company's ESPP stock purchase is about done so I have some extra to liquidate in early March - this will get a few of my projects a little further along visibly.

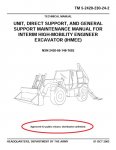
I figured I'd also let anyone know who is doing a Cummins 5.9L diesel of this vintage - a shop manual is very important for maintaining this engine, things like the order of tightening head bolts is in there. I had been looking to buy a copy of Cummins 3666017-01 (1991-1994 5.9L 6BT shop manual) a few on eBay went for more than MSRP ($110), and weirdly a local Cummins dealer wouldn't even return phone calls or email (not sure why). It was in frustration I started searching for Technical Manuals for any piece of military equipment that has this engine in it (and there are quite a few). Lo and behold, TM 5-2420-230-24-2 "INTERIM HIGH-MOBILITY ENGINEER EXCAVATOR (IHMEE)" (this is a 26MB file!!) is for an excavator with this engine from that era. Remarkably, they have the entire OEM Cummins shop manual (Cummins P/N: 3666017-01) unaltered in section two of the TM, AND the entire troubleshooting manual (Cummins P/N 3666087-01, another $110 book) for the engine in the third section.

1912-so-much-win.jpg

TM-5-2420-230-24-2_cover.jpg
 
Last edited:

tim292stro

Well-known member
2,118
40
48
Location
S.F. Bay Area/California
I've been bagging parts from the engine tear down in preparation to move it to the central valley for rebuilding. In the mean time I picked up 8x CF-19 ToughBooks for the last of the CarPuters (only plan to use 5, have 10 to pick from) - they are a little smaller than the CF-30's I'm using in the FOBIC and S-250 projects, and in tablet form they are VERY compact (but still features a 10.4" sunlight readable touchscreen LCD):
ToughBookSizes.jpg
I got them all booted and configured this weekend while I was stuck home, started work on the fast-boot "docked" OS build. These will be two mode machines, you have to power down to remove/install them in the dock, this means I can configure them to boot from a USB hard drive attached to the docking station when docked and the internal hard drive when un-docked. Running a slim 15-second-boot Linux for the docked usage, mostly a web-kiosk. When un-docked, running a full Ubuntu Desktop 64-bit 14.04 LTS install with more tools and software.

I can safely repeat:
OneToughBookMeme.jpg


I also found a huge deal here in the classifieds and bought a case (four to use + two spares) of RadioRay GoLights from Gimpy (thanks!!) to put on the truck, like what you see on the top of MRAPs:
matv-mrap.jpg
I'm seeing how possible it is to put in 130Watt HIDs in these (will need to "remote" the ballast), or convert them to 3x 150W 6000K-White/940nM-IR LEDs.


Still more happening here in the next weeks...
 
Last edited:

tim292stro

Well-known member
2,118
40
48
Location
S.F. Bay Area/California
I found a bit of a disaster today. I swung by the storage lot and noticed that my transfer case box had been knocked over, apparently it happened a while ago, the transfer case fell out of its box and was "transmission opening up," so the last storm did a great job filling it up with water :doh:, I would have drained it tonight, but the t-case still had oil in it, so I'm not just going to dump it on the ground. I think it's probably toast though based on the color of the soup in the housing. aua
 

Csm Davis

Well-known member
4,158
391
83
Location
Hattiesburg, Mississippi
Tim don't give up on the transfer case just yet go ahead and drain it and open it up and clean it out you will probably be happy with just how little damage there will be. Fingers crossed for you.
 

tim292stro

Well-known member
2,118
40
48
Location
S.F. Bay Area/California
Yeah, I've heard these can be pulled back from the brink with marvel mystery oil or something since it's mostly hard cast metal, I'm hoping the oil coated the gears and case mostly and only the cheaply replaceable parts have been converted to oxide - if I have to replace the shafts, that's not a big deal - I was thinking about replacing them with hardened 300M shafts for robustness. I won't be able to take a look at this until the weekend, so it's very unnerving with this in the back of my mind.
 

tim292stro

Well-known member
2,118
40
48
Location
S.F. Bay Area/California
A quick step back the the LED lighting for this truck...

I finally found a video someone did which shows the 500Watt LEDs I'm using:
https://www.youtube.com/watch?v=3Pi-LKf0hXI


Skip to 6-minutes to see the demo outdoors - he does a lot of "spinning his wheels" while talking earlier. Also at 7:30 you get an idea of how hot the beam off the front of these can be (so as I suggested earlier, ice build up is NOT an issue). He talks about the lens used being 100-degree beam angle, I'll be using two of those in the front, and two in the back for the floods, the spots will be 15-degree beam angle (two lenses, one multi-faceted plano convex, and one fesnel to fit in the housing). You should be able to see what I mean about needing dimming even during the day, and the need to be very careful in locking the maximum brightness out unless the conditions are right. Just running the floods, I wouldn't be able to see an on-coming car's headlights, and the driver of that car would basically be temporarily blinded - so again, EXTREME CAUTION is the name of the game.
 
Last edited:

Another Ahab

Well-known member
17,988
4,527
113
Location
Alexandria, VA
A quick step back the the LED lighting for this truck...

I finally found a video someone did which shows the 500Watt LEDs I'm using:
That's some serious lighting:

- I thought LED's produced NO heat (part of their selling point).

I guess THAT's not accurate (based on the video).
 
Top
AdBlock Detected

We get it, advertisements are annoying!

Sure, ad-blocking software does a great job at blocking ads, but it also blocks useful features of our website like our supporting vendors. Their ads help keep Steel Soldiers going. Please consider disabling your ad blockers for the site. Thanks!

I've Disabled AdBlock
No Thanks