• Steel Soldiers now has a few new forums, read more about it at: New Munitions Forums!

  • Microsoft MSN, Live, Hotmail, Outlook email users may not be receiving emails. We are working to resolve this issue. Please add support@steelsoldiers.com to your trusted contacts.

FLU419 SEE HMMH HME Owners group

The FLU farm

Well-known member
Steel Soldiers Supporter
3,338
1,319
113
Location
The actual midwest, NM.
The see I have here after all the see fixing I need to make a adapter to mount a auger in place of the bucket and either find a place to tap into the backhoe plumbing or use the auxiliary hyds.
Maybe you could plumb in diverter valves, so once the backhoe is positioned, the same setup could run the auger instead?
 

The FLU farm

Well-known member
Steel Soldiers Supporter
3,338
1,319
113
Location
The actual midwest, NM.
I agree that just replacing that weird male screw-on fitting on each side of the truck with a typical NPT quick connect would be a preferred option. I guess the worst that can happen is for me to try it...what could possibly go wrong? I'll post pictures...

Yes, these push-in drain valves suck...
You try it, and I'll copy it if it works. I can live with that.
 

BigBison

Member
317
1
18
Location
Yampa, CO
That's an interesting snow blower setup. Makes sense now that I've seen the picture of it. It'll also be interesting to find out how the SEE deals with its hunger for volume and pressure.
They sell optional bolt-on top/side extenders, so if 6' proves too narrow, I can go to 6'4" or 6'8" depending on 2" or 4" extenders. I like the simplicity of ditching the augers, unfortunately it's still by far the priciest unit I've found. BUT, it is industrial-grade construction with an uprated hydraulic motor compared to most, plus it's the fan that makes all the difference in snowblower performance so having two 35" six-blade fans ought to get lots of work done.

Once I've got a tranny-mount PTO & hydraulic pump worked out with enough capacity to run it, that is! I hope it works out, because the oddball design does make it perfect for a SEE!

http://snowwolfplows.com/products/quattroplow/

That's the plow I mentioned. Those two tools oughtta make Bam-Bam a beast of a plow truck. My crazy idea for Pebbles would be running out the hose reel to a rotary brush mounted on the crane, for rooftop snow removal...
 
Last edited:

The FLU farm

Well-known member
Steel Soldiers Supporter
3,338
1,319
113
Location
The actual midwest, NM.
They sell optional bolt-on top/side extenders, so if 6' proves too narrow, I can go to 6'4" or 6'8" depending on 2" or 4" extenders. I like the simplicity of ditching the augers, unfortunately it's still by far the priciest unit I've found. BUT, it is industrial-grade construction with an uprated hydraulic motor compared to most, plus it's the fan that makes all the difference in snowblower performance so having two 35" six-blade fans ought to get lots of work done.

Once I've got a tranny-mount PTO & hydraulic pump worked out with enough capacity to run it, that is! I hope it works out, because the oddball design does make it perfect for a SEE!

http://snowwolfplows.com/products/quattroplow/

That's the plow I mentioned. Those two tools oughtta make Bam-Bam a beast of a plow truck. My crazy idea for Pebbles would be running out the hose reel to a rotary brush mounted on the crane, for rooftop snow removal...
Wings are easy enough to make, should you decide to go wider. I'm fairly sure I'll end up adding at least two six-inchers to mine...if it'll run okay in the first place.

This spring, would you mind if I borrowed your snow blower for a while? I'd love to see what that dual fan setup would do to a herd of prairie dogs.

I've used my "sky hook" to pull snow off roofs and container tops. Gotta be a bit careful, though, especially around vents and such.
You could possibly use your rotary brush as a chimney sweeper, too.
 

BigBison

Member
317
1
18
Location
Yampa, CO
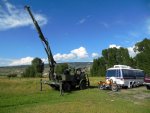
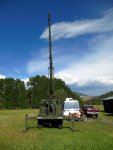
The crane controls are as "jumpy" as the swing pedals on the SEE's backhoe (I didn't do it, but my otherwise-pristine hoe bucket has a big dent from getting rammed into the passenger-side stabilizer, prolly while stowing). I'm editing some pics now, of my exploits with the crane. There's maybe 1/8" of lever travel between full-closed and full-open, prolly why there are bash marks and dents in various places on both my mogs -- I only took some paint off the driver-side outrigger extension ram the first time I tried the crane! I'd need waaay more operating hours on the crane before I'd try the rotary-brush idea, to develop "feel" on those controls. WHAM! BANG!! The crane's tricky, but maybe that has something to do with my hydraulic leak, I am not an expert?
 

The FLU farm

Well-known member
Steel Soldiers Supporter
3,338
1,319
113
Location
The actual midwest, NM.
The crane controls are as "jumpy" as the swing pedals on the SEE's backhoe
Several of my levers and valves were quite sticky, too, but lots of JB-80 applications and moving things around did eventually free them up quite well.
Also, ditching the 10W in the system probably didn't hurt.
For now, the sure-fire way for you to avoid damage and/or surprises is to only run the engine at about 700-800 rpm.
 

BigBison

Member
317
1
18
Location
Yampa, CO
Both my mogs came with ASW-32 for the hydraulics. I probably still would've done the damage I did, even if I wasn't running 1800RPM thinking the HMMH has the same PTO hydraulics as the SEE (pics pending). Always RTFM, I'd have noticed there wasn't a problem with my idle control on the HMMH. Although it did stick a bit. I was out of WD-40 so I squirted a few drops of 3-in-1 on the actuator and "exercised" it, voila it works! But yes, thanks, maybe lubing the crane properly and giving it some real loads (after that cylinder's rebuilt) will make for a different operational experience!

Instead, I got impatient, and figured "what can go wrong lifting a 25-lb load" like a dumb***.

pic1.jpg
 
Last edited:

BigBison

Member
317
1
18
Location
Yampa, CO
GIMP keeps crashing on my iMac... wait, what?!? Never happened before. Anyways, some pics:

pic2.jpg

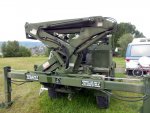
It's the horizontal cylinder in the next pic, which leaks. Some of the cylinders on the HMMH are field-serviceable, this one has to be removed & rebuilt:

pic4.jpg

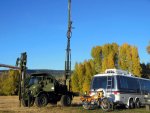
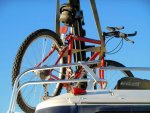
My 25-yr-old rigid mtn bike seemed like a lightweight, non-valuable practice load. I'd like to lift the BMW R90/S, so I tried the mtn bike first, don't know how to lift the motorcycle without breaking it. Probably too valuable at this point, to even attempt! Had a microburst here today, otherwise no wind, but took me a good 1/2 hour to clean up after, even though it only lasted 30 seconds!

pic5.jpg

Ooopsies! Didn't damage the mtn bike, but did discover an issue for the '77 GMC Motorhome refurbish -- through-bolt the ladder to the (aircraft aluminum) struts, instead of screws!

pic6.jpg

Close-up of the sticker on the back of the motorhome:

pic3.jpg

When I re-paint, something along these lines will be on both sides, I really hate how motorhomes look nowadays as regards their paint jobs. I'm refurbishing mine for winter duty, front-wheel-drive already, gonna get the same W-960 Blizzaks for it as I run those year-round on my other trucks.
 
Last edited:

Skidpad

New member
55
0
0
Location
Nashville, Tennessee
Hey guys, just back from a long night of chasing down various bugs on the SEE. I have two random questions in case anyone knows the answer to either.

1. What are these two cables on the passenger side of the engine?

2. What is this electrical port to the right and below the steering wheel?

Finally, has anyone got any advice on parking brake adjustment? The TM is a little unclear on the adjustment nut thing. I spent 30 minutes tonight gazing up at the cables and such. I holds on level ground but on a good slope it will still move. With only 560 miles I can't imagine that the pads need replacing so I think it must be the cables need adjustment.

20160919_193929.jpg20160919_193626.jpg

Oh, and FLU farm and Big Bison, I have serious HMMH envy now...
 

BigBison

Member
317
1
18
Location
Yampa, CO
Meanwhile, the real problem with rooftop snow removal, is the lack of remote crane-control capability (Pebbles also lacks the load sensors of other modern cranes, which lock out the controls before the truck tips or seals blow, if an overload situation is detected). The rotary brush idea would basically dump all that rooftop snow right on the operator... wear yer goggles! What I might do is attach a push-broom and get some practice on buildings around here that are falling down anyway, before getting too carried away with the coolness of a rotary brush. Or thinking about remoting a crane that never had that as part of its design criteria?

The seriously-crazy idea, would be to equip the HMMH with the same gadgetry found on my AutoCrane 3203 EH PRFX (on custom Knapheide w/ air compressor & dual-tank setup, six off-road lights on the worry bar, LED work lights at all four corners, Wilton's biggest vise on a custom mount, two years old now but only used 1/2-dozen times to pull boat motors, mine at auction for $10K delivered last year) w/ FM remote control. I have stuff to build, OK? :) The concept is, use the service crane for everything it's capable of, and the HMMH for 2nd-story work and such. So many cool tools to put out at the tip of a knuckle-boom crane these days, but really, the load sensors & remote-controls are a must-have for that, also the hydraulic capability not being jury-rigged.

Although, just calling a friend to be a spotter woulda kept the mtn bike pedal from catching on the motorhome ladder, that's just common sense! Maybe one less beer. I'm the guy out there getting to know his SEE and HMMH wearing shorts, t-shirt, and flip-flops, with beer in hand. Makes me soooo aware of my knuckles & toes! I've ripped a fingernail, but not past the cuticle, so far. When I do real work I'll be kitted out in steel toes & a hardhat, because the driver-side operational controls on the HMMH (passenger side isn't full-function) can really, really injure someone. HMMH is a knuckle-buster to limber/unlimber, I have a bad back to boot so I'm learning a few things as I go.

Like, engage PTO before exiting cab! :) Those stabilizer pads are easiest to swing in/out with the crane about halfway between lock positions, lower the crane all the way and feel like a total moron for forgetting, eh? Even on the SEE, about 80% of the time I get out and try to lower the hoe into position, only to have to climb back in to engage PTO! Buried somewhere in this thread, is the tip to put the H-shifter in 1 with the range shifter in N, *then* engage the PTO -- even at too-high an RPM (up to a point), I haven't heard any grinding noises using this method.

There's a "tread plate" on the HMMH if you need to climb up onto it after unlimbering the crane, like to grab that jerry-can you see in the pics of mine. What I'd like to do, is make it somehow quick-release. So I can put it down at the controls. The damage I did to my motorhome with the mtn bike, even with a spotter, was going on 180* behind me (the remote control on my AutoCrane would've negated the need for a spotter) so I was "contorting" at the controls. While standing on gravel -- even without flip-flops, easy to slip, more so in winter... do that while you're putting down the stabilizer several inches away, and that warning decal with a foot gettin' all Kunta Kinte'd is no joke!

Or, if you slip, how you gonna not reach out to catch yourself, and hit one of those hydraulic levers? Maybe just a snow-rated stair-step or two in the toolbox, to put down. Or, when I busted up the motorhome, I shoulda been on the other side of the HMMH so I could see both what I was doing, and the controls, by just bobbing my head instead of having to rotate 180*. My only other crane experience is using the FM remote on my service crane, so going all old-school was a bit of an eye-opener. No mtn bikes were damaged in the production of my pics!
 

BigBison

Member
317
1
18
Location
Yampa, CO
2. What is this electrical port to the right and below the steering wheel?
If the thing it's next to is the really-annoying buzzer which sounds until the air's up to pressure, it's my understanding it's a totally-useless diagnostic port. I've seen a couple references here to the thing which plugs into said port, also being totally useless. Forward of the fuel tank on my HMMH, I found a connector which is more "data" than anything else, traced the wiring to the port in question. Way down on my to-do list for the mogs, is checking into those sensors, for the purpose of modding it for an OBD1 (or 2, 1's simpler) diagnostic port any Fluke, etc. can plug into. Really long-term project, but I do have the skills and wherewithal at some point...

Especially if I can get my hands on the wiring schematic discussed in this thread!!!
 

BigBison

Member
317
1
18
Location
Yampa, CO
The problem with my AutoCrane/Knapheide is it's on the wrong truck! Which I didn't care about, because I was gonna use the HMMH to remove the bed from the right truck, and install the Knapheide on it. So now I'm jury-rigging to get the AutoCrane running, to fix the HMMH... running around in circles this year. The heartache of the new FLU owner, is getting all the bugs worked out. The joy, is realizing that once you do, if you keep on top of the routine maintenance, these things oughta get plenty of work done over the years with very little maintenance hassle. When I use my HMMH to swap beds on my Dodge CTDs, and both FLUs are capable of being used to fix/maintain/operate themselves, I'm gonna be a happy camper... until then, I'm worried I'm dreaming!
 

BigBison

Member
317
1
18
Location
Yampa, CO
Finally, has anyone got any advice on parking brake adjustment? The TM is a little unclear on the adjustment nut thing. I spent 30 minutes tonight gazing up at the cables and such. I holds on level ground but on a good slope it will still move. With only 560 miles I can't imagine that the pads need replacing so I think it must be the cables need adjustment.
My SEE's parking brake is totally f***** but the one on the HMMH *seems* to work, engages the dash light and everything, but now you have me thinking I ought to park it somewhere that isn't level before I go trusting it!
 

BigBison

Member
317
1
18
Location
Yampa, CO
Also, my AutoCrane (like most modern cranes) has proportional control. The HMMH has a switch from 800RPM idle to 1100RPM for crane operations, not the same thing. I'm not gonna knock the HMMH because having that burly a knuckle-boom on any other truck these days, requires a third axle and a CDL to operate anywhere but the owner's property. My mogs will live in a Quonset Hut that I intend to erect with the HMMH, very very carefully, as it lacks pretty much any basic safety feature that's standard equipment on 21st-century cranes. Caveat Emptor! ;)
 
Last edited:

General Hood

Member
712
2
18
Location
Fort Towson, OK
I had not realized, until today, the SEEs have an optional auger attachment which replaces the backhoe bucket, pictured in this photo, hydraulically operated. The 5 ft auger bit was in the bucket of another SEE.
IMG_20160920_092422706.jpg
 

BigBison

Member
317
1
18
Location
Yampa, CO
If my SEE's gonna have snow tools on the front in winter, I'm thinking detach the backhoe, and run a sand spreader off the stock PTO on the rear.
 

Bikers33

New member
129
1
0
Location
British Columbia
I had not realized, until today, the SEEs have an optional auger attachment which replaces the backhoe bucket, pictured in this photo, hydraulically operated. The 5 ft auger bit was in the bucket of another SEE.
View attachment 644874
Funny how those attachments/tools seem to just move around or disappear entirely, all on their own in Texarkana... Must be the Rats playing more tricks on us.
Thanks for sharing Sir.
 
Top
AdBlock Detected

We get it, advertisements are annoying!

Sure, ad-blocking software does a great job at blocking ads, but it also blocks useful features of our website like our supporting vendors. Their ads help keep Steel Soldiers going. Please consider disabling your ad blockers for the site. Thanks!

I've Disabled AdBlock
No Thanks