-
Steel Soldiers now has a few new forums, read more about it at: New Munitions Forums!

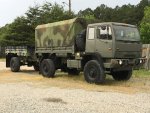
What have you done to your FMTV or LMTV today
- Thread starter Coffey1
- Start date

More options
Who Replied?- 62
- 1
- 8
- Location
- Atlanta GA
Attachments
-
 130.2 KB Views: 111
NV555
Member
- 388
- 16
- 18
- Location
- Ely and Vegas Nevada
Have the new cab ready to go this weekI have the cab off getting ready for the new cab to go on. View attachment 727937View attachment 727938View attachment 727939


Last edited:
- 5,637
- 382
- 83
- Location
- Spring Branch, TX
The doors should close easier on the new one.
coachgeo
Well-known member
- 5,210
- 3,547
- 113
- Location
- North of Cincy OH
New cab..... is it pre wired or do you have to transfer all the wire, gauges etc.Have the new cab ready to go this week ...
NV555
Member
- 388
- 16
- 18
- Location
- Ely and Vegas Nevada
It is all pre-wired and basically plug-and-play has all the instruments the dash the controllers everything
NV555
Member
- 388
- 16
- 18
- Location
- Ely and Vegas Nevada
The New Cab is on ")


coachgeo
Well-known member
- 5,210
- 3,547
- 113
- Location
- North of Cincy OH
congratsThe New Cab is on
- 3,871
- 504
- 83
- Location
- Gray Court SC


Finally got the crane installed
- 467
- 274
- 63
- Location
- Seville, OH
Replaced the front Gladhand checkvalve - yes!! Working parking brake now.
Troubleshooting CTIS. Took front QRV apart to diagnose it.
And finding other minor things wrong
Troubleshooting CTIS. Took front QRV apart to diagnose it.
And finding other minor things wrong
- 2,318
- 922
- 113
- Location
- Fargo ND
Coffey1 the 1078 turned out extremely nice looking, that is a darned fine looking truck! I have a question for you concerning your HEMTT in the background, that truck also looks mighty spanky and the paint looks beautiful, did you paint that truck also? The reason I am asking is I picked up an M977 this spring and its in desert tan, and hope not to offend anybody but I truly dislike that color a LOT, I need to paint my truck 3 color NATO woodland. If you painted yours I am just looking for words of advise Coffey1?
Thanks much
Karl
Thanks much
Karl
- 3,871
- 504
- 83
- Location
- Gray Court SC
Karl I sent you a pm.
And every one here knows my feelings on tan. Lol
If I lived in a desert it might be different. Also the truck with crane is a 1088 not 1078.
And every one here knows my feelings on tan. Lol
If I lived in a desert it might be different. Also the truck with crane is a 1088 not 1078.
coachgeo
Well-known member
- 5,210
- 3,547
- 113
- Location
- North of Cincy OH
swapped seats...... sorry didnt get final pic yet. (see update below)

THE SEAT(s) for cab.
went sorta cheap on seats though friend making brackets on hourly rate may have pushed the price back up to stupid (on my part). Using used and abused seats out of a 2006 Mitsubishi Eclipse spyder I bought for 50 bucks. Adding 50$ cheapish seat covers and to pilot seat a gell butt cushion for my skinny arse. On the driver seat the left side ribs bolster was shot.. saw a video that showed someone expanding foam in a seat somewhat successfully by heating it with heat gun. Though he did it with factory cover off... I knew I was going to put a cheap seat cover over it anyway..... so proceeded to try it with OEM cover on. did ok... till I looked up for a split second and must stopped the gun in one spot.. burning a hole in the cover... grrrr....
Oh well.... turned lemon into lemonade.... and stuffed thru the burned hole (white spot in pic) shop rags and tada.... nice shape returns... and since I only ride my ribs against it while bouncing offroad.... it should be fine. May actually be better cause when getting in and out... it won't squash that spot anymore. The passenger seat did not have this issue... it got less use. Seen other Spyder driver seats of same era for sell with same problem.

you can see all the Eclipse mount hardware cut off the Spyder seat slides.
We came up with one mount design..... too tall so scrapped it. Plan B worked better. Much lower. maybe too low.

Test fit pic

Heat the shiat out of it then spray with rubberized auto paint like chassis rust coat paint.... this heat and spray process supposedly provides a complete seal that sits on it like one has powder coated it. will see..

tuff finish once cooled.

final product before welding to seat's oem slide mechanisim
for this to work we had to relocate seat belt retractor attachment from its home on piller so it would not punch the rider in an accident. Used proper bolt hardware equivalent to what was there before. put the retracting pulley on wall below side window. Worked great on driver side. For some reason on passenger side the seat belt is more finicky.... at an angle how it sits it will NOT retract. stays locked. Might swap one off rear wall in its place to see if it acts the same way.it was lateeeeeeee. didn't get pic after install in truck. duhhh. my bad. Will put on seat covers and get final pics soon with new tan seat covers.
__________________________________________________________
Update 1. installed seat pics...... pre-new seat covers and arse cushions

 baby seat and middle seat will eventually be removed. bench with storage and fold down bed of some sort to go there as guest sleeping space or ...... napping space for long drives?
THE SEAT(s) for cab.
went sorta cheap on seats though friend making brackets on hourly rate may have pushed the price back up to stupid (on my part). Using used and abused seats out of a 2006 Mitsubishi Eclipse spyder I bought for 50 bucks. Adding 50$ cheapish seat covers and to pilot seat a gell butt cushion for my skinny arse. On the driver seat the left side ribs bolster was shot.. saw a video that showed someone expanding foam in a seat somewhat successfully by heating it with heat gun. Though he did it with factory cover off... I knew I was going to put a cheap seat cover over it anyway..... so proceeded to try it with OEM cover on. did ok... till I looked up for a split second and must stopped the gun in one spot.. burning a hole in the cover... grrrr....
Oh well.... turned lemon into lemonade.... and stuffed thru the burned hole (white spot in pic) shop rags and tada.... nice shape returns... and since I only ride my ribs against it while bouncing offroad.... it should be fine. May actually be better cause when getting in and out... it won't squash that spot anymore. The passenger seat did not have this issue... it got less use. Seen other Spyder driver seats of same era for sell with same problem.
you can see all the Eclipse mount hardware cut off the Spyder seat slides.
We came up with one mount design..... too tall so scrapped it. Plan B worked better. Much lower. maybe too low.
Test fit pic
Heat the shiat out of it then spray with rubberized auto paint like chassis rust coat paint.... this heat and spray process supposedly provides a complete seal that sits on it like one has powder coated it. will see..
tuff finish once cooled.
final product before welding to seat's oem slide mechanisim
for this to work we had to relocate seat belt retractor attachment from its home on piller so it would not punch the rider in an accident. Used proper bolt hardware equivalent to what was there before. put the retracting pulley on wall below side window. Worked great on driver side. For some reason on passenger side the seat belt is more finicky.... at an angle how it sits it will NOT retract. stays locked. Might swap one off rear wall in its place to see if it acts the same way.it was lateeeeeeee. didn't get pic after install in truck. duhhh. my bad. Will put on seat covers and get final pics soon with new tan seat covers.
__________________________________________________________
Update 1. installed seat pics...... pre-new seat covers and arse cushions
baby seat and middle seat will eventually be removed. bench with storage and fold down bed of some sort to go there as guest sleeping space or ...... napping space for long drives?
Last edited:
yertnamreg
Member
- 92
- 21
- 8
- Location
- Houston TX
I upgraded my in cab indicators (turn and brights) to LEDs! I'll start another thread with part numbers and instructions.
Before:

During:

After:

Before:
During:
After:
Adventure Driven
Member
- 321
- 14
- 18
- Location
- Montana
cooked dinner and had a glass of wine here
Seth

Seth
KGBruce
Member
- 39
- 1
- 6
- Location
- High Ridge, MO
Seth I think you need more lights!!!
pontiac62
Member
- 180
- 4
- 18
- Location
- battle creek, mi
Would like to see a night photo of the lights on.
Sent from my iPhone using Tapatalk
Man of few words
M1081 LVAD
coachgeo
Well-known member
- 5,210
- 3,547
- 113
- Location
- North of Cincy OH
After months of waiting on access to a friend of a friend with a huge milling machine (can fit about a whole chassis in the mill) we finally get started on machining (a Portion) of spring perches off my Intermediate/Middle axle from MTV in prep for installing in my LMTV. New (2me) 3rds with high speed and the rear with detroit will be fitted as well. Will use clamp on mounts that are OEM on LMTV rear axle; to mount the Intermediate/Middle axle in the truck same as stock one would. Fingers crossed but semi confident no driveshaft changes will be needed at rear.


https://www.youtube.com/watch?v=VIMqcTwWQMg
https://youtu.be/bXs6fzMi-M0
well since I can still edit this thread will add updates to this .
Update ... added photos below of paint prep, scuffed it good, and FIRE dried. The OEM paint on this NOS axle was the shiats as you can see in the pics. It was peeling and axle was rusting from a horrible factory paint job. Potentially why this one was released to govt. auction instead of being mounted on a truck. Not knowing why it was peeling so bad (poor prep or bad paint) we went overboard and prepped it with wire wheel, grinder, high grit paper.


Using Duplicolors version of POR 15 was next step. The rust prep primer threw us for a loop for awhile...... strange stuff. You know how it goes...... you rip the cap off..... you paint...... but noooo..... well you do..... but it is deceiving... the stuff goes on CLEAR but turns flat black as it chemicalizes itself with the metal. We saw it changing color finally and we were less stumped..... then later saw on the can (who reads instructions on a paint can right) "GOES ON CLEAR" Once we figured that out rest went smooth. We fired it to quicken drying to fudge the 24 hours drying time that we did not have.(not pictured) Then we painted with Duplicolor chassis paint.... which like POR 15 encapsulates the area painted with a tuff coating that does not allow water nor oxygen to penetrate it..... thus.. NO RUST can form. It goes on nicely and is rubberized as well which I am sure is probably component of the encapsulation. We fired this too (Pictured) Chris my friend and my hired Fabricator, welder, mechanic, machinist, has had great success with fire/searing rubberized paints.

Note for clarity.... in the Fire pic above you can see when it was milled we left the oem MTV perch height. We will massage height and angle as needed to get correct axle angle for it to sit right when mounted on LMTV. (axle upside down in pic so Perchs ar at bottom). Thus we will NOT need to weld on a new perch, just massage what is there and drill a locating pin hole for the center pin of leaf spring. LMTV leafspring mount components will clamp around axle tube same way it did on the axle it is replacing. What was milled off is the portion of perch that protruded beyond the axle tube (see other pics and vid that shows this well)..... and at bottom of axle there was cast in eyes that linkages attached to for mounting this to the end of a leafspring on an MTV. The protutions of Perch Pad and the eyes were in the way for using LMTV rear axle mounting system thus the milling. Could have instead of all the milling removed these with sawzall and grinder... sure... but why when you know someone with a bigg arse mill. Granted that decision put us months behind schedule waiting to get onto the mill.
https://www.youtube.com/watch?v=VIMqcTwWQMg
https://youtu.be/bXs6fzMi-M0
well since I can still edit this thread will add updates to this .
Update ... added photos below of paint prep, scuffed it good, and FIRE dried. The OEM paint on this NOS axle was the shiats as you can see in the pics. It was peeling and axle was rusting from a horrible factory paint job. Potentially why this one was released to govt. auction instead of being mounted on a truck. Not knowing why it was peeling so bad (poor prep or bad paint) we went overboard and prepped it with wire wheel, grinder, high grit paper.
Using Duplicolors version of POR 15 was next step. The rust prep primer threw us for a loop for awhile...... strange stuff. You know how it goes...... you rip the cap off..... you paint...... but noooo..... well you do..... but it is deceiving... the stuff goes on CLEAR but turns flat black as it chemicalizes itself with the metal. We saw it changing color finally and we were less stumped..... then later saw on the can (who reads instructions on a paint can right) "GOES ON CLEAR" Once we figured that out rest went smooth. We fired it to quicken drying to fudge the 24 hours drying time that we did not have.(not pictured) Then we painted with Duplicolor chassis paint.... which like POR 15 encapsulates the area painted with a tuff coating that does not allow water nor oxygen to penetrate it..... thus.. NO RUST can form. It goes on nicely and is rubberized as well which I am sure is probably component of the encapsulation. We fired this too (Pictured) Chris my friend and my hired Fabricator, welder, mechanic, machinist, has had great success with fire/searing rubberized paints.
Note for clarity.... in the Fire pic above you can see when it was milled we left the oem MTV perch height. We will massage height and angle as needed to get correct axle angle for it to sit right when mounted on LMTV. (axle upside down in pic so Perchs ar at bottom). Thus we will NOT need to weld on a new perch, just massage what is there and drill a locating pin hole for the center pin of leaf spring. LMTV leafspring mount components will clamp around axle tube same way it did on the axle it is replacing. What was milled off is the portion of perch that protruded beyond the axle tube (see other pics and vid that shows this well)..... and at bottom of axle there was cast in eyes that linkages attached to for mounting this to the end of a leafspring on an MTV. The protutions of Perch Pad and the eyes were in the way for using LMTV rear axle mounting system thus the milling. Could have instead of all the milling removed these with sawzall and grinder... sure... but why when you know someone with a bigg arse mill. Granted that decision put us months behind schedule waiting to get onto the mill.
Last edited:
- 467
- 274
- 63
- Location
- Seville, OH
This went well...

The CTIS, not so much...
The CTIS, not so much...
- 114,235members
- 167,162threads
- 2,353,366posts
- 3,381online users