rtrask
Well-known member
I guess if you are tearing it down that far, you might as well replace them all and save redoing it.You can replace the piston seals without taking everything apart, but not the rod's seal.
Steel Soldiers now has a few new forums, read more about it at: New Munitions Forums!
I guess if you are tearing it down that far, you might as well replace them all and save redoing it.You can replace the piston seals without taking everything apart, but not the rod's seal.
sorry I didn’t reply sooner. A good hydraulics shop can likely make you a new rod for less than that. The seals are CASE parts and I can get you the PN or you can call a dealer and ask for parts for an M35C backhoe. It is in their parts manual as an “Attachment” or you can provide the seal PN from the military manual and they can tell you the kit it comes in.Thanks Speedwoble, I did a web search and found a replacement (part no. G105087) at Greatlakes Equipment in IL. With shipping I can get a new rod delivered for < 410$. I searched Case Equipment Parts local to Denver, but almost no web hits and nothing specific to that part. I have not worked with hydraulics much but it does not look like it would be too hard to replace. The hardest part will be dealing with the torques involved and getting the gland nut started back on the rod. I assume that while it is apart I should replace all the seals. I have a leak on the boom cylinder that I need to fix as well. I remember a discussion earlier in this thread on repacking the boom cylinder, that maybe I don't need to tear it completely down if it is just the gland that is leaking. Does anyone have the correct part numbers for the seal kits?
On the air pressure system, work your way from the compressor down to the components first checking for blockage and then for leaks. You will be surprised how much junk can be in the regulators and alcohol injection valve.I need some advice on how to proceed. I have two issues that may be related, but probably are not. When I first got my SEE, the air pressure built up to 90 pounds or so and seemed to bleed off slowly. A few weeks ago I could hear an air leak, and the pressure never built up. Over the weekend after I fired it up I could not hear a leak, but the pressure never built up. While it was running I looked for a leak, I could not find a leak but the line coming off the compressor was very hot, so I think it must be blocked prior to getting to the pressure sensor.
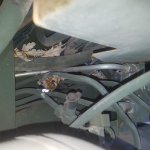
The next issue is that I am trying to bleed the breaks, without much success. The clutch seems to work pretty well but there is nothing on the brakes. I rigged a system to put pressure into the brake and clutch fluid reservoirs, but I get little or no fluid when I open the bleeder valves. On the back bleeder valve of the master cylinder I get a reasonable amount of flow, but even that seems anemic with 25 lbs of pressure. The front bleeder valve on the master cylinder does not even weep the smallest amount of fluid. I have taken it out completely and cleaned the ports, but even with the bleeder valve completely removed I get nothing. I tried the bleeder valve on right rear caliper, (which was badly clogged I suspect by an insect that took up residence there) but I only got a tiny amount of fluid weeping from the empty port I took the bleeder valve out of..
When I got the SEE the brake fluid caps were in poor shape, and I suspect water may have gotten in to the reservoirs. The front bleeder valve shows some evidence of rust in the bottom of the port.
So what is the collective wisdom? Should I just call the existing master cylinder toast and buy one of EI's after market master cylinders? Is it worth tearing into the one I have to just see if I spot something?
And where should I start on figuring out why there is no air getting to the tanks?
Thanks in advance
Ron
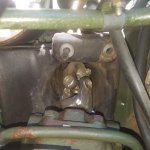
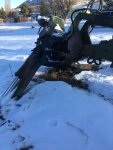
High lift jack will do it. Just make sure you have a good base.View attachment 750541
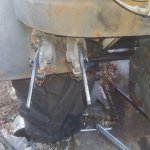
Oops. What have others done when faced with this? I’m pretty sure the loader won’t pick it up.
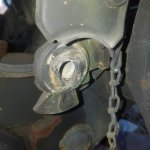
btw the outriggers were chained together.
Uh, oh. Mine's sitting with the outriggers chained together. Luckily, the backhoe is still attached to the SEE.btw the outriggers were chained together.
Thanks, I will give it a shot . But at least a good chunk of the trailer lines were removed before I got it. The other thing is I think it is blocked now, not leaking.Ron, you'll save on cold starts, fuel, and frustration by feeding the SEE air pressure from an external source. Easiest to use the glad hands.
Second best is to turn the engine off and then listen for leaks. They'd have to be substantial to be loader than the engine.
That the compressor's outlet gets hot proves that the compressor itself is working.
Good, that gives you more options to plug in an air hose.Thanks, I will give it a shot . But at least a good chunk of the trailer lines were removed before I got it. The other thing is I think it is blocked now, not leaking.
It's probably a good thing that there often isn't enough space for an adjustable wrench. That forces people to use the correct tool for the job, in turn lessening the odds of rounding the hex parts and/or breaking things.Do yourself a favor and pick up some jumbo metric combination wrenches.
The fittings are stacked up on top of each other so there is frequently not enough room to get a Crescent (adjustable) wrench in there so you need the right size metric wrenches.
I have most of the metric combination box and open end metric sizes between 30 mm and 7 mm, of course I could run into one that falls in between two sizes that I have, but no way of knowing until I get into the middle of it. If you know specifically some of the sizes I need I will verify I have those before I head to HF. I think I will pick up a set of the metric double end flare wrenches. for the weekend's activities. From your description I need both the flare end and the open end wrenches to break the connections.Do yourself a favor and pick up some jumbo metric combination wrenches. As discussed you need to start at the alcohol injector and work your way out to the air tanks and beyond to get the drap out of the system..
There is a known issue that the air line that runs from the outlet of the air pressure regulator to the other side of the truck is a low point that rusts out on the inside and is source of a lot of crap down stream. If you are lucky someone switched it over to stainless if copper nickel tubing. If you were not lucky might a well switch if out once you figure out the thread types..
Thanks for that, you have probably saved me some grief.In order to chase down crap down in the air lines you need to break a lot of fittings apart in close quarters. The paint they apply on top of the air lines is thick and gets down in the threads and it makes getting the fittings apart difficult. The fittings are somewhat fragile so you need to use two wrenches to take every connection apart where there is spot that crap can collect. One is backing wrench that takes the load off the fitting and the other is what actually turns the connection. If you skip the backing wrench you may break a fitting and some are difficult to replace as they are combination of threads. The fittings are stacked up on top of each other so there is frequently not enough room to get a Crescent (adjustable) wrench in there so you need the right size metric wrenches. Harbor Freight, Amazon and Northern Took all sell jumbo sets.
I have not worked with an air system before so I have a bunch of NOOB questions. Probably once I break a connection I should blow it out as a matter of course even if it looks clean. Since I am traveling in the direction of air flow, once I am satisfied that It is good to that fitting I should reconnect the fitting. I suspect that you don't want to use any kind of pipe dope or Teflon tape when you remake the connection, but I gotta ask, "Is there any type of compound to use when I remake the connection?".This is not rocket science but it does require time and patience. If you break a fitting, its unlikely the local car parts store has them. Belmetric does and they own Unimogs so they are good source.
I am not sure how much of the trailer brake lines are intact.Good, that gives you more options to plug in an air hose.
Taking fittings apart, at least partially, makes it easy to find out how far the pressure does travel. Or doesn't.
Thanks Peakbagger, I had heard of the student manual but not seen it before. It is a good reference.Unfortunately I didn't keep track of sizes, I just used a lot of them.
I have never seen metric tubing wrenches for the size fittings on some of the air system components. Maybe someone makes them that big but expect the cost would be significant. If I remember correctly the fittings are a combination of two possibly three thread systems. I don't think they were intended to have pipe dope or tape used on them. If I was to do so I would probably put a dab of neverseez.
The air pressure regulator may or may not have a screen on the air inlet that is integrated with the regulator It looks like some did and some didn't,. The valves over near the air tanks are just check valves. One of the air tanks is not needed unless you use the trailer brakes.
I assume you have seen reference to the student manual that is stored in the misc technical documents forum. That has some excellent drawings of the air system and how it works.