• Steel Soldiers now has a few new forums, read more about it at: New Munitions Forums!

  • Microsoft MSN, Live, Hotmail, Outlook email users may not be receiving emails. We are working to resolve this issue. Please add support@steelsoldiers.com to your trusted contacts.


84 m1009 cucv chevy blazer build-up

2INSANE

Well-known member
722
819
93
Location
Belgrade, Montana
Nice stories; alcohol & 2 girls is always an interesting mix. But, I think I will keep my stock glow plug system as is; it gets my engine started just fine "without the alcohol".
Your build though is amazing and you know your s--t. Keep up the good work.
Thank you! I don’t drink much. Maybe 2 beers every other month. And the girls thang... That was back in my 20’s over a decade ago. Much older now and more settled in with a great woman!

Under normal driving conditions, the stock glow plug system works fine. But I noticed when idling up rocks in the Desert all day long there tends to be a larger build up of carbon on the sensors, glow plugs etc because it is not getting shot out quickly enough while idling for long periods of time it takes a big toll on everything. I learned never to turn off a hot motor without letting it cool down first.

More awesome info coming as soon as the parts arrive! Stay tuned!
 

german m1008

Well-known member
Steel Soldiers Supporter
883
1,302
93
Location
Rhein-Main Area, Germany
I did a manual override push button switch years ago. Because of the override, it is to my understanding that I don’t need that sensor anymore?

I’ll tell ya a story. There was this one time in Moab... 
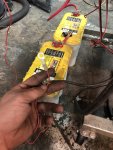
I met up with a random group of Jeep’s and Toyota’s. I did not know anyone of them personally. When I first joined the group on the trail, I was in the back of the group line as “that noob with the heavy Chevy”. My K5 M1009 dominated them all! By the time we got to the end of the trail, I was now the badass with the blazer and the group leader, first in line. The only embarrassing moment I had on that trail ride was when we stopped at an overlook for 30 minutes and the blazer had a hard start. I only needed 2 seconds of glow time but the stock sensor read the motor as still warm and would not turn the plugs on. It embarrassed me so bad I did the manual override with a flip toggle switch.

Then there was this other time I got so wasted with 2 girls. When we got to the Motel I accidentally hit the glow plug toggle flip switch with my knee when getting out of the Blazer. When party time was over in the morning, we checked out and the blazers 2 new yellow top Optima Batteries were fried, glow plugs melted in combustion chamber, resistor fried and relay was toasted. While things were getting hot inside the Motel that night, the Blazer got even hotter! Lol! That’s when I switched the glow plug toggle flip switch to a push button and deleted the 2 big resisters on the firewall. Ahh the memories!
....... please, the story shouldn't end like this........ I have no idea whether we will all still be here............. but..........I need to know what happens to you with the push button.......
LOL!
..... but maybe it's better if some things stay hidden.
LOL
 

2INSANE

Well-known member
722
819
93
Location
Belgrade, Montana
The Thermostat showed up. The darn thing was $41... I installed it with a gasket and finger painted a light coat of Ultra Blue on both sides of the gasket since there was a lot of corrosion and pitting.

Also I installed a coolant pressure gauge in place of the deleted glow plug temperature sensor after taping it. 15 psi max might not be enough because I’ve seen coolant pressures get up to 17 psi. I’ll order a different one but use this for the time being since I had it laying around...

After a few days of letting the RTV cure, I’ll finally get the pressure test done on the coolant system.
 

Attachments

2INSANE

Well-known member
722
819
93
Location
Belgrade, Montana
Today I hooked up the custom 4 core 6.2 diesel radiator and started the Coolant Pressure testing. I pumped the pressure to 15 psi. She is leaking 1 psi per 5 minutes. So quiet I could not hear it. I used soapy water in a spray bottle and sprayed every single spot associated with the cooling system. There was only one spot that was slowly leaking... It was the recently installed thermostat gasket with rtv. My assumption is that the 24 hour cure time needs to be increased by at least a few days. Here are pictures of coolant test number 1.
 

Attachments

2INSANE

Well-known member
722
819
93
Location
Belgrade, Montana
Banks Pyrometer fitting installed on the Exhaust Manifold.

Also installed the Banks rubber caps for the intake manifold. It’s design deletes the CDR hoses from going directly into the intake manifold. It is redesigned to go into the banks air filter housing.
 

Attachments

cucvmule

collector of stuff
1,139
577
113
Location
Crystal City Mo
I have used studs and nuts on all thermostat housings for 40 plus years as the anti freeze, aluminum and steel corrosion weakens the threads too eventually. Once studded and if the housing is still serviceable by the base being flat then a good gasket should seal.

The housings will distort when tightened and the more the housing is taken off and on the more flex it gets. I will also take 320 wet sand and on a flat surface and rub housing to check and flatten housing. If it will not seal find a replacement or double gasket with Indian shellac is my last option.
 

2INSANE

Well-known member
722
819
93
Location
Belgrade, Montana
I have used studs and nuts on all thermostat housings for 40 plus years as the anti freeze, aluminum and steel corrosion weakens the threads too eventually. Once studded and if the housing is still serviceable by the base being flat then a good gasket should seal.

The housings will distort when tightened and the more the housing is taken off and on the more flex it gets. I will also take 320 wet sand and on a flat surface and rub housing to check and flatten housing. If it will not seal find a replacement or double gasket with Indian shellac is my last option.
Thanks for the advice! I will be doing the thermostat and gasket again after work!
 

2INSANE

Well-known member
722
819
93
Location
Belgrade, Montana
Off work early today. Helped the Wife clean the house and finished installing the Exhaust Crossover.

Then I installed the Water Pump Hose Heat Shield. Crossover appears to be in the way of the water pump hose. It is going to be a pita to install the water pump hose with the heat shield on. I have read that some people delete that heat shield because of how much of a Bixxx it is to get that hose on. We will see when I am ready to do the second coolant pressure test.

For the thermostat gasket, I choose to use Felpro this time. I also did a decent sized bead of Ultra Blue on each side of the gasket. I’ll give it 3 days of cure time before the next test.
 

Attachments

2INSANE

Well-known member
722
819
93
Location
Belgrade, Montana
Next I cleaned the intake holes with brake cleaner and installed the new Felpro gaskets.


Some porting food for thought on the next motor build...


I blew out the injection lines with compressed air and cleaned the ends of the injection lines with a paper towel and brake cleaner.

Using brake cleaner and Q-Tips, I cleaned the injector ends and injector pump ends.

Fuel lines installed again...
 

Attachments

2INSANE

Well-known member
722
819
93
Location
Belgrade, Montana
I cleaned up the intake manifold with brake cleaner and paper towel.

The intake manifold was hitting the cheap LMC truck valve covers. I used my die grinder and took off some metal from the valve cover so the intake manifold fits.

I installed the intake manifold. Torqued to 31 foot pounds after putting blue thread sealer on the threads.

Installed the J-Code Alternator support rod.

The banks installation manual shows a Civilian CDR. I might have one in the spare parts box. But I am going to hold off on the CDR because I would like to attempt hooking up the air filter housing to the snorkel which means CDR can’t be determined yet.
 

Attachments

2INSANE

Well-known member
722
819
93
Location
Belgrade, Montana
Next I wire brushed the Ultra black off of the Banks Air Hat.

Then I cleaned up the air hat in the sink with soap and water.

Here’s pictures of the air hat all cleaned up and dried.

Looking at the installation instructions, I installed the correct washers, studs and nuts for the air hat, along with my original round intake gasket to seal the air hat and intake.

Air hat installed...
 

Attachments

Last edited:

2INSANE

Well-known member
722
819
93
Location
Belgrade, Montana
Intake/turbo tube installed... I used the original rubber boots since they are still in great shape. Just dirty. Waste not... Save more$

Since I am on a roll today, I also installed the turbos oil fill line and used zip ties to keep it secure...
 

Attachments

2INSANE

Well-known member
722
819
93
Location
Belgrade, Montana
Keeping the garage warm for a few more days before I do the 2nd coolant pressure test which gives the Ultra Blue more time to cure.

I ordered a 0-30 psi 1/8 NPT coolant pressure gauge for the rear driver side coolant plate to replace that 0-15 psi gauge.

I also need more braided fuel hose for the return line.
 
Last edited:

2INSANE

Well-known member
722
819
93
Location
Belgrade, Montana
For educational reasons only, I mocked up the CUCV J-Code CDR valve to check fitment. It appears to work well with the Banks kit. The bottom inlet seems a little tight at an angle. Actual CDR location is not determined yet.

I also capped off the Pyrometer fitting temporary for the test runs..

I also got 2 matching intake air hat nuts installed. Grade 8.
 

Attachments

2INSANE

Well-known member
722
819
93
Location
Belgrade, Montana
Picked up some free stainless steel sheet metal at work. I used my tin snips and made my own turbo heat shield. It will protect the 6.5 Alternator that has plastic on the back of it and protect other things as well.
 

Attachments

2INSANE

Well-known member
722
819
93
Location
Belgrade, Montana
Last night the 1/8 NPT 0-30 psi coolant pressure gauges arrived in the mail. I replaced the 0-15 gauge and installed the 0-30 gauge on the driver side rear coolant plate.

I also installed a 0-30 psi 1/8 NPT coolant pressure gauge on the front top thermostat housing neck replacing the necks OEM fitting.

Went on a parts run to O’REILLY auto parts, I bought 4’ of fuel line for the return to fuel, 4’ of Red battery cable 4 gauge, 4 butterfly battery terminals and 4 battery cable connector ends. I hooked the battery’s positive to negative which reads 12 volts and the positive end to the starter which reads 24 volts and the negative end (Ground) to the bottom driver side motor mount holes.

Using thick gauge stereo speaker wire, I hooked up the glow plugs after I tested the glow plug ohms and connected the ends of all 8 wires together and crimped a connector on. I tested all 8 plugs which read 11.25 volts. Plenty for the G60s.
 

Attachments

2INSANE

Well-known member
722
819
93
Location
Belgrade, Montana
I installed the fuel hose and return line with just a few inches from the floor so I can use a diesel fuel can to put them in.

Here’s wire for Starter Solenoid.

Here’s wire for the Injection Pump.

I hooked up my Racor fuel filter/housing and wire tied it to the motor. The Racor housing has a primer on it. It will help me prime all the air out for an easier first start. This upgrade is up for sale. Send PM if interested. Spin on type that replaces the OEM box filter. Bolts right up to the existing firewall holes.
 

Attachments

2INSANE

Well-known member
722
819
93
Location
Belgrade, Montana
Good news and bad news!


The good!

Racor fuel filter/housing is sold.

I filled up the oil a few days ago and drained it last night. It was extremely dirty from doing all that work to the motor. I filled it up again and started the motor for 1 minute dry of coolant.

It runs very good! No white smoke, no blow by.


The Bad...

Because of the location of my snorkel, I determined the best CDR for my needs will be the 6.5 CDR with the 6.5 CDR valve cover and 6.5 oil filler tube. This means I get to take apart the top end of the motor again! Fun!

More Bad...

The belt I used stretched sooo much that I am going to have to go down a size because the Tensioner Pulley is getting dangerously close to the Water Pump Pulley. Why? The water pump I choose to use has a wider Pulley then the stock 6.5 bolt on Pulley.

Will get you pictures and video after I release these 6.2/6.5 Demons.

 
Last edited:

panama

Member
123
21
18
Location
Miami, FL
I installed the fuel hose and return line with just a few inches from the floor so I can use a diesel fuel can to put them in.

Here’s wire for Starter Solenoid.

Here’s wire for the Injection Pump.

I hooked up my Racor fuel filter/housing and wire tied it to the motor. The Racor housing has a primer on it. It will help me prime all the air out for an easier first start. This upgrade is up for sale. Send PM if interested. Spin on type that replaces the OEM box filter. Bolts right up to the existing firewall holes.
Ya have a part number for that bolt-on RACOR housing? Thanks!
 
Top
AdBlock Detected

We get it, advertisements are annoying!

Sure, ad-blocking software does a great job at blocking ads, but it also blocks useful features of our website like our supporting vendors. Their ads help keep Steel Soldiers going. Please consider disabling your ad blockers for the site. Thanks!

I've Disabled AdBlock
No Thanks