• Steel Soldiers now has a few new forums, read more about it at: New Munitions Forums!

  • Microsoft MSN, Live, Hotmail, Outlook email users may not be receiving emails. We are working to resolve this issue. Please add support@steelsoldiers.com to your trusted contacts.


M934A2 Camper/RV Build or Bringing Sasquatch to life...

Gunny65

Member
173
7
18
Location
Bonners Ferry, idaho
I want to post a few pics and so forth of my build so far. I started a little while ago but as I am slow, I wanted to get a few areas done to start this.

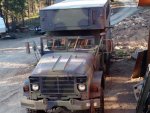
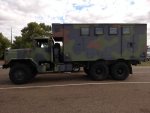
Here is the truck as I picked it up.
IMG_20150911_073816374.jpg

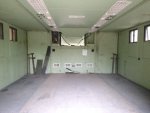
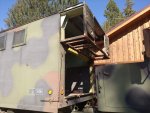
Here is the van extended.
IMG_20151019_153713057.jpg

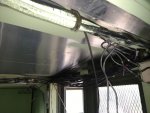
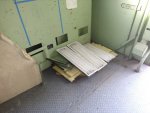
I am taking out the ducting, lights and unnecessary wiring. The A/C ducting takes up about four inches of head room. It did not come with an A/C installed and I didn't want to use the ducting anyway. The florescent lights take way to much energy to run so I will be swapping them with LED lights. The van is setup for 3phase, blackout lights, etc. I only need lights and plugs (120v/12v). I will reuse the applicable wiring and remove all the wiring that will never get used. It was a LOT of wiring. The screws to take all that down amounted to about 300 or more screws.
Lights and Ducting.jpgWiring.jpg

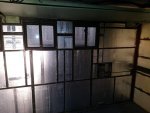
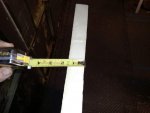
Then I removed the wall panels, took the old insulation out and put in closed cell, foil backed insulation. The old fiberglass holds water and I wanted to fix any rust that was in there. I had very little rust to fix, which was nice. I also drilled weep holes in all end panels. The side has them, the ends do not. Weird. They need them. One panel was holding water but had not rusted out. Mostly surface rust that was easy to fix. I also painted the back sides of the wall panels with a water resistant primer so just in case water does leak back there, it will not ruin the wall panels. It won't get held by the insulation either and any water will drain out the bottom weep holes. I replaced all the wall screws with new screws. It took a little over 400 screws. I am going to spackle the walls, sand them down smooth and then paint them. Along with the ceiling wood panels.
Insulation2.jpgInsulation size.jpg

More pics in a little bit.
 
Last edited:

Gunny65

Member
173
7
18
Location
Bonners Ferry, idaho
I had thought about making the sides of the van slide in and out like normal RV slideouts. Because the walls flipouts are full length, it would be impossible to make a spot for a bathroom as the bathroom toilet needs to be stationary over the black water tank. It would also limit me in other ways. So, I decided to work with the walls flipping up/down and out. I will make the toilet stationary near the rear drivers side door area. The cabinets will be made to swivel in and out with the walls and so will the bed frame. I want to be able to fully use the RV with the sides in or out. The only time I would use the RV with the walls "in" is if I were just stopping for the night for a rest on my way to whatever destination I am headed.

Oh and I decided to extend the cab back and make it a walk through to the Van like a Class-C Motor-home. I will also make the cab taller so I can almost stand up in it. The batteries will go behind the passenger seat in a vented box. The coach batteries will go behind the drivers seat in a vented box. There will be two side sitting seats behind the Driver and Passenger seats and they will be attached to the top of the battery boxes.

I am shortening the "bonnet" (that thing that sticks out from the front of the van and kind of over the cab). This will help make the cab taller and make it easier to traverse the walk-through without busting your head. The remaining area up there will house some of the electrical items and provide some storage room.

Here are some pics of the destruction.

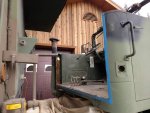
I took the hard top and rear window portion of the cab off then cut the back of the cab out.
Cab Off.jpgBack off Cab.jpg

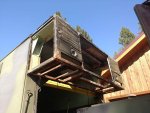
Then I cut/popped a TON of rivets off and opened up the van and bonnet. AND....here is all the rust that was missing from the walls. I was so happy the walls were not all rusted out. The bonnet made up for it by having had a small swimming pool inside. The insulation was rotten and water drained out of everywhere. Good thing I was planning on cutting the bottom off anyway. I will remove what little rust is up top and coat it with Ospho rust converter/primer. BTW, this Ospho stuff is awesome. It converts rust to iron oxide and you can paint over it. In some areas where the rust was kind of thick it created some crust that needed scraping off but it was easy to scrape off that gunk.
Rust Bucket.jpgVan Open.jpg

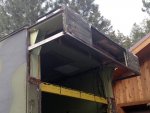
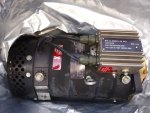
Then I cut the bottom off the bonnet and this is just the bottom of the framing tacked into place. I still need to cut the main yellow beam out to accommodate the walk-through door. Yep, I could leave it open but I want to be able to shut the door and keep it dark inside when I am sleeping. I am putting a roof A/C unit in the bonnet area that will cool the van and the cab. I bought a 400 amp alternator so running it while driving or off the generator when I am boondocking will work. Of course I am going to fabricate a mount for this behemoth. It is a dual 14v/24v alt. I believe it is 50 amps at 14v and 350 amps at 24v.
Bonnett Resize.jpg400amp Alt.jpg

Okay, more later.
 
Last edited:

Gunny65

Member
173
7
18
Location
Bonners Ferry, idaho
Looks like you got pretty lucky with the lack of rust. Have you dealt with the asbestos lined ducts at the front yet?

I didn't have the asbestos problem. I assume because I got this out of Minnesota, and the cold they have up there, that the heater was used often and therefore "fixed" at some point before I got it. There was no type of insulation in the bulkhead ducts or overhead ducts (the A/C duct had a protective insulation/lining directly in front of the A/C unit but not in the ducts).

The bonnet area made up for the walls not having rust. I am very happy the walls were in such good shape. Fortunately I was cutting the bottom of the bonnet off anyway as that area was to rusted to repair. Due to amount of water that was held in there I still have a good amount of rust removal in the top area just from moisture condensation.
 

Mos68x

Active member
825
30
28
Location
Seligman,AZ
Doin some good work! I am plannin on doing something very similar. What does yours weigh? My biggest challenge right now is finding a chassis combination that will work for what I want and still stay legal (non-CDL)
 

Mike929

Member
Steel Soldiers Supporter
820
22
18
Location
DFW, Tx
If you are making a rv you won't need CDL.
Gunny looking good.
sent from my decrepit fingers
May be different in your state, but TX requires a class A or B non commercial min. If you are going to travel outside the state, they might not honor your ability to drive on a class C in your own state.

Just a thought.
 

Csm Davis

Well-known member
4,151
376
83
Location
Hattiesburg, Mississippi
May be different in your state, but TX requires a class A or B non commercial min. If you are going to travel outside the state, they might not honor your ability to drive on a class C in your own state.

Just a thought.
This thread is not about CDL and all states have a reciprocity agreement that they honor your home state laws.

sent from my decrepit fingers
 

Gunny65

Member
173
7
18
Location
Bonners Ferry, idaho
Just as a note, Idaho did Not require a CDL for my rig. It is titled and registered as an truck/motor home. Because it is a cab and chassis style, it is considered a Class "C" motor home. Here, in Idaho. I have no idea about anywhere else.

I am am working on the bed frame right now. I have to get some pictures and post them later. The fresh water tank will go under the bed, inside the bed frame. About a hundred gallons or so. The tank will be centered over the frame of the truck to avoid any possible weight issues and/or bending of the van portion. The bed will fit a queen size mattress so the frame will need to extend and retract as needed. Meaning, it needs to be usable with the walls in or extended. I have it worked out for when the walls are retracted but the extended part is a bit trickier as the frame of the bed now needs to extend in the other direction. Oh, and the bed frame will also double as a couch when the mattress is in the stowed position. Pics coming tomorrow. I hope. We have the mud bogs this weekend along with Mother's Day. I have stuff I need to get done for that as well. It's coming along nicely.

Oh, I also got a Eberspacher diesel heater for the truck. It is Much smaller than the standard van heater and puts out more than enough heat for the space. It is the D4 model.

I ordered my personalized lisence plate today. "SSQATCH".
 
Last edited:

Csm Davis

Well-known member
4,151
376
83
Location
Hattiesburg, Mississippi
So are you doing a futon style bed that folds along the length? How about a sketch of the floor plan so us feeble minded can get an idea of how you are doing it.

sent from my decrepit fingers
 
Last edited:

Gunny65

Member
173
7
18
Location
Bonners Ferry, idaho
Csm, the mattress will stow vertically on the wall. It will slide down into a pocket and probably have a strap up top to help hold it vertical. Foam cushions will be used for the couch side of things. I want an actual 12 or 13 inch mattress as my bed in the rv. I took some pics of what I was doing but found out later my plan would require way to much steel. More than I wanted to use anyway. I am working the new frame portion when I can but I will definitely have pics of it in place. I think I have a basic floor plan in PowerPoint. I will have to check.
 

Mos68x

Active member
825
30
28
Location
Seligman,AZ
Gunny, you could always frame it up (interior) with aluminum instead of steel. All I'm going to frame up in steel is the exterior walls and anything very important, the rest will be aluminum framing or wood.
 

M934A2

New member
22
0
1
Location
Tualatin, OR
I am kicking around the idea of removing the floor and roof section on the drivers side and never opening that side as to expose the exterior wall to be able to do my bathroom and a larger kitchen area and then everything else can be mobile for when the passanger slide is out and will still be usable with the side in.
I have been trying to design the same thing but these slides do not make it easy.
looks like you're making great progress so far! I've only had mine home since Wednesday so I've got a long way to go!
 
Top
AdBlock Detected

We get it, advertisements are annoying!

Sure, ad-blocking software does a great job at blocking ads, but it also blocks useful features of our website like our supporting vendors. Their ads help keep Steel Soldiers going. Please consider disabling your ad blockers for the site. Thanks!

I've Disabled AdBlock
No Thanks