• Steel Soldiers now has a few new forums, read more about it at: New Munitions Forums!

  • Microsoft MSN, Live, Hotmail, Outlook email users may not be receiving emails. We are working to resolve this issue. Please add support@steelsoldiers.com to your trusted contacts.


PU798 (MEP-803a & M116A3) Followed me Home!

Guyfang

Moderator
Staff member
Moderator
15,931
22,245
113
Location
Burgkunstadt, Germany
Just for laughs and giggles, I once hooked up a voltage measuring device to my distribution box here in germany. Drift, is being kind. More like a roller coaster ride. It wasn't earth shattering, but for from the accepted "norm". I think that a little bit of "drift" can be accepted without a big problem. Now when I supplied power to the HAWK and PATRIOT missile systems, it was a completely different matter. 416 volt, 400 hertz. And it had better be stable!
 

lonesouth

Active member
322
29
28
Location
Tallahassee, FL
Yes, that is called droop. It is normal. 2hz is a little higher than I would expect but not a serious problem. Set it for 61hz unloaded and you will be down to 59hz loaded.

There is a procedure to adjust the governor in the TM. Making it track too tightly can cause RPM hunting. That is way worse than being a hertz high or low.

Personally I wouldn't worry about it. I would make sure your governor linkage moves freely. That can cause some issues with excess droop as well. A bit of lube on the linkage is always welcome. Voltage control is more important. These sets are very well controlled for voltage.

The fuel gauge is a balanced coil type and not a spring return type. It should stay near where it was when it is powered off. Hopefully it won't get caught up at the edge unless something pushes the needle over that far. I would bet that happened from some rough handling of the set if I were to guess.
how very controlled for voltage should they be? Loaded vs unloaded, should it make a difference? Are we talking +- 1 volt, or +-0.1 volt?
 

DieselAddict

Well-known member
Steel Soldiers Supporter
2,483
1,884
113
Location
Efland, NC
I've found on mine that it varies by a few. 115v-120v is what I see. It stays in that range regardless of load.

Most of the variance I'm sure is just VD from the cabling.
 

Haoleb

Member
197
7
18
Location
Raymond, Maine
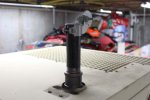
A few more mods I did to my set this weekend. I got rid of the stock exhaust flapper and added on a 6" extension and rain cap. For now the generator stays in my garage so it is not really a worry of anything getting into the exhaust but I did want to modify it because when I pull the set out to run it the stock flap tends to deflect the exhaust towards my house. This one I installed so it will deflect away from the house. And if I have to keep it outside I do feel better with this setup for keeping stuff out. I put a bunch of antisieze on the threads so it wont seize up if I want to take it off. The components are detailed in another thread by someone else but for matter of reference the stock exhaust is 1-1/4" NPT so you need a coupler and a nipple. Here I have a 6" nipple and a 1-1/2" rain cap from tractor supply.

IMG_0771.jpg

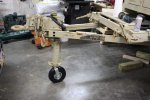
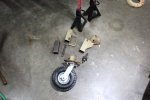
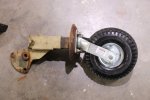
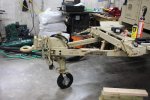
I also wanted a way to move this thing around without having to lift up the toungue weight and push or pull it by hand... Getting it into or out of my garage is a manual procedure because I cannot get my truck into place due to the door size. So I added a pneumatic wheel onto the trailer jack. This one is from tractor supply it is a swivel wheel and says it will support 350lbs cost $60.

IMG_0766.jpg

I simply bolted it to the foot of the stock jack.. I knew that even on the fully closed position it would be too high to sit level anymore but once I had it together I really did not like the way it looked. I wanted it to sit level!!

So I took the jack back off and set about dis assembling it so I could cut it down. Once I figured out how it came apart I cut off 6-1/2" from all of the pieces. Tthen had to re-drill a couple holes in the inner square tube and also boogered up the threads on the end of the screw to keep it from coming apart and put it all back together... Sure I lost a lot of the adjustment but now it sits level again and is a heck of a lot easier to move around!

IMG_0768.jpg
IMG_0770.jpg
IMG_0772.jpg
 

Haoleb

Member
197
7
18
Location
Raymond, Maine
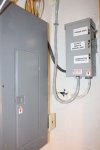
I wanted to give another update since today I finally was able to get the generator electrical hookup buttoned up. I had an electrician come out and do the hookup of integrating the new components into my existing DPDT manual transfer switch that was in use for a 30A standard portable generator hookup.

IMG_0774.jpg

This is my existing transfer switch for switching between the utility or generator hookups. The meter socket is on the other side of the wall behind the transfer switch. The 10AWG romex that was run into the switch before was replaced with 2-2-2-4 SE cable that runs to my second transfer switch that switches between my two generator inputs.

IMG_0781.jpg

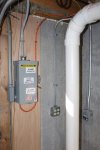
The second transfer switch I added in. This one switches between the 30A inlet which is in the far right of the photo inside my garage and the new 60A hookup which is on the other side of the wall and is wired with 4AWG THHN in the conduit on the left side of the switch.

IMG_0777.jpg
IMG_0778.jpg

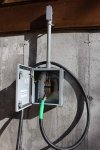
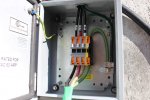
My 60A generator inlet... consisting of high current terminal blocks mounted in a Nema 4X rated enclosure. Right now in order to run off generator power I have to roll the trailer out of my garage/basement and then open up the inlet box and hook the 4 wires into the terminal blocks then switch over the transfer switch of course. Someday I may add some sort of plug/receptacle combination so no need to hook up each wire and mount it to that same box. I also planned it so that if I were to permanently mount the generator on a cement pad I can just run some conduit to this box and wire it up that way.

IMG_0775.jpg

Of course I had to hook it up and see how many things I could run in my home too! My biggest loads consist of my well pump and my electric dryer. I also have a water radon system which adds in a blower and second small pump. All of my water heating is via propane. I switched on the water so both pump systems would run, ran the dryer, ran the microwave.. lights.. etc and only got it up to 80% load. There are more small loads that would typically cycle on and off like the reefer and chest freezer... TV's...pellet stove etc. I am pretty happy to know when the power goes out that rotating loads will not be an issue and I can go along as normal in-fact I will probably have more of a concern not loading it down enough.

I also added onto the two side doors some stick on sound dampening insulation that is like 1" foam with a foil face. I got a bunch of remnant pieces from my work and stuck them on to try and cut down the sound level more. I am a little concerned I might melt it where it is closest to the exhaust since I am not sure what kind of temperature that stuff is good for but I guess I will know it was a bad idea if it bursts into flames.
 

Another Ahab

Well-known member
17,834
4,185
113
Location
Alexandria, VA
I also added onto the two side doors some stick on sound dampening insulation that is like 1" foam with a foil face. I got a bunch of remnant pieces from my work and stuck them on to try and cut down the sound level more. I am a little concerned I might melt it where it is closest to the exhaust since I am not sure what kind of temperature that stuff is good for but I guess I will know it was a bad idea if it bursts into flames.
Nobody can argue that one with you. :burn::popcorn:
 

Korgoth1

New member
191
2
0
Location
radford, va
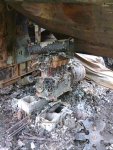
The block is iron, but most aluminum melted away. We had a barn burn down couple years ago, I lost many tools. No insurance because it was just a barn.
 

JRM

Member
166
9
18
Location
Brightwood, Oregon
I had a F250 burn to the ground due to the tail pipe rusted where it bent over the rear axle blowing super heated exhaust from a rich carb + cat converter right onto the fuel tank changeover valve, I noticed the fuel level dropping like a rock and pulled over... one small backfire and that was it! its amazing what burns in a hot fire!
 

Haoleb

Member
197
7
18
Location
Raymond, Maine
I am in the process of getting my 50 gallon AUX fuel tank setup added to the trailer. Does anyone know what size and type of fitting I need to use for the aux fuel inlet on the generator?
 

Haoleb

Member
197
7
18
Location
Raymond, Maine
Thought I would update a little bit with some details on the Aux fuel tank I have added to my generator...

So basically I wanted to add more fuel storage for the generator so I can be prepared to run it for power outages up to a week without re-fueling. I looked at transfer tanks... then I looked at aux fuel tanks for pickups.. And finally settled on getting a used fuel tank from a semi truck. Found a local junkyard that has heavy equipment and found a nice sized tank from a Volvo truck. I believe it is a Volvo VNL model. The tank data sticker was worn off the tank so I do not know exact fuel capacity but calculations show it to be about 50 gallons.

I actually got a different tank before this one that was off of a reefer trailer. 50 gallon capacity but different shape but unfortunately it was too far gone. There were a couple holes.. epoxy patches.. etc. Took it back and got the tank I have now. The tank I have now had a good 1/4 inch of thick sludge in the bottom of it and had a bio diesel sticker on the outside so I assume it was partially due to bio diesel use. Several days of letting 100% strength purple power work its magic and all of the sludge was finally gone. I sanded the exterior and then pressure tested it for any leaks. all good!

Next step I painted the original mounting arms and decided to mount them to the front deck of the trailer. In order to still have reasonable access to the output terminals and storage door I moved the front deck plate forward and re-drilled new mounting holes and used new hardware to mount it. Got all 1/2" grade 8 hardware from tractor supply since they sell by the pound for a good price.
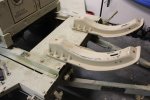

IMG_0788.jpg

With the support arms mounted to the front of the trailer there I can jump on the ends of the arms and the deck plate will flex somewhat. a section of 2x4 between the plate and front frame rail fit nicely and added extra support. The full tank should weigh about 400lbs so It should be strong enough for that kind of weight. I am 200lbs and I can jump on the very ends of those arms.
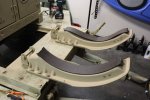
IMG_0799.jpg

I also bolted down some other anchor points for the ratchet straps behind the arms. Since the original tank straps were rusted out I decided to toss them and use some ratchet straps instead. The only time I plan on taking this setup down the road is to fuel up the tank and I feel comfortable with the two straps it will not go anywhere. I also tossed the old rubber that the tank mounted on so instead of buying more rubber I used instead 3 strips of 40# tar paper to pad the tank on the supports.
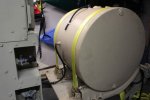
IMG_0807.jpg

Tank mounted and strapped down. One end of the straps goes to the anchor brackets I bolted onto the deck and the other end with the ratchet hooks onto the rear underside of the support arms. The hose on the top of the tank is the vent valve/hose The hose coming out of the side is the fuel pickup and there is a pickup tube inside the tank that goes to about an inch off the bottom.
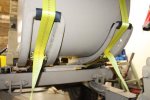
IMG_0803.jpg

The ratchet part of the straps fits perfectly under the support arms when closed. I put a small section of rubber hose on the tips of the support arms to prevent any chafing of the straps on the metal.
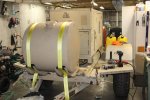
IMG_0814.jpg

I still need to tie back the extra strap material or cut it off. I know the extra weight on the front of the trailer will probably make it too heavy to pick up and put onto my pintle hook but I will probably get a hi-lift for that purpose. Since I already added a wheel to the front leg it will still be able to roll around!
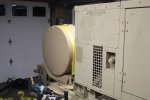
IMG_0816.jpg


IMG_0811.jpg

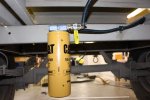
I wanted to add in some sort of filtration for fuel leaving the storage tank. I had a hard time deciding if I wanted do a filter or a water separator but I just decided on a filter only. The CAT filters seem to be pretty popular among diesel truck guys so I installed a WIX filter base and the fuel filter which is good down to 2 micron filtration. Also added in a shutoff valve for filter changes or to just shut off the supply. I bolted the filter to the first cross member under the trailer. Since the 37" tires leave plenty of clearance its easy to service underneath. The fuel line is 3/8" rubber fuel hose. I ran it along the frame rail under the generator and secured it with some nice clamps. I saw some info saying not to use brass fittings for diesel due to corrosion issues but I already had all of the fittings I needed and even some of the stock fittings on the generator are brass so I figured what the heck.
IMG_0783.jpg

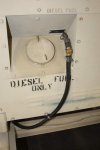
I did have a hard time finding the right -5AN fitting for the aux fuel inlet. I eventually found what I needed at my work place..a small pipe attached to a hydraulic test gauge. I had to tap one of the 1/4" NPS fittings into NPT for my 45 degree elbow but everything fits up perfect.

Next step is fuel it up and get the aux pump to draw some fuel! And some more touch up painting... I made some stencils to spray on diesel fuel only onto the tank (you can see I tested it on the generator.. and did a poor job at that)
 
Top
AdBlock Detected

We get it, advertisements are annoying!

Sure, ad-blocking software does a great job at blocking ads, but it also blocks useful features of our website like our supporting vendors. Their ads help keep Steel Soldiers going. Please consider disabling your ad blockers for the site. Thanks!

I've Disabled AdBlock
No Thanks