• Steel Soldiers now has a few new forums, read more about it at: New Munitions Forums!

  • Microsoft MSN, Live, Hotmail, Outlook email users may not be receiving emails. We are working to resolve this issue. Please add support@steelsoldiers.com to your trusted contacts.

Body mount bushing install questions.

121
8
18
Location
Metairie, LA
Tomorrow I plan on installing a set of urethane body mount bushings. I have loosened the existing bushings on one side, and removed the fastners for the bushings on the other, and am ready to jack that side up, then repeat on the other side to do the install. I removed the linkage from the transmission and transfer case, as well as the bracket that holds the torsion bars in place on the tailgate. I was hoping that might allow a bit of wiggle room without removing them. I will be using a 4' section of 4x4 on the structural member of the cab, right under the doors to spread the load up a bit as I jack up the cab. My concern is this: The bolts under the radiator and the others in the rear a really long. That said, Im going to have to lift the body a bunch to clear them up and out enough to slip in the new bushings. How far can I go? Im guessing I may need to lift the body 5" or even more. Do I need to sweat any steering components being over stressed etc??? How "loose" must the loose side be? Are we talking just breaking them loose, or just hanging on by a few threads?
 

nyoffroad

Well-known member
918
642
93
Location
Rochester NY
IIRC you can reach the core support bolts by removeing the grill and looking in a slotted hole thats about 2"x 4, I don't remember having to remove the rad.
Be careful, jack it up and the toss a block in there the last thing you want is to have the body come down on your hand and your all by yourself.
 
Last edited:

cucvrus

Well-known member
11,293
9,688
113
Location
Jonestown Pennsylvania
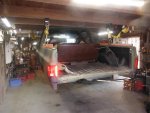
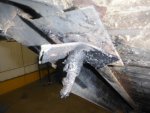
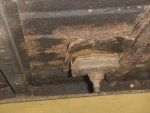
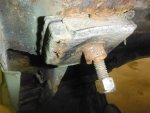
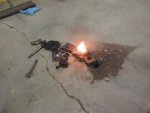
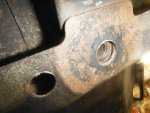
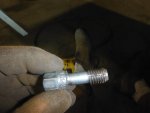
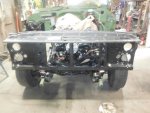
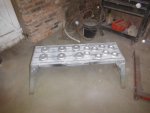
DSCF4272.jpgI don't think you will have any problems getting the core support bolts out. Getting the mounts out should be straight forward. I would use 2 bottle jacks one in front and one in back. Get a helper. Only lift it enough to get the old mounts out. I used a gantry set up and lifted the entire body at once with 4 winches. I know that was cheating but it worked out well. DSCF5654 (1).jpgDSCF5656.jpgDSCF5658 (1).jpgA few of them old bushings can be a real chore to get loose. These are the second from the back. And the rear one I needed to beat out and replace the bolt. DSCF5662 (2).jpgEven had to get as nasty as the fire wrench on a few. DSCF5669 (2).jpgDSCF5670 (1).jpg I recommend chasing the threads and cleaning the mounting area well and painting it.
 

cucvrus

Well-known member
11,293
9,688
113
Location
Jonestown Pennsylvania
DSCF5690 (1).jpgDSCF5694.jpgDSCF5696 (2).jpgThe back 4 mounts on the M1009 are the definite butt kickers. The second one front is welded to the floor and you need to get it high enough to get the top steel mounts out. I don't think you can do that from one side being loose. I am afraid you will need all the body mounts off of the main body at one time to get high enough. I know I done this a few times and it is not a hop, skip and jump job. It will require a bit of help and caution to do correctly and safely. Good Luck. I wish you well.
 
121
8
18
Location
Metairie, LA
I got lucky insofar as loosening them. To avoid having to lift the body up a mile, Is this possible: It looks like the bolts at the radiator support have access holes from which they can be removed. Can I remove those, then just drill out and replace the four in the back. That way I could just lift it a little, and slide the new bolts in from the top, through the new bushings. By the way, my fuel tank is out, so I have easier access.
 

cucvrus

Well-known member
11,293
9,688
113
Location
Jonestown Pennsylvania
You can load new bolts into the core support. That is row 1 of supports. That is the easiest one. Row 2 under the drivers feet and row 3 at the front of the rear seating foot area you need to pull the bolts from the bottom. Row 4 & 5 is where the real bear comes in. the rubber and bushing are adhered and rusted fast to the bolt. The last one in back I suggest you replace that bolt with a standard 1/2" carriage bolt, use the old one as a length example. Like I showed I have done this on several vehicles. I charged by the hour on customers and some were a lengthy chore. Others were easy and the only real issues I encountered were broken gage nuts in row 2 & 3 and stripped bolt heads. That makes fun times. Having the fuel tank out is a bonus and an opportunity to do some nice maintenance. I would replace all fasteners and use never seize on every bolt I reinstall. Good Luck. take some pictures and ask questions if you need to. I will await your report.
 

cucvrus

Well-known member
11,293
9,688
113
Location
Jonestown Pennsylvania
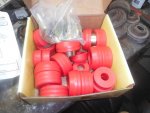
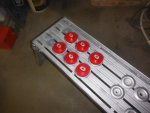
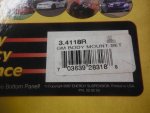
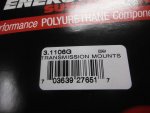
DSCF5692 (1).jpgNot sure which kit you have but I used Energy Suspension and it required me to reuse the top mushroom spacers. I removed them cleaned and painted them. Of course. DSCF5691 (2).jpgThis is the kit and part number I ordered. I don't care they are RED. They are never seen. DSCF5617 (2).jpgWhile in there and that far do the transmission mounts. I also recommend new bolts when ever you take out the old ones. Good Luck.
 
121
8
18
Location
Metairie, LA
Things so far have gone reletively smoothly. Time only allowed me to tackle the drivers side so far. I was able to drive the number 1 position core support bolt up and out with a drift punch and hammer. The two and three positions came out with a 24" breaker no problem. I did notice a while back that a small hole exists ajacent to the #2 body bushing where the bolt enters up into the body. I have been aiming my Deep Creep straw up into there for a couple weeks, spraying the area where i belived the "nut" to be captured in the body support. I think that helped a lot. The bolts came out soaked in Deep Creep. As for the #4, I noticed that the carriage bolt was spot welded, so I just drilled it out, then ground off the head. From there I was able to drive it right out from the top. Number five was more of a pain. I basically did the same as #4, except I noticed that to drive the bolt out the bottom would be impossible, given the fact that the fused sleeve would not pass through the metal plate on the factory bushing, and that bushing was captured by a retainer. the Energy Suspension kit doesn't use that retainer, so I just cut it off, drove down the bolt far enough to cut off the lower portion with the fused sleeve, and then was forced to fish out the top portion of the bolt with my magnet. The squared potion of the carriage bolt couldn't be pulled through from the bottom. I will continue to post as I progress. Thank you Cucvrus!
 

cucvrus

Well-known member
11,293
9,688
113
Location
Jonestown Pennsylvania
Cutting out my row 4 bolt was not an option on mine. I have my entire interior sprayed in Line X. I could imagine the rust and grinding particles sticking in the Line X forever. I did remove the Row 5 rear bolts as they are not welded in place. Painted black they look fine and the interior remains untarnished. Good Job. I hope everything works out. I removed the rear cushion retainers as outlined in the Energy Suspension instructions and used 1/2" bolts for the bumper angle braces. The retainers are a very bad idea when it comes to disassembly and reassembly at this point. I even had mine blasted and coated and never used them. Show up some pictures of your progress. I am still wondering how you drove the bolt shank thru the mounts from the top side. Were the mounts that badly corroded and rusted away?
 
Top