Dasgog
Active member
- 177
- 148
- 43
- Location
- Tucson, AZ
Hello!
So I got my ‘72 over a year ago and have had no issues with the brakes. Prior owner had replaced the air pack, master cylinder and so forth and also had installed the remote MC. He also mentioned using DOT3.
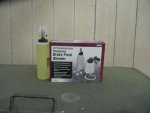
I want to drain the whole system and place DOT5 but have never bled brakes before.
I guess I am confused over process. Being I am not necessarily “bleeding” but am draining, do I just open all the nipples and keep pushing till all lines are empty and then close all but one and fill up until new DOT5 comes out then close and work my way back?
I really have looked it up but get lost on the whole remote master cylinder and the fact I’ve never bled brakes (thanks dad).
many help would be appreciated
So I got my ‘72 over a year ago and have had no issues with the brakes. Prior owner had replaced the air pack, master cylinder and so forth and also had installed the remote MC. He also mentioned using DOT3.
I want to drain the whole system and place DOT5 but have never bled brakes before.
I guess I am confused over process. Being I am not necessarily “bleeding” but am draining, do I just open all the nipples and keep pushing till all lines are empty and then close all but one and fill up until new DOT5 comes out then close and work my way back?
I really have looked it up but get lost on the whole remote master cylinder and the fact I’ve never bled brakes (thanks dad).
many help would be appreciated