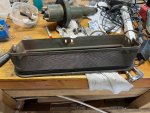
The ventilator is a pretty nifty feature on the M37 and I use it often. The weather seal on mine is deteriorated, as rubber items do.
I got a replacement from Vintage Power Wagons and spent last night figuring out how to disassemble cowl ventilator so I can install the new weather seal. It is semi straightforward, after removing the instrument panel, you can get access to the 5 bolts that hold the cowl on. Even with the instrument panel off, its not convenient to get to anything. I needed 7/16ths and 1/2 wrenches and sockets with various extensions to reach things. 4 bolts, 2 on each side hold the body level and have some play to adjust level if needed. The 5th bolt holds the assembly to the opening lever. This 5th bolt had very little room and I couldn't get a socket in there, so I had to use a normal wrench which was a tedious pain.
TM 9-8031-2, Power Train, Body, Frame has a short blurb on this item on page 314, but does not give much detail really.
Ill need some adhesive (like black RTV) to attach the replacement weather seal, and while I have this thing out ill clean it up and paint it.
Anyone that has done this job, or something similar, have recommendations for install to make it look nice and seal well? I was thinking adhere the seal, use some seran wrap to prevent sticking where it shouldn't, and using a weight of some kind to press the replacement in the groove maybe while it cures so its where it should be when I bolt it in when its ready?


