• Steel Soldiers now has a few new forums, read more about it at: New Munitions Forums!

  • Microsoft MSN, Live, Hotmail, Outlook email users may not be receiving emails. We are working to resolve this issue. Please add support@steelsoldiers.com to your trusted contacts.


Crew cab build started

mattgunguy

New member
290
2
0
Location
Springfield, Mo
It is right now. The seat I'd a few inches higher in the picture than it will be once installed. The seat frame still has the locking mechanism to hook into the van floor. This make it sit about 4 inches higher. Already cut those off the back seat & tested it up front, it fit nice & comfy for me. But for $65 for the pair, I'll figure out how to make them work. Also I plan on using a smaller steering wheel once I get around to doing the power steering. I like the smaller wheel that's in our m818.
 

dawico

Member
728
1
18
Location
Lampasas,TX
If you don't mind, how much length are you adding to the cab? I have a crew cab build in mind also and just trying to get a rough idea of layout before I start.

It looks great.
 

mattgunguy

New member
290
2
0
Location
Springfield, Mo
I cut the front cab 1 inch behind the front door & 1 inch in front of the back door. There is 6 inches between the doors. I cut the floor were it starts to angles upwards in the front. I cut roughly 10-13 inches off of the floor supports. Over all I added right at 40 inches with the rear cab.
 

dawico

Member
728
1
18
Location
Lampasas,TX
I cut the front cab 1 inch behind the front door & 1 inch in front of the back door. There is 6 inches between the doors. I cut the floor were it starts to angles upwards in the front. I cut roughly 10-13 inches off of the floor supports. Over all I added right at 40 inches with the rear cab.
Thank you.
 

mattgunguy

New member
290
2
0
Location
Springfield, Mo
Not a problem. Happy to help.

Finally found the pictures of my el cheapo Lds-465-1a that I hope to go through & install someday. Been sitting a while but I did get to see a video of it running the seller made just prior to pulling it. Still looking for a steering box for it. Any one got an extra Ross HF54 they'd be will to part with cheap.
 

Attachments

mattgunguy

New member
290
2
0
Location
Springfield, Mo
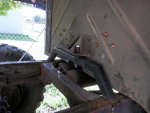
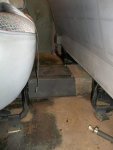
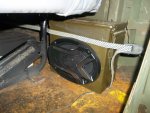
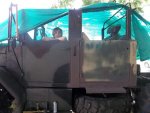
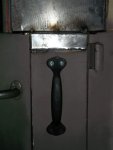
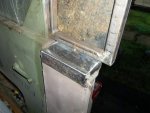
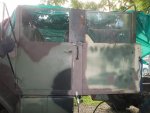
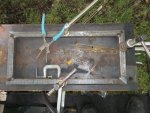
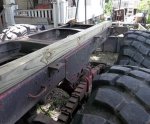
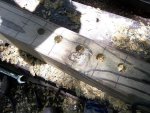
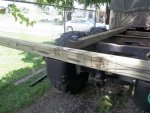
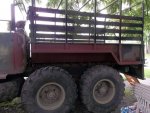
Ok so the bottom half of the cab is mostly done for the bigger stuff. Still got a bunch of detail stuff to do. But I got the seats in, ended up just welding them in after discovering that the supports on the seats are the exact width to go through the edge of the floor supports. Who woulda guessed. The seats are easy to remove from the supports, so it ain't all that bad. My buddy came through on the tranny tunnel, but it's another who woulda guessed moment. Apparently this cabs have some size differences in the tranny tunnels. The rear of the original cab is a 1/4'' wider than the donor cab. I ended up cutting the tunnel down the center, spreading it to the correct sizes, & welding a strip on the top. It's my own fault for not double checking, but to be honest I kinda like the looks of it. Finally, I made a new rear cab support & I am so flipping peed about it. I used 1/4''x 2'' square tubing. Cut & welded & re-enforced the joints. Triple checked my hole locations, clamped it down in the drill press, & some how I screwed up somewhere. The holes are a 1/4'' to the left. Some stuff may have been thrown & cussed at. But my wife convinced me to use it for now. Then I broke my 5/8'' drill bit before I could drill the holes to mount the blasted thing. Broke down & just welded it to the frame till I can do up a replacement. Was worth it in the end. Took the kids out for a ride, & they think they are in hog heaven.

My wife has decided the truck must stay a convertible. So time to figure out how to make a soft top & dust off the sewing machine.
 

Attachments

Recovry4x4

LLM/Member 785
Super Moderator
Steel Soldiers Supporter
34,014
1,814
113
Location
GA Mountains
For all you folks considering a crew cab, here is a little tidbit of information that might prove helpful considering all the 939 trucks being parted. The 939 cab is 10" wider than the M44 cabs. The front is 10" narrower than the back. That means the front of the 939 cab is roughly the same width as the back of the M44 cab. This nets you a cab you don't have to pry open and a wider back seat area. Fuzing 2 hardtops may be easier as well.
 

rustystud

Well-known member
9,071
2,388
113
Location
Woodinville, Washington
For all you folks considering a crew cab, here is a little tidbit of information that might prove helpful considering all the 939 trucks being parted. The 939 cab is 10" wider than the M44 cabs. The front is 10" narrower than the back. That means the front of the 939 cab is roughly the same width as the back of the M44 cab. This nets you a cab you don't have to pry open and a wider back seat area. Fuzing 2 hardtops may be easier as well.
Now that is some handy information to have ! I have seen what you said about 939's getting cut-up. Parts are all over the place right now.
 

mattgunguy

New member
290
2
0
Location
Springfield, Mo
Been back at it the last few days. Got the space between the windows filled. Used 1'' square tube to make a frame, & skinned it with 14ga. sheet material. Put the outside handles put back on & capped the pillar between the doors. Bent those up the same way as the floor pans & then cut down to fit. Hopefully I can get the roof support bent up in the next few days. Then I can start cutting this nice new canvas to make a top.
Next, I decided to add some steps to the rear doors. 7 or 8 months back I had a piece of 1/4'' tread plate bent up for another project that never worked out. So I cut it in half drilled some holes and presto. A step on each side. As an added benefit, on the passenger side it acts as a guard for the fuel pump & connections.
Finally, every truck needs some tunes. Was feeling creative & made speaker boxes out of ammo cans. Worked out pretty well, Still need to spray some under coating in the cans to stop the rattling. Best of all I can hear it over the exhaust.
Checked on paint. All I can say is, wow. That ain't gonna be cheap. Not at all. I'm using a color that is something out of the ordinary.


Hope to get to the bed soon.
 

Attachments

oboyjohn

Active member
340
120
43
Location
Quebec , Canada
I have a question for you and everyone else that has done a crew cab. Do you experience any cab flexing on the area between the front and back doors? With an origional cab, the back wall re-enforced the door striker plate section, resisting any movenent. But now with the addition of another door hung in the same area as the striker plate of the front door, do you get movement here when opening and closing the doors? And if so, how did you strengthen this region?
 

dawico

Member
728
1
18
Location
Lampasas,TX
Been back at it the last few days. Got the space between the windows filled. Used 1'' square tube to make a frame, & skinned it with 14ga. sheet material. Put the outside handles put back on & capped the pillar between the doors. Bent those up the same way as the floor pans & then cut down to fit. Hopefully I can get the roof support bent up in the next few days. Then I can start cutting this nice new canvas to make a top.
Next, I decided to add some steps to the rear doors. 7 or 8 months back I had a piece of 1/4'' tread plate bent up for another project that never worked out. So I cut it in half drilled some holes and presto. A step on each side. As an added benefit, on the passenger side it acts as a guard for the fuel pump & connections.
Finally, every truck needs some tunes. Was feeling creative & made speaker boxes out of ammo cans. Worked out pretty well, Still need to spray some under coating in the cans to stop the rattling. Best of all I can hear it over the exhaust.
Checked on paint. All I can say is, wow. That ain't gonna be cheap. Not at all. I'm using a color that is something out of the ordinary.


Hope to get to the bed soon.
Looking good. Great idea for the speaker boxes.
 

mattgunguy

New member
290
2
0
Location
Springfield, Mo
I have a question for you and everyone else that has done a crew cab. Do you experience any cab flexing on the area between the front and back doors? With an origional cab, the back wall re-enforced the door striker plate section, resisting any movenent. But now with the addition of another door hung in the same area as the striker plate of the front door, do you get movement here when opening and closing the doors? And if so, how did you strengthen this region?
I haven't had a problem with flexing in that area. My only problem is with the gap on the top of the front drivers side & rear passengers doors. Not much of a problem but still needs to be addressed.
 

mattgunguy

New member
290
2
0
Location
Springfield, Mo
Finally got around to starting the bed, & my oh my what fun. We used 4x4 pressure treated boards. I measured the locations of the rivets in the frame & marked the lumber. Then used a 7/8 spade bit to drill the pockets for the rivets. Went down about an inch. Things lined up quite nicely. Then we set the bed on. I measured for the tabs that held on the factory bed, & drilled holes in the floor of the bed to match (got 1 more to do, but the drill died). Dropped in some 5/8x9 carriage bolts to secure things. Now the bed will have the wheel well extended forward to accommodate the front drive. She's drivable now, but watch out for those speed bumps. There's only about a 2'' gap between the bed & the tires as it stands now. Gonna get that done over the next week or so. Should look cool anyways.

Lumber $32
Bolts $45
 

Attachments

mattgunguy

New member
290
2
0
Location
Springfield, Mo
Also, Got paint today as well. Like I said, the color is out of the norm. Same color that I use on rescued and restored German helmets (another hobby, the things on can find on craigslist for cheap). It's a German color that was either early war or late. I've never remember which. But we like it.


Two gallons of feld olive, ral 6006 $70
 

Attachments

mattgunguy

New member
290
2
0
Location
Springfield, Mo
Got the bed done, or mostly done over the last few days. I still need to do some patch work here and there, but that is a minor thing. Was going to do something more normal looking but it turned out that a lot of the front of the bed was rusted out. So this is what I ended up with after I cut the rusty stuff out. I've got more than enough clearance now, & I made myself a nice little stowage spot for the tow bar. If I ever get around to that dump bed conversion, the sloped sides will work well. The look of it is growing on me. Need to do some mud flaps yet.


More to come. Roofing...
 

Attachments

Top
AdBlock Detected

We get it, advertisements are annoying!

Sure, ad-blocking software does a great job at blocking ads, but it also blocks useful features of our website like our supporting vendors. Their ads help keep Steel Soldiers going. Please consider disabling your ad blockers for the site. Thanks!

I've Disabled AdBlock
No Thanks