• Steel Soldiers now has a few new forums, read more about it at: New Munitions Forums!

  • Microsoft MSN, Live, Hotmail, Outlook email users may not be receiving emails. We are working to resolve this issue. Please add support@steelsoldiers.com to your trusted contacts.


Crew cab build started

camoyj7

Member
927
18
18
Location
wonder lake IL
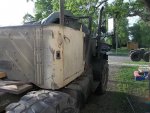
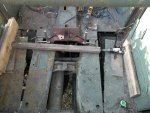
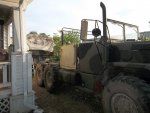
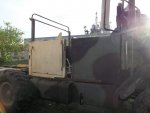
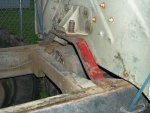
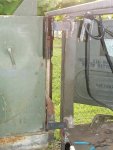
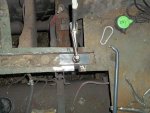
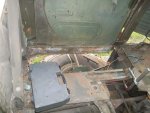
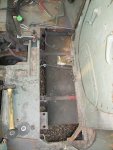
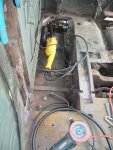
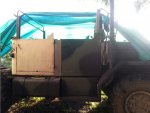
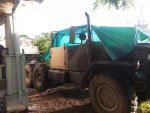
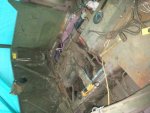
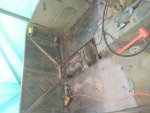
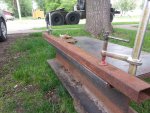
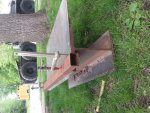
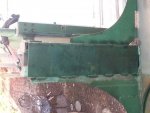
Starting my own crew cab build, can you fab the crew cab on a jig separate from the the truck?

You could do that if you had a jig big enough. I think you would be making a lot more work for yourself. Removing steering column, wiring, hood and fenders. Plus the crew cab with doors would be close to 1000lbs. I had to use a twin line wrecker to lift mine back onto the frame.
 

502NDMP

Member
Steel Soldiers Supporter
61
3
8
Location
NH
Thanks for the info, trying to keep the truck working while building cab. I was thinking if building the whole thing and stripping down to the bare cab and reassembling. Plan is to build cab this summer and blasting other body parts. Planning on reassembling and painting in the fall. Interior working etc during the winter. I am also using a custom box for the rear of the truck. I have access to a crane truck if need be. Someone told me that there was a post by Clintdigger somewhere here on step by step info on a crew cab build, but I am unable to locate it.
 

mattgunguy

New member
290
2
0
Location
Springfield, Mo
Not got a lot done, but I've gotten a little bit of progress made. Braced the original cab, and cut the back out. Got the second cab roughly set where it will go & starting to get it lined out. Supposed to rain for the next several days, so I'm probably at a stand still for now.
 

Attachments

mattgunguy

New member
290
2
0
Location
Springfield, Mo
Got the cabs joined together. Passenger side is a little off on the top, so I'll be cutting that side loose & correcting it today or tomorrow. Just have to get more wire, I'd forgotten how much I dislike .025 wire. I'll get pictures up tonight.

I also hate to say that my little junk yard cat Cali died last night. She'll be missed.
 

mattgunguy

New member
290
2
0
Location
Springfield, Mo
She was a good cat. Can't get out to get squat done now. Blasted rain won't let up. Did get the passenger side cut back loose and clamped in the right spot. I'm connecting the cabs a bit differently than most I've seen. I'm using 5/16 flat bar to connect & reinforce the sides. Top, bottom, & one the square tube under the doors. I'm setting the sides before I do the floor channels. I cut those a bit crooked. Easy to adjust for, but I wanted to be sure I have straight doors. Making progress despite the weather. Just slow.
 

Attachments

mattgunguy

New member
290
2
0
Location
Springfield, Mo
Finally got the chance to take some pictures. I decided to replace the whole floor, so I've been cutting the old one out. Should look cleaner in the end. I've got a buddy with a press brake who's going to make me a new transmission tunnel to finish it off. I screwed up by not putting in the rear cab mount before the cab went on, So I'll be putting it on top of the frame as in the picture most likely. Should work out though. I'm using 5/16'' x 2 flat bar to connect the cabs. Fits into the channels under the floor nicely. I hope to start doing some sheet metal this weekend.
 

Attachments

mattgunguy

New member
290
2
0
Location
Springfield, Mo
Finally got something done. Been sick lately. Finally got the floor supports joined together. Got the sheet metal done on the outside between the two. Used 12ga. material for that. Should add a good bit more strength than the stock sheet metal thickness. I'm planning on using 10ga. material on the inside. Hopefully I can get that and most the floor done over the weekend. :-D
 

Attachments

mattgunguy

New member
290
2
0
Location
Springfield, Mo
This is 10 step redneck floor pan fabrication.

Step 1: drag out the big piece of 3/4" web you've been using for an anvil for several years now.

Step 2: measure floor section to the desired width. Then measure it several more times just to be sure.

Step 3: measure & mark your material to the desired width. Did I mention MEASURE. Then cut.

Step 4: decide how much of a flange to put into your material & clamp between a heavy piece of metal and the afore mentioned piece of web.

Step 5: get a hammer & start swinging. NOTE, THIS MAY VERY WELL UPSET YOUR NEIGHBORS BUT TOUGH CRAP IT HAPPENS.

Step 6: back to measuring some more. Find the dimensions of what the new pans need to be. Transfer your measurements to your material. Check your measurements repeatedly. Cross your fingers & take the plunge.

Step 7: if things didn't go terribly wrong. Trim your new floor pan to its final fit. Hopefully any gaps aren't past your skills to fill.

Step 8: drill a few holes along the floor support to spot weld to add some support.

Step 9: skip weld the new floor pan in. Short welds here help to prevent heat distortion. I also used 12ga. material to help with this & for added strength.

Step 10: this is really important. Don't run out of gas for your welder with things half done on a holiday weekend. No one, & I mean no one is open to get a bottle refilled. It sucks.

Ten pound spool of .023 wire $30
New bottle of gas $unknown as of yet

Sorry for the direction of some of the pictures. The computer is being crotchety.
 

Attachments

mattgunguy

New member
290
2
0
Location
Springfield, Mo
This is what I will be coating the floor with. I put it on the bed of the shop truck I drive a year ago. It's held up really well in an industrial environment. Should also hide any weld lines.

I'll be starting on the transmission tunnel this week & starting the roof supports between the windows.
 

Attachments

mattgunguy

New member
290
2
0
Location
Springfield, Mo
I really can't complain about it. Has held up well & the two gallons I've got we're free. Left overs from doing the work truck. Work said they didn't have a use for the rest & that I could have it.
 

mattgunguy

New member
290
2
0
Location
Springfield, Mo
This is the interior sheet metal between the doors. Once again I used 12ga. material. I tacked the front down and then clamped the back to bend it around the supports between the cabs and tacked to the raised ridge in front of the rear door. Welded the back solid & skip welded the front. Thinking I may leave the front how it is. Looks kinda factory like. And for some reason my pictures keep coming out sideways.
 

Attachments

mattgunguy

New member
290
2
0
Location
Springfield, Mo
Got some new seats today. Two matching bench seats out of a 05 full size dodge van. Will bolt in nicely once I cut off the stock latches & weld on some brackets.
The interior sheet metal is almost done. Taking some material to be broke next week for the trans tunnel & I've still got to do the panels between the Windows. Then it's on to the roof & setting the bed. Stupid pictures are uploading sideways. Really starting to annoy me.

Should be fun :clinto:
 

Attachments

Top
AdBlock Detected

We get it, advertisements are annoying!

Sure, ad-blocking software does a great job at blocking ads, but it also blocks useful features of our website like our supporting vendors. Their ads help keep Steel Soldiers going. Please consider disabling your ad blockers for the site. Thanks!

I've Disabled AdBlock
No Thanks