• Steel Soldiers now has a few new forums, read more about it at: New Munitions Forums!

  • Microsoft MSN, Live, Hotmail, Outlook email users may not be receiving emails. We are working to resolve this issue. Please add support@steelsoldiers.com to your trusted contacts.


CUCV Stereo Install

cajuninmn

New member
22
0
1
Location
Crosby, MN
Marcus, I definitely see your point! I tapped the stereo itself into the fuse box but for the sub's amp, I ran a wire under my floor mat, through the firewall, and directly to the battery to help distribute the load. I just grounded the sub to a bolt I drilled in a wire brushed portion of the floor behind the seat. So not everything is clumped together... So as far as I can tell all is well, but hey, I'm no electrician... My only electrical experience comes from slapping some AED patches on a poor fella every now and again! rofl Thanks for the website link too tim! Good stuff!
 

MarcusOReallyus

Well-known member
4,524
810
113
Location
Virginia
I'd be really leery of running that radio head off the fuse box. These truck are senior citizens, after all.

How many power leads come off your radio? Typically you'll see either two (ignition sense and power) or three (ignition sense, keep-alive, and power).

You can safely run ignition sense and keep-alive to the fuse box, because they don't draw any power to speak of, but main power.... I think you are asking for troubles there. It would be much safer to run it to the battery. OR splice into your feed for the amp.
 

forest522

Member
308
4
18
Location
Bernalillo, New Mexico
Marcus has a very valid point. The referred to earlier is a good one too. Here is another option that has been referred to before in the CUCV forum. When I started my project I too, realized that a source of safe, reliable 12v was needed beyond the old fuse box. So, some web trolling for "secondary fuse panel" or "auxillary fuse panel" and I found this:

http://www.fjcruiserforums.com/foru...-switched-fuse-block-installation-w-pics.html

It may look complex but it is relatively inexpensive (considering all that could be fried if done incorrectly) and easy to do if you take your time.

I replicated this system in my rig about 8 months ago. The system has been great. The one addition is a switch that controls the system. When its switched off - no power. Assurance that my batteries won't go dead. The system worked great when either sitting still for a week or two and during our move to another state 1200 miles away - 8 hour days on the road, most of them during that nasty heat wave through Nevada in late June.

The fuse panel as shown in the link above is installed under my passenger seat...

photos follow the panel under the seat, wiring under the hood and the switch set up in the center console.
 

Attachments

allenhillview

New member
272
3
0
Location
Jonesborough, TN.
Similar set up here works great, three years now on this one, use daily. Mine is also under seat. Used number #6 wire brought in from battery under cab then in under seat , fused of course at battery with one of those nice stereo water tight deals. Also, each circuit is fused at the panel witch sits under seat then wires run to that toggle panel. RV company built and sent wires and fuse panel, swithes $60 bucks. I fabbed the sheet metal surround then Velcro to metal under seat mount, seat moves freely without conflict.
 

Attachments

Last edited:

MarcusOReallyus

Well-known member
4,524
810
113
Location
Virginia
VERY nice, gentlemen! :beer:


This is the right approach on these old gals - take a good solid lead to a new distribution panel, and take power from there for any new accessory. Fuse the main power lead, or better yet, as shown above, use circuit breakers, then fuse each load separately at the new distribution point.
 

forest522

Member
308
4
18
Location
Bernalillo, New Mexico
Allenhillview - Nice set up! I like the switches!

Cajun - yep...nearly every time I log in here my project board gets cloudy and jumbled...But that is what makes these rigs so great!
 

epitts

Member
500
1
18
Location
Terre Haute, Indiana
I have a problem picking up my local stations. I installed the stereo in my M1009 and all works and sounds good, but the antenna does not seem to work very well. I used a universal antenna like LMC sales. I also ran a ground wire from the antenna stud to the body, any other ideas? Thanks
 

MarcusOReallyus

Well-known member
4,524
810
113
Location
Virginia
Try removing that ground wire on the antenna, and clean up the antenna mount really well. You want your grounding to be through the antenna mount itself.

With that ground wire you may have created what's called a "ground loop", which will do bad things for your reception.
 

tim292stro

Well-known member
2,118
39
48
Location
S.F. Bay Area/California
For RF grounding, there are a few concepts you will want to learn.

  1. Skin effect. Basically the higher the frequency, the shallower a signal will penetrate a conductor. To this effect, at higher frequencies, a wide flat strap or metal foil is better at conducting an RF signal in its entire volume than a round DC current carrying conductor like a brake light wire. As an example, a 14-Gauge wire at 100MHz (approximately the center of the FM radio band), is only using about 4-5% of it volume (all at the surface) for conducting RF energy.
  2. RF Bonding. You want your vehicle to look to the antenna as a continuous ground plane - that is, your truck should appear as a monolithic piece of metal. By using only a few small and round conductors to ground your truck and radio(s), you are creating small tuned circuits in your body panels that react in unknown ways to RF energy (think of this as small body panel sized antennas everywhere). It's better to ground EVERYTHING (doors, hood, body, frame), and ground it frequently and with wide (and multiple if possible) ground straps. Remember that rubber isolators don't conduct much of anything, so in addition to a DC ground, you would want to RF bond the component as well (think engine, transmission, and transfer case here - nice big pieces of metal).

Spot welds (or screws) that are used to hold together body panels are cheap, but make terrible RF ground points - they focus energy down to a few tiny points of energy transfer, and the spacing of those welds can create a small resonant circuit in the skin of the vehicle. If you are ever going to do HAM or higher powered CB, you would want to get to each of the joints and bond them with a continuous weld or a copper foil bridging over the seam brazed to the metal.

As was said above, the antenna base gives your antenna a path to ground, any rust there changes the conductivity of the base, and makes it harder for controlled RF to get to your ground plane (this can de-tune your antenna). Even if you don't do high power CB or HAM, your truck would benefit from having the major components bonded/strapped with a 1" wide copper ground strap, either welded or using a sheet metal screw and a star washer to bite into the metal. The idea being you want as best DC and RF conductivity from all body panels to a common ground point. By making these connections as wide and low resistance as possible, you would reduce any ground loop threats to a lower level than the noise floor of the RF signal. With the ground at the same or nearly the same potential (voltage) at both ends of the antenna coax, there is no longer a significant energy returned over the antenna cable shield (and no more noise picked up as a result). Think "path of least resistance" here - if it's easier for noise to get to ground using your ground straps, it won't bother with your antenna wire.

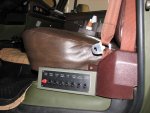
This same thing is a problem if your radio only has a wire connecting to ground, and not a good solid RF ground to the chassis. If more RF energy gets returned to the ground of the truck by going through the antenna shield, then it will introduce noise into the RF receiver in the stereo. If you think the dash is a good ground point, then make sure the dash metal is actually a good ground point to the chassis first :).

For you guys reading this with M1008, M1010, M1028, or M1031 trucks, it's helpfull to remember that your bed-box is not directly connected to the cab body, and that the cab is mounted on rubber isolators usually that need to be bridged with RF straps as well - but keep the straps away from the side of the frame rail with the fuel tanks, small sharp things like screw heads can puncture tanks in a crash.

I used to do car stereos, and with alternator whining problems I often found the RF ground lug included on the back of the stereo deck unconnected to anything, let alone the frame.
 
Last edited:

cajuninmn

New member
22
0
1
Location
Crosby, MN
axelfinn, as you can see in my initial pictures, I ran right from the existing fuse panel (which has worked fine for me). The only thing I ran directly to the battery was the sub I put in behind the seat. That being said, if you plan on making any other electrical additions to your rig I would strongly suggest looking into the setups posted by forrest522 or allanhillview. I think they might be onto something... [thumbzup]
 

cpf240

Active member
1,479
5
38
Location
Free in Northern Idaho
I have a stock M1009 And am fairly new at this. How do you wire in a stereo on this 24 volt system? Do I wire the power to the fuse panel?
Um, in a stock system, only the starter, glow plugs and slave port are 24v. The rest of the truck is pretty much 12v, like any civy Blazer. There is 24v going to the volt meter, and the passenger-side alt does output 24v in reference to ground, and 24v shows up in a few spots in the fuse panel.

I suggest looking at the wiring diagrams, etc, provided in the Helpful Threads Sticky at the top of the CUCV forum. Also examine the wiring diagrams, both in some of those threads, and in the TMs. Plenty of threads here on installing 12v items in these trucks are on this forum. If you decide to go straight to the battery, only use the front battery for 12v items, as using the rear battery takes some special considerations.

This is all assuming your truck is stock...
 
Top
AdBlock Detected

We get it, advertisements are annoying!

Sure, ad-blocking software does a great job at blocking ads, but it also blocks useful features of our website like our supporting vendors. Their ads help keep Steel Soldiers going. Please consider disabling your ad blockers for the site. Thanks!

I've Disabled AdBlock
No Thanks