- 3,318
- 3,533
- 113
- Location
- NORTH (Canada)
These days I do need a project once in a while to stay sane (I surmise the current pandemic has something to do with it). For a long time I wanted to prepare my hot water heater to be mounted in-cab, similar to what the M35A3 models have. It is an easy project.
Tools:
1/2 inch wrench/socket to remove heater box from fender bracket (4 bolts)
Slot screwdriver for removing hose clamps
Large Philips screwdriver for heater box screws
Straightedge
Sharpie
Measuring tape
Cutoff wheel/angle grinder and protective glasses
Some suitable rubber pieces to protect heater core
Drill and drill bits
Blind rivets for data plate
Duration:
It took me an hour and a half of puttering along to get this done.
The heater box will reside sideways under the passenger side dash.
I have a 5ton series diverter box on the way; the 5ton intake faces right, the heater box discharge faces left; easy to connect the two.
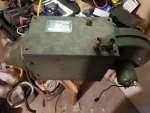
Here is the Hunter hot water heater, already removed from its fender bracket.
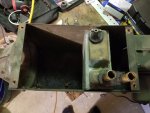
Removing foru Philips screws reveals the vastness of nothing. Oh, and a little brass heater core. The waste of space has to go (and the hazelnut shells as well). Also, the heater core sits metal-on-metal in the housing, one of the pipes chafes against the box. This is sloppy, I do not like it and we will fix that.
With the heater core still in place, measure from the right side and mark where you want to cut the box. Be careful to leave enough space for the mounting flange of the outlet wall that you are moving. In my case, 5 inches from the right (13 cm) was perfect.
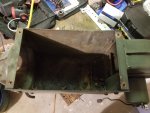
Mark all around.
Using safety glasses, a cutting wheel does quick work cutting the steel box.
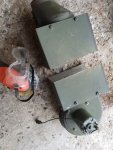
Remove the side wall with the outlet, place the side wall into position and mark the new screw holes that you need to drill. The thread is in the side wall, so you can drill the screw holes generously large.
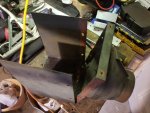
This is the heater box after re-assembly. I used rubber cut from an inner tube to wrap the heater core so that it sits protected inside the heater box. I also ground out the flange at the bottom for clearance for the pipe and made sure this part is also covered by a rubber flap.
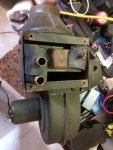
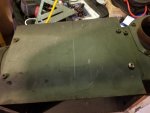
I ground the rivets of the data plate off from the back, drilled new holes and used aluminium blind rivets to re-mount the data plate on the smaller heater box lid. The heater box now needs a good cleaning and painting, then it is ready to be mounted!
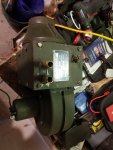
If you are eagle-eyed you will notice that one Philips screw is now a hex bolt. The reason is a visit by Murphy where he made me drop my tray with all the screws, all of which I found - bar one.
Tools:
1/2 inch wrench/socket to remove heater box from fender bracket (4 bolts)
Slot screwdriver for removing hose clamps
Large Philips screwdriver for heater box screws
Straightedge
Sharpie
Measuring tape
Cutoff wheel/angle grinder and protective glasses
Some suitable rubber pieces to protect heater core
Drill and drill bits
Blind rivets for data plate
Duration:
It took me an hour and a half of puttering along to get this done.
The heater box will reside sideways under the passenger side dash.
I have a 5ton series diverter box on the way; the 5ton intake faces right, the heater box discharge faces left; easy to connect the two.
Here is the Hunter hot water heater, already removed from its fender bracket.

Removing foru Philips screws reveals the vastness of nothing. Oh, and a little brass heater core. The waste of space has to go (and the hazelnut shells as well). Also, the heater core sits metal-on-metal in the housing, one of the pipes chafes against the box. This is sloppy, I do not like it and we will fix that.

With the heater core still in place, measure from the right side and mark where you want to cut the box. Be careful to leave enough space for the mounting flange of the outlet wall that you are moving. In my case, 5 inches from the right (13 cm) was perfect.

Mark all around.

Using safety glasses, a cutting wheel does quick work cutting the steel box.

Remove the side wall with the outlet, place the side wall into position and mark the new screw holes that you need to drill. The thread is in the side wall, so you can drill the screw holes generously large.

This is the heater box after re-assembly. I used rubber cut from an inner tube to wrap the heater core so that it sits protected inside the heater box. I also ground out the flange at the bottom for clearance for the pipe and made sure this part is also covered by a rubber flap.

I ground the rivets of the data plate off from the back, drilled new holes and used aluminium blind rivets to re-mount the data plate on the smaller heater box lid. The heater box now needs a good cleaning and painting, then it is ready to be mounted!
If you are eagle-eyed you will notice that one Philips screw is now a hex bolt. The reason is a visit by Murphy where he made me drop my tray with all the screws, all of which I found - bar one.


