• Steel Soldiers now has a few new forums, read more about it at: New Munitions Forums!

  • Microsoft MSN, Live, Hotmail, Outlook email users may not be receiving emails. We are working to resolve this issue. Please add support@steelsoldiers.com to your trusted contacts.

Engine Mount Replacement

GeneralDisorder

Well-known member
Steel Soldiers Supporter
2,354
5,821
113
Location
Portland, OR
My engine mounts were shot. And every other truck I've looked at was in similar condition. Speaking with someone in the know - apparently even Acela doesn't change these.

2008 M1079 w/25,000 miles.

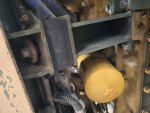
Before. You can see the "fretting" from vibrations that is causing that characteristic red "dusty" look. That's from constant abrasion of the metal that is shedding bits of iron and abrading the oxide layer. You can also see some cracking where the rubber is delaminating from the steel plates.

PXL_20240922_172240311.jpg

You can see that the safety sleeve that protects the bolt is eating it's way into the frame mounting bracket:

PXL_20240922_172230363.jpg

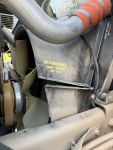
Changing these involves taking the upper fan shroud loose, unbolting the mounts, then lifting the engine up. I could only get about 1.5-2", and unlike the TM's suggestion of "remove the mounts" I had to unbolt the frame mounting bracket lower bolt, and loosen the upper bolt to rotate the bracket and allow removal of the rubber mount, sleeve, and bolt.

PXL_20240930_011941420.jpg

PXL_20240930_011527724.jpg

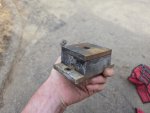
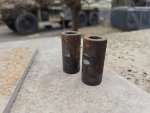
Old mounts and sleeves:

PXL_20240930_011841575.jpg

PXL_20240930_011648075.jpg

PXL_20240930_011750363.jpg

New mount installed:

PXL_20240930_171005369.jpg

And now we have an air gap!:

PXL_20240930_171050684.jpg

Fan to shroud clearance before and after. Seems to have raised the engine about 1/4-3/8"

Fan Clearance Compare.jpg

And the difference is noticeable. Lower cab noise and vibration. Especially at and near idle and just off idle when accelerating. When coming to a stop in gear I would have varying amounts of vibration depending on how the truck was sitting and where gravity was putting the most load on the collapsed mounts and sleeves I assume. No longer get that and much less vibration overall under all conditions. Very worthwhile.

Look close. I bet you ALL find yours are essentially the same unless you have already changed them.
 
Last edited:

hike

—realizing each day
Steel Soldiers Supporter
551
874
93
Location
Texas Hill Country
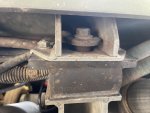
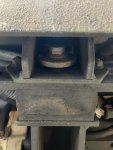
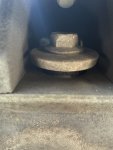
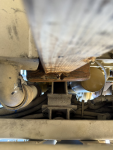
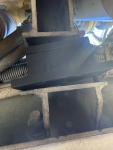
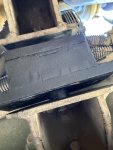
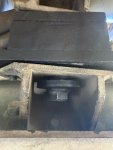
Ours look like the passenger side was changed and the driver side is original?

passenger
IMG_4471.jpeg

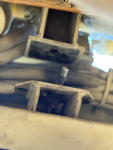
driver
IMG_4470.jpeg

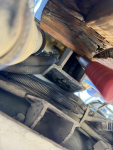
driver detail
IMG_4469.jpeg
 

Keith Knight

Well-known member
Steel Soldiers Supporter
1,080
2,076
113
Location
Wauchula, FL
I can definitely see on both of mine where the steel bushing on the bolt is rubbing on the large clearance hole caused by the rubber compressing over time. So where did you find new motor mounts?
 

GeneralDisorder

Well-known member
Steel Soldiers Supporter
2,354
5,821
113
Location
Portland, OR
They are out there. Be aware of manufacture dates as they are rubber - don't buy anything older than ~5 years if you can help it. There is a fellow on ebay that has sold them for $50 each a couple times now but he only lists two at a time - I'm assuming to promote the assumption of scarcity.

NSN:

5342-01-382-5021
 

GeneralDisorder

Well-known member
Steel Soldiers Supporter
2,354
5,821
113
Location
Portland, OR
Ours look like the passenger side was changed and the driver side is original?
Looks like they are both collapsed to me. You can see where the metal is being rolled off the bracket in both pics I think (hard to see on the passenger one - need a close up with more light). Not as badly as mine but have put miles on mine in the 3 years I've owned it (7k a year) and it served in the desert in Kuwait and El-Paso with 1st Armored Division.

Sounds implausible that someone would have only done one. That would be a hell of a high speed soldier to even bother with these, and to stop at doing just one side? Seems unlikely to me. Mine were not evenly worn and I looked at @Lostchain's 2003 M1078 truck this last weekend when doing mine and his were also bad but one is worse.

Could have been done if/when the engine was changed out. That's plausible. Definitely can happen that the Army throws an engine at a truck. Would believe that and maybe one got swapped and the other didn't...... supply chain issues perhaps. Ordered two mounts and only got one by the time the job needed to get done or only had one on hand..... Maybe one failed entirely so Snuffy only changed the broken one..... Motorpool is often that kind of world.
 
Last edited:

aw113sgte

Well-known member
Steel Soldiers Supporter
845
1,330
93
Location
La Crosse, WI
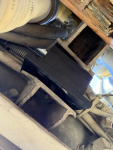
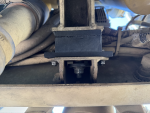
Just did mine. Not a fun job with lack of clearance for the bolts. I really don't like how they mounted these at an angle. They don't have much movement capability and just gravity is going to have them touching metal before too long I bet.20250326_145607.jpg20250326_144725.jpg
1743093573546.jpeg
 
Last edited:

GeneralDisorder

Well-known member
Steel Soldiers Supporter
2,354
5,821
113
Location
Portland, OR
I should have just done that in retrospect. Once I started the process of unbolting the adapters I didn't want to let them beat me.
I was at my buddies shop and didn't have my die grinders and accoutrements so I just dealt with it. Removing the bolt that you can get to and merely loosening the one you can only grab at a stupid angle with an open-end wrench worked for me as I was able to tilt the frame adapter and slide the mount out. Not easy and *just* barely possible with a bushel of red hot cursing and a six foot snipe.
 

MugOfPaul

New member
Steel Soldiers Supporter
4
7
3
Location
Portland, OR
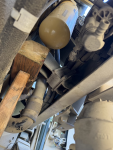
I just tackled this on my A1R in my driveway with just a floor jack, a short length of 2x4, and a 4x4 block. While not the easiest way to do it, it is possible (with some tricks!) so maybe this will be helpful. Especially for someone doing a field repair. Just be prepared for yoga positions and curse words.

The first side took me a few hours to figure out but the second side I had done in about an hour. I also agree with previous comments the bolt should be going the other direction. In fact, I will say it's mandatory for this particular approach. I burned a lot of time to figure out how to keep the original orientation and I'm convinced it's not possible with the jack method.

Like @GeneralDisorder said, step 1 is getting the upper fan shroud loose. When the motor is jacked up enough for the fan to touch this, you have enough room to do the job.

motormount_00.png

Go ahead and remove the center nut and side bolts on the old mount while you have the room. The center bolt won't come out yet.

OK for the floor jack set up. I found the 2x4 was ideal for threading the needle between the front axle and trans cooler. The 2x4 will also neatly slip up into the pocket of the engine side bracket, but DO NOT bother with this. You need the space inside that bracket for maneuvering the flipped bolt. This is where the 4x4 block comes in. Technically, you could just turn the 2x4 to achieve a similar result but you run serious risk of the 2x4 getting split by the bracket.

motormount_01.png motormount_02.png

Jack the engine up until the fan nearly kisses the lifted upper shroud. You should now be able to get the old mount out pretty easily. Focus on getting the bolt sleeve worked out first and the rest should practically fall out from there.

motormount_03.png

OK here's where the "tricks" start. Put the bolt up into the bracket pocket and get it through the slotted hole. I used needle nosed vise grips to hold it in position and also give me a way to manipulate the bolt in the next step.

motormount_04.png

Now slip the new mount up into place and get the bolt through. Tip: run the bolt through this hole a couple times before you do this step just to ensure it can pass through more easily. Also go ahead and get your side bolts started. It won't all like up perfectly but it's easier to do this now than later.

motormount_05.pngmotormount_06.png

Next trick: run the bolt sleeve up through the bottom and get it fully seated (ignore that side bolts disappeared in this pic)

motormount_07.jpg

OK at this point you will not have enough thread on the center bolt to get the washer and nut on. You'll need to lower the jack enough to close the gap but the motor mount should still be loose and moveable. Once you have enough thread to get a bite, get the washer and nut on. I don't have a sure-fire tip on this part. It takes dexterity to get both up in that tiny space with one hand. But as soon as the nut bites on, you're in the home stretch.

motormount_08.jpg

At this point, leave the jack in position and tighten all the nuts as much as possible. I feel like this gives the best shot at the main bolt sleeve getting centered in the hole. I couldn't get sockets to work in the tight space and I don't have ratcheting wrenches, so plain old wrenches worked for me... just took a lot of patience.

Finally, fully lower the jack and fully tighten all the nuts.

motormount_09.png

At no point did I feel unsafe or sketchy. But never get too comfortable when pinch points and jack blocking are involved!!
 
Last edited:

MugOfPaul

New member
Steel Soldiers Supporter
4
7
3
Location
Portland, OR
I should also say, a stout piece of pipe or 80/20 may work even better because you can get it up into the bracket pocket and still have room to move the big bolt into place. Less things to go wrong.
 
Top