• Steel Soldiers now has a few new forums, read more about it at: New Munitions Forums!

  • Microsoft MSN, Live, Hotmail, Outlook email users may not be receiving emails. We are working to resolve this issue. Please add support@steelsoldiers.com to your trusted contacts.


FLU419 SEE HMMH HME Owners group

The FLU farm

Well-known member
Steel Soldiers Supporter
3,291
1,225
113
Location
The actual midwest, NM.
Peakbagger, I re-read lots of your useful advice in old posts last night, in an effort to learn about the common issues, and hopefully pin down more precisely what's going on in this case.

Known is that this SEE ran just fine a few months ago (but it was warmer then, if that can factor in) and that the line from the strainer to the late style primer pump was replaced when I got it, as was the tank sending unit. Also known is that the tank was full of crap - both liquid and solids.

Not much dirt in the strainer (more on that later) and very little in the bottom of the filter canisters when I changed filters yesterday.
Blew out the section from the valve to the tank with compressed air, thinking that the inlet could've been plugged. Lots of bubbles in the tank, so no stoppage there.
The connection to the strainer could be rotated, so put a split hose and hose clamp over that. Tightened the clamps at the tank. Checked all other connections for tightness.

One of the two main things I'll try today is removing the front bleeder screw. It turns, but won't move in or out. If it can be removed, I'll drill and tap for a new bolt (with the canister removed, of course). It's probably stripped, so air could get in there, even if I can't make fuel come out.
The other is to put a suitable size O-ring in as a gasket for the strainer cup. If I have one. Might have to use gasket material instead.

And while on the subject of the strainer, after having blown the incoming line out, there has been lots of debris in the strainer cup after each starting attempt.
If I can get it started, I'll momentarily pull the drain plug on the tank to flush out more crap, but if it won't start...

My guess is that enemy number one is the bleeder screw. And if the removal attempts continue to fail I'll replace the filter holder assembly. Which means removing the gizmo on top of it. What the heck is that little "box" with fuel and two wires going to it??

Then, after all else fails, I'll go asking around in the neighborhood for a boat tank to borrow.

And, yes, the knowledge would be easier to find if we had a "FLU bugs" thread, with subcategories such as electrical, fuel, hydraulics, etc.
 

peakbagger

Well-known member
728
349
63
Location
northern nh
Sorry for repeating myself but I went through much of the same. The thing with the wires on it is fuel pressure transmitter for the diagnostic system. No use otherwise and other folks have removed it. I believe someone posted that the fittings are standard US thread. There were a pile of entire fuel filter assemblies for sale for relatively cheap on the market in the past year. I think EI has them. it may be cheaper to buy a entire assembly than to buy parts to fix yours. I think I got mine for less than the cost of the filters inside it from an Ebay seller.

Trust me the boat tank trick wasn't done first thing it was after a few days of frustration. I hope its retired now although I have thought of putting tees in the full lines and using it to run off road diesel instead of running road diesel when I am off road. As long as I route the supply and return line to it, the red dye in the road off road would flush out real quick from the injector pipe and fuel lines.
 

The FLU farm

Well-known member
Steel Soldiers Supporter
3,291
1,225
113
Location
The actual midwest, NM.
Ah, the infamous diagnostic system. Alright, that pesky thing will be gone before the day is over, and it does indeed look like regular NPT thread.
I did pick up one of those filter assemblies some time back, from EI as I recall. As you say, it was no more than the two filters inside.

Unfortunately, the dye doesn't flush out easily so an over-eager cop could nail you for running (having run, in real life) off road diesel.
The only way I know of to get away with that is to run some used engine oil (filtered, of course) through the system. An oil analysis representative admitted to me that they could not pick up the dye once it was all covered in black from the used oil.
Up to seven percent is deemed perfectly okay, if memory serves me, but to be legal the used oil has to come from the same vehicle it goes into the tank of. Not that I understand how they could prove the origin.
Good side effects include a noticeably smoother running engine and better lubricity.

Edited a spelling error.
 
Last edited:

BigBison

Member
317
1
18
Location
Yampa, CO
One, which apply to those of us with a SEE in a wintry climate, I thought of some time ago (but actually remembered to check today). Before lowering the backhoe, make sure the levers aren't ice covered and stuck to the seat. I'd imagine that bad thing could happen if they are.
Also, engage the PTO and let it idle for several minutes to warm the hydraulic fluid. I barely used the right stabilizer, working mainly the left, now it leaks. What precisely is leaking is difficult to determine, because the fluid's seeping out through cracks in the mopped-on Desert Tan paint. I'm guessing -35*F temps had something to do with it!

Got to -40* up at my place two nights in a row, Sunday & yesterday it rained, turning into a major blizzard and freezing ice all over the SEE. I was glad a little contact cleaner brought the heated windshields back, two minutes on, and the wipers cleared the slush. Although it's not very cold today, it is a mess around here. The SEE reveals more problems the more I operate it...
 

BigBison

Member
317
1
18
Location
Yampa, CO
Saturday morning, after it warmed to single-digit subzero temps, I threw my cordless impact wrench and some hand tools into a backpack and rode my fatbike out to the stranded SEE, determined to change my own tire...

The first thing I did, due to the cold, was re-prime the fuel system. Warmer temps, just makes 'er crank some more because it's not much of a leak wherever it is, but I was worried about having enough juice to start it. Half an hour later, it started on the second try just as the starter was slowing down from the batteries gave it all they had. The next thing I did was remove the spare, which I hadn't done before (and is secured differently on the SEE and the HMMH).

Then I tried lifting the front-right wheel off the ground with the loader bucket. Close, but no cigar! So I unlimbered the backhoe to use the left stabilizer for a jack. This worked, as far as getting the flat tire off. Once again, close but no cigar! Needed to lift the truck just another 1 1/2". I thought about deploying the backhoe, then decided against it on a snowy/icy/unpaved county road. So the malamute and I rode back home (she was sitting in the passenger seat when I was in the ditch, as the inclinometer pegged I made her jump out the driver's side because I was worried she weighed just enough to topple us), and I called a buddy to come help me wrangle my big floor jack down there.

Aside from that, I managed a roadside spare-tire swap in subzero temps by myself. I had to take the rest of the day off, and the next, to watch some playoff football. Although I did remove & replace all my lug nuts, half at a time. Nothing wrong with the professional torque job, but I was unhappy with the state of my nuts & bolts. Soaked & scrubbed the nuts in Stoddard solvent, and used a fresh battery-terminal brush & some brake-dust cleaner on the bolts.

I coated all the scrubbed metal with 3-in-1 oil. Then I dabbed some Permatex Aluminum Anti-Seize Lubricant (silvery-metallic greasy goop) on the inner bolt threads, and the mating surface of the nuts; reinstalled, did the other half, and hand-torqued 'em all with my biggest dial-indicator torque wrench -- which only goes up to 250ft-lbs, so I'll need a bigger one for the FLUs. As it is, I stopped at 247.5. My Dodges & GMC torque to 150ft-lbs, but they all have eight-lug wheels. I haven't done this to the GMC or the HMMH yet, but all my other vehicles have gotten this treatment.

Doing this on the SEE, I noticed the right-rear tire's sprung a slow leak. Sitting at that tilt, then getting dragged sideways back up over the stairstep-dropoff, at -30*F, was more than the "X" radials could apparently handle. I didn't crash into the ditch, at first I just had one wheel off and coulda backed right out in 4WD, had it not disengaged temporarily (now it's completely out). Dug myself out from the blizzard with the SEE today, in 2WD with a leaky tire...
 

BigBison

Member
317
1
18
Location
Yampa, CO
As I was plowing the yard today, I kept hopping out and turning up the air regulator, back by the alcohol-injection pump. As it is, I got it to go from 60psi to 80psi where the warning light/buzzer go out. Any higher, and it settles back down to 80psi in short order.

NOW I know where the air's leaking, sorta. At 60psi and under, nothing hisses. Up at 80psi, it's real obvious that one leak has something to do with the brake booster. The other's coming from under the vehicle, but only loses air in 4WD. Sometimes, that 2WD/4WD/diff-lock knob doesn't work right, the whole thing's spongy on the SEE, not crisp like on the HMMH. 2WD holds air longer, but either way, at the psi I was running before, there's no sound of an air leak -- except maybe for my dog? ;)

Next time I fire up the SEE it'll be to find the 4WD air leak. One curious side-note, and I'll have to investigate the HMMH when I go fetch its spare tire in a few days (after the Dodge gets back from the body shop), so I can eventually (I hope) recover it using the SEE, the air regulator on the SEE doesn't have an adjusting screw as shown in the manuals. It has an eccentric, oval-shaped nut lok-tited to a bolt! Not apparent upon casual inspection, due to the mopped-on Desert Tan paint job. :) So the bolt doesn't turn on its axis, it gyrates around. I suspect once I've tracked the leaks down, I'll need to turn it back down and hope I don't need to replace that regulator -- it's obviously been jury-rigged so I can't rule out that it has its own problems...

An interesting foible in the manuals (aside from "aline the gage" vs. "align the gauge"), is if you're looking for the voltmeter, search for "ammeter" even though it isn't one. :D Although there is a nice, big shunt in the battery box for an ammeter, this goes into the diagnostic system. So an ammeter on the dashboard is a simple matter of mounting it & connecting the leads from the shunt. I've always preferred to have an ammeter over a voltmeter on the dash, but ideally I have both.

Nutshell, whatever's leaking air in the 4WD system (pressurized-axle seal perhaps) got bad enough to keep the diffs from engaging, before I got the pressure up high enough to hear it leaking. Sometimes, having a 90*F temperature fluctuation over the course of a day, is enough to turn a pesky glitch into an all-out failure, or at least make the diagnosis easier!
 
Last edited:

BigBison

Member
317
1
18
Location
Yampa, CO
Oh, and at least on my SEE, the little tank doesn't pressurize until the air climbs past 70psi. Then it fills? I'm still studying the diagrams, but maybe there's a pressure regulator between 'em...
 

The FLU farm

Well-known member
Steel Soldiers Supporter
3,291
1,225
113
Location
The actual midwest, NM.
Your cylinder is leaking through paint?? The only thing I can picture creating that scenario is a cracked cylinder. Are you sure it wasn't just ice on the exposed rod that took a seal out? I had to do a bit of ice removal before using the backhoe.

Not sure what you mean by the spare being secured differently between the SEE and the HMMH. As far as I know, all FLUs have the spare held on the same way.

Using anti seize on the wheel studs and nuts sounds risky to me. For one, the torque values go out the window, but the bigger risk would be that they can loosen up much easier.
I've used anti seize on the outer surface of mag style lug nuts, but that was to prevent galling against aluminum wheels and didn't affect the threaded connection.

Now I'm waiting for you to find your 4WD engagement leak. My HMMH does the same thing. No such thing as easily getting to check out the bottom of that switch.
 

BigBison

Member
317
1
18
Location
Yampa, CO
Your cylinder is leaking through paint?? The only thing I can picture creating that scenario is a cracked cylinder. Are you sure it wasn't just ice on the exposed rod that took a seal out? I had to do a bit of ice removal before using the backhoe.
No, I'm not sure, because the seal's all covered in paint. So's the hose, and the fitting. Wherever it's leaking, it's coming out the nearest paint crack. If the cylinder was cracked, I doubt the stabilizer would work, but it's fully functional.

Not sure what you mean by the spare being secured differently between the SEE and the HMMH. As far as I know, all FLUs have the spare held on the same way.
Not according to the manual. But who knows what's actually on one of these trucks? I have an oddball eccentric nut lok-tited to a bolt, instead of a screw, for example! :) The SEE's supposed to have a short bolt and "four" washers, I have a really long bolt and about a dozen washers. Took about 15 minutes with the ratchet-wrench to undo the bolt, because it was not turning easily (possibly due to the cold), but this is obviously not the original bolt!

The manual shows a completely different setup for the HMMH, consisting of a lever you rotate 90* to release the spare. What's on my HMMH remains to be seen, but if that 15-minute procedure gets cut down to a few seconds, I'll order up those parts for my SEE, ya know? Stuck on the roadside is no place for a 15-minute procedure to release a spare tire from its mount!!!

Using anti seize on the wheel studs and nuts sounds risky to me. For one, the torque values go out the window, but the bigger risk would be that they can loosen up much easier.
I'll trust a dial-indicating torque wrench over any other type, but the other part of that equation is some lube, to avoid that "skipping" action (which is metal galling). The important thing is not warping the brake rotors -- I learned this as a kid working on four-banger foreign cars with disk brakes. It's interesting researching the lug-nut torque on my Dodges (one steel-wheel dually, one mag-wheel non-dually), there's a tech bulletin advising lower than the owner's & service manuals say, due to rotor warpage. The GMC motorhome originally had six-lug wheels, changed to eight-lug due to wheel breakage and rotor warpage.

But you're right, until the grease from the anti-seize-lube is fully squeezed out, leaving just aluminum in the threads, you'll want to re-torque. On a passenger vehicle, I re-torque after the first drive, after 100 miles, and after 1,000 miles. On the SEE, I re-torqued after clearing the driveway, and I'll do it again before too long, and again before next winter. Then I'm content to leave them alone until the tires are bald, never had a problem with the lugs getting loose. Or seized lugs!

The important thing, is following proper torque procedure where disk brakes are concerned, and keeping torque even. Using a clicky-type or torsion-bar-type torque wrench (or, forfend, some digital contraption) without anti-seize compound, is all guesswork because the lugs skip as the metal galls while torquing, making a true reading/setting difficult to obtain. Whereas lubed metal with a dial indicator makes it really, really easy to get all the lugs torqued exactly the same -- halfway first, then the rest of the way, in a proper star pattern. I don't care if I have to be a little anal-retentive on re-torquing at first, checking lug torque on disk-brake vehicles is a good habit to have, anyway.

What I've never had to do, is grab a bigger impact wrench to get the wheels off, even after a decade and tens of thousands of miles. Just because they're easier to turn, doesn't mean they're susceptible to coming loose!

I've used anti seize on the outer surface of mag style lug nuts, but that was to prevent galling against aluminum wheels and didn't affect the threaded connection.
I don't know how you can torque steel-on-steel to 250ft-lbs without galling, particularly in subzero temps. You have encountered seized lug nuts before, though, right? Why I put it on the threads, too. ;)

Now I'm waiting for you to find your 4WD engagement leak. My HMMH does the same thing. No such thing as easily getting to check out the bottom of that switch.
I think the switch comes last, because I think 4WD would engage if air wasn't blowing out the axle seals? They're positive-pressure axles in 4WD so they're supposed to leak *some* but I think I'm losing too much air for the lockers to engage, now, and a "tricky" knob isn't the same as a "broken" knob. I'm going to start at the wheels and work my way in. It'd be easier if this leak was audible with the motor running, like the brake-booster leak once pressure's up high enough. More of a "whoosh" than a hiss, but it finishes right quick, so I'll have to crawl under the Mog and have a buddy shut 'er down so I can listen.

Because I think once I've got it figured out, the dashboard indicator lights for the 4WD will probably turn out to be working fine, and a failure to disengage 4WD would be obvious from the dash light? So fiddling with a spongy switch works well enough for now, preferable to me than pulling that floor panel between the seats. Although I'll have to do precisely that soon enough, to re-wire my primary battery wiring, which routes to the master cutoff switch, under there.
 
Last edited:

General Hood

Member
712
2
18
Location
Fort Towson, OK
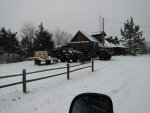
Single digit temps and snow in southern OK over the weekend. Decided to crank the FLU419 to see how she likes the cold. One little push of the start button and she was running. I need to do a little more wire tracing and rat chew repairs, but it will be sometime past winter before I tackle that task
IMG_20170106_160845493.jpg
 

The FLU farm

Well-known member
Steel Soldiers Supporter
3,291
1,225
113
Location
The actual midwest, NM.
Bison, not sure what the manual shows, but on all the FLUs I've seen there's a bolt "with a bent rod" on top holding the spare. They function like any bolt, except that it's not easy to use regular tools on them, so when they're balky, a piece of cheater pipe is about the only option.

I don't think that the axle seals are affected by what happens between the switch and the air cylinder that actuates the 4WD lever on the transfer case.

I've tried, but can't remove the panel between the seats. It goes down, which is helpful when tilting the cab, but doesn't come up readily. If it did, my battery switch would've been replaced by now.
Interestingly, today the HMMH lost power with the key in full "On" position. Turned it back a few degrees and it made contact again. That's two of my FLUs that will need some work in that department now. Still think that a parallel ground circuit and switch is the most feasible option.
 

BigBison

Member
317
1
18
Location
Yampa, CO
I don't think that the axle seals are affected by what happens between the switch and the air cylinder that actuates the 4WD lever on the transfer case.
One of the coolest things about these rigs, are the pressurized axles/hubs. Which only happens (according to the manual) when 4WD's engaged, with or without diff locks. Hence the recommendation to operate in 4WD in sloppy conditions even if 2WD has enough traction -- keeps the muck out. A high-volume, low-flow leak that whooshes instead of hisses, isn't some little air line leaking like on my brake booster. I'll have to try again in daylight, but it sounds like the whoosh is coming from the driver's-side front axle, not centrally under the truck like one of the diffs, or the actuator valve under the center panel, is the source of the leak.

quonset-2.jpg

quonset-1.jpg

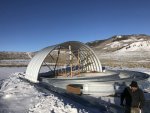
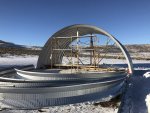
My contractor tells me raising an arch is a six-man operation. Then mentions how heart- and back- breaking it is for them to look at the HMMH parked right there, and wish that crane worked! :(
 

The FLU farm

Well-known member
Steel Soldiers Supporter
3,291
1,225
113
Location
The actual midwest, NM.
Single digit temps and snow in southern OK over the weekend. Decided to crank the FLU419 to see how she likes the cold. One little push of the start button and she was running.
Okay, after all the crap I gave you when your SEE wasn't running, I can understand why you wanted to rub it in that mine does not.

Actually, it did run today. For a while. First I tried removing the bleeder screw, and failed again. Following peakbagger's advice (I'm stubborn, but not that stubborn) the new filter assembly was installed. And the diagnostic gizmo on top removed, so now the correct end of a wrench, or even a socket, can be used on the banjo bolts.
In the process I found that the useless headlight guard on the useless headlight is useful for hanging useless parts on.DSCN0074[1].jpgDSCN0075[1].jpg

Couldn't find a suitable O-ring for the strainer, but after much bleeding and pumping, the SEE did run at 600 rpm. Eventually it ran great, so the backhoe was used to lift the rear.
Got the impact plugged in...only to remember that both the light and tool switches are frozen in off position.
Fired up the HMMH to use its hoses instead. Went over to the SEE to check the gauges only to find that it had died again. Oh, well.
Removed three wheels (what could possibly go wrong?) in preparation for wheel widening.DSCN0077[1].jpg

With that part of the job finished, a quick check revealed a drop of diesel on the strainer's wing nut. That's an obvious culprit. If it doesn't snow too badly tomorrow it'll get an O-ring (didn't check the supply all that carefully) or a homemade gasket of some sort.

Then it's back to the fun and games of breaking down three more tires. Just the thought has made me consider buying a set of Interco Super Swampers, to go on stock width wheels.
I'm sick and tired of radials, and this would be the time to decide - before cutting those nice tire chains down.
 

The FLU farm

Well-known member
Steel Soldiers Supporter
3,291
1,225
113
Location
The actual midwest, NM.
One of the coolest things about these rigs, are the pressurized axles/hubs. Which only happens (according to the manual) when 4WD's engaged, with or without diff locks. Hence the recommendation to operate in 4WD in sloppy conditions even if 2WD has enough traction -- keeps the muck out. A high-volume, low-flow leak that whooshes instead of hisses, isn't some little air line leaking like on my brake booster. I'll have to try again in daylight, but it sounds like the whoosh is coming from the driver's-side front axle, not centrally under the truck like one of the diffs, or the actuator valve under the center panel, is the source of the leak.
Aha, another feature for me to delete. I'd rather have 4WD than pressurized axles. And one of the FLUs did have a loose piece of plastic tubing by the left front, which I just pushed back onto the nearby metal pipe. Looks like I should take a peek at that area again. The more I think about it, it was on the HMMH.
 

BigBison

Member
317
1
18
Location
Yampa, CO
Bison, not sure what the manual shows, but on all the FLUs I've seen there's a bolt "with a bent rod" on top holding the spare. They function like any bolt, except that it's not easy to use regular tools on them, so when they're balky, a piece of cheater pipe is about the only option.
Now I get it. I don't know what's on my HMMH, but my SEE obviously has the best bolt some owner prior to me could make work. There's a different manual page for the SEE spare tire and the HMMH spare tire. Upon closer inspection, it appears the only difference is the SEE has the "bent rod" cab-side, while the HMMH's is crane-side? Nice. But still a bolt with a handle, not a latch, OK, bummer!

Part of the reason trying to get out of a ditch & then put on the spare exhausted me, is particularly when tilted, the FLU is somewhat of a "bouldering problem" just climbing in & out and on & off. The controls were ice-free, but my butt got cold & numb from "thawing" the icy backhoe seat.

SEE startup procedure: Everything by the book, except hold in the starter button while jiggling the master cutoff switch until the starter engages (once I figure out where to spray some contact cleaner, I'll give that a try). Lights & gauges & such work regardless. The master switch in my HMMH does absolutely nothing... I believe I'll eventually discover it's been bypassed instead of fixed.
 

BigBison

Member
317
1
18
Location
Yampa, CO
Aha, another feature for me to delete. I'd rather have 4WD than pressurized axles. And one of the FLUs did have a loose piece of plastic tubing by the left front, which I just pushed back onto the nearby metal pipe. Looks like I should take a peek at that area again. The more I think about it, it was on the HMMH.
Wait, even with 4WD, why would you want muddy water getting in your hubs & axles if you cross a creek or whatnot to get at some firewood? I'm a noob with vehicles this large, but wrenching on 'em ain't like wrenching on a Honda by a long shot! I'd rather not re-pack my wheel bearings after every water crossing, all's I'm saying. Or worry about standing water in my axle tubing, that the air pressure's meant to blow out?
 

The FLU farm

Well-known member
Steel Soldiers Supporter
3,291
1,225
113
Location
The actual midwest, NM.
SEE startup procedure: Everything by the book, except hold in the starter button while jiggling the master cutoff switch until the starter engages (once I figure out where to spray some contact cleaner, I'll give that a try). Lights & gauges & such work regardless. The master switch in my HMMH does absolutely nothing... I believe I'll eventually discover it's been bypassed instead of fixed.
I sprayed some JB-80 down the "key hole" on the SEE, and that one has behaved better since. Of course, it may also be that I dropped a washer in there, as a spacer of sorts. Just can't remember if I fished it back out or if it's still there.
 

BigBison

Member
317
1
18
Location
Yampa, CO
Ya know, before it got snowed in, I was field-servicing the fuel system on my HMMH. The symptoms I described earlier in this thread sound the same as you're having with your SEE -- runs great until it comes up to temp, stops... cools down, starts, runs, lather-rinse-repeat. Exactly the symptoms my dually exhibited, before losing cylinder compression entirely and being unable to start any more. After slowly going from driveable, to idling-only, in the course of the only 20 miles *I* ever put on that truck. Wasn't the fuel system at all.

I can't wait to get the HMMH down into the new garage space, with fingers crossed about getting it there. The first thing I'm going to check is compression. It says it has 22 hours on the rebuild, but that doesn't mean the honing was done properly or the rings ever seated correctly. Which can result in a motor that starts & runs, just not very well, and not for very long after it's up to temp. Could still be the fuel filters.
 

The FLU farm

Well-known member
Steel Soldiers Supporter
3,291
1,225
113
Location
The actual midwest, NM.
Wait, even with 4WD, why would you want muddy water getting in your hubs & axles if you cross a creek or whatnot to get at some firewood?
If it's that same hose I already found, yeah, I'll fix it. Not planning on any creek crossings with the HMMH, and the closest the SEE is likely to get is when I drop a wheel into the irrigation ditch.
Of course, the SEE's 4WD works, but that and the potential water intrusion will be the least of my worries when its on its side. Which would be the likely outcome of ending up with a tire in the ditch.
 
Top
AdBlock Detected

We get it, advertisements are annoying!

Sure, ad-blocking software does a great job at blocking ads, but it also blocks useful features of our website like our supporting vendors. Their ads help keep Steel Soldiers going. Please consider disabling your ad blockers for the site. Thanks!

I've Disabled AdBlock
No Thanks