• Steel Soldiers now has a few new forums, read more about it at: New Munitions Forums!

  • Microsoft MSN, Live, Hotmail, Outlook email users may not be receiving emails. We are working to resolve this issue. Please add support@steelsoldiers.com to your trusted contacts.


FLU419 SEE HMMH HME Owners group

The FLU farm

Well-known member
Steel Soldiers Supporter
3,286
1,213
113
Location
The actual midwest, NM.
Last night I thought about doing it "in reverse", as I think you are suggesting; mount the plate to the back of the bucket and let that dictate where the parts end up. It sure would simplify the positioning if using adapter parts that aren't tied together.
Of course, it wouldn't take much to tie the two parts together temporarily, using a known to be good plate.

I could use a setup for front hydraulics like what you describe. It'd let me use the grapple on the rock bucket, and angle the plow blade (normally used on the tractor), among other things. I probably wouldn't use a joy stick, but rather regular valves. It'd be easy enough to mount them to the back of the cab since the lever is usually reversible relative to the valve body.

But then there's reality. In my case that means it won't happen anytime soon. Heck, I still have to make brackets for the QD fittings for the snow blower hoses, and hook up the electrical control for it. Last winter it was alligator clips on one battery, and the cord for the controller coming in through the vent window.
On the other hand, I have to get in hydraulic mode here, soon. For two years now the poorly made remote valves on a Kubota L3800 have been a huge irritant, and time consuming. They leak down at an amazing rate, so some sort of concoction of quality aftermarket valves will take their place. Naturally, I'm bent on cramming them into the stock position, and making an adapter to mount and feed them off the block like the stockers. While I don't mind the exposed valves all over the place on a SEE, on that tractor I want it all to remain invisible.
With all the numbers and thoughts whirring around in my head from that hydraulic adventure, the SEE would be a piece of cake to modify as a follow-up act.
 

alpine44

Member
397
16
18
Location
Asheville, NC - Elkton, MD
Re: Bucket modification / Quick Tach conversion

One of the annoying things of the original bucket is that it does not curl down past vertical, which makes it impossible to push yourself backwards with the bucket when stuck. Also, if you want to get the front tires of the ground you have to drive forward to prevent the bucket from rolling up (due to the over pressure relief valves) and then set the handbrake.

Did anybody experiment with modifying the bucket dump geometry to allow more downward travel of the bucket? If that reduces the bucket load capacity, that's fine as the front wheels cannot handle a chock full bucket anyway.
 

Foxyjosh

Member
53
0
6
Location
Northeast /OH
After looking through several inspection reports there's no doubt that they are a little careless with the fork lift, and my exhaust pipe shows a mild example.

Good advice on asking the driver to pick up stuff on the ground around the SEE. None of the pictures show the engine hatch cover on my FLU. Maybe I will get lucky and it was just removed prior to taking the pictures. Or maybe there is one laying on the ground near by that belongs with it. If it gets here without the engine cover I guess I can live without it. Does anybody here have experience with getting a replacement?

I half way want to do a road trip to supervise loading it up, but suspect it would be a lot of trouble without any net gain.


Any advice on jump starting it once it arrives? I am not sure how to do that with a 24 volt system. I intend to have the new batteries before it arrives, but it is best to have a backup plan.
I'd go to a airport service center for turbine aircraft. Each engine uses a 24v battery and they have to be replaced every few years regardless of condition. I got (2) 24v Gill batteries from a Turbine Twin Commander. They have enough oomph to get the Mog started and I only paid what a scrap dealer would pay. I just had to convert the two leads to a single quick disconnect for the battery. It also fits perfectly in the existing box with the Mog's battery tray still in the box.
 

FarmMOG

New member
42
1
0
Location
Texas/Oklahoma
Not reading all 346 pages of posts yet, I have decided to post the NAPA and other part numbers I have been able to come up with for the FLU 419. Knowing there are more out there, this is an initial attempt at trying to put everything together in one spot. If anyone has any additional info to add it would be greatly appreciated. Thanks for all the advice shared here so far.
FarmMOG

Part, NAPA Part Number
Battery, BAT 7256
V-Belt for Alternator, 25-9570
V-Belt for Hydraulic pump, 25-9440
V-Belt for Power steering, 25-9530
Air filter (main one), 2522
Air filter (inner one), 6560
Fuel Filter, 3167
Hydraulic Fluid (AW 32) 5 gal, 85-905
Brake fluid (Dot 5) qt, NBF 45032
Either canister ea, KAT 33121
Lucas grease (Construction grade) tube, LUC 10881

Others
Rear hydraulics filter (for backhoe), Pall filter HC2124FKN8H
Synthetic 80W oil for transmission, Red Line MTL 75W80 GL-4 Gear Oil
Oil filter, Mann H 1366-X (NAPA says they don't have this filter equivalent)
Bosch diesel primer pump, 2447222126 (I bought this at local diesel supply. Very happy with it)
Front hydraulics filter (for bucket), Donaldson P169014
 
Last edited:

Another Ahab

Well-known member
17,825
4,156
113
Location
Alexandria, VA
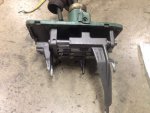
Well I got some of the covers off.View attachment 698156

It looks clean but a bearing is spinning in the front and a bearing or seal is starting to come out.
I wouldn't know what to look for inside a transmission:

- What's generally the first thing to look for (besides broken gear machining), like is there a conventional sequence of things to inspect once you open one up?
 

Foxyjosh

Member
53
0
6
Location
Northeast /OH
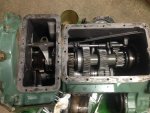
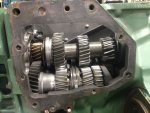
I don't know what to look for either. This is the first transmission I have ever taken apart. Right now I am looking for things I don't want to find. I'll need to re-tap some holes because some nit-wit who had this apart before me put grade 8 bolts in some of the holes. Grade 8 bolts are not metric. I'm taking lots of pictures as I go and I will post them as I hopefully progress.
 

alpine44

Member
397
16
18
Location
Asheville, NC - Elkton, MD
I wouldn't know what to look for inside a transmission:

- What's generally the first thing to look for (besides broken gear machining), like is there a conventional sequence of things to inspect once you open one up?
First thing is to look for metal pieces or flakes in the oil sump. Anything you find there has been worn or broken off from the parts above.
Check all gear teeth, clutch dogs, and shift forks for broken/chipped parts and pitting on the hardened surfaces.
Check ball/roller bearings for smoothness, play, and seating. This is somewhat of a subjective judgement in the absence of specifications. Same goes for wear status of bronze bushings.
The toughest parts to assess are the synchro rings. It is generally easier to go by how the transmission performed before teardown.
Finally, replace all seals and everything that does not look or feel kosher. The labor effort is generally a multiple of the parts cost on transmissions.
Before you reinstall the transmission do yourself a favor and check as much functionality as you can on the bench or a test stand. This can be as simple as an electric motor coupled to the input shaft.
 
Last edited:

The FLU farm

Well-known member
Steel Soldiers Supporter
3,286
1,213
113
Location
The actual midwest, NM.
Today the what I now call Summer SEE got to do some more work. It was the first time using the 12-inch bucket, digging a new ditch, and it sure felt like I was just spinning my wheels. Not literally, as the Super Swampers have very good traction, but to only get half as much dirt per scoop didn't feel very rewarding.
Then again, when you want only a 12-inch wide ditch it is the best tool for the job.DSCN0732[1].jpg

While digging away I noticed a leak on the dipper cylinder. Dang, that's the one that's rebuilt. A closer look showed that it isn't leaking at the seal, but around the cap.
Hopefully it just needs tightening.DSCN0733[1].jpg
 

alpine44

Member
397
16
18
Location
Asheville, NC - Elkton, MD
While digging away I noticed a leak on the dipper cylinder. Dang, that's the one that's rebuilt. A closer look showed that it isn't leaking at the seal, but around the cap.
Hopefully it just needs tightening.View attachment 698590
If tightening does not work because the O-ring got nicked during assembly, it is still relatively simple to repair. You only have to take the pin out of the rod eye, slip the new O-ring over the eye, re-install the pin, unscrew the cap and stretch the O-ring over the cap into its grove. The backup ring, if used, is probably OK. Use plenty of grease on the cap to avoid O-ring damage and rust in the threads.
 
Last edited:

The FLU farm

Well-known member
Steel Soldiers Supporter
3,286
1,213
113
Location
The actual midwest, NM.
Thanks for that tip, alpine! Sounds like you've been through that one yourself.
And thanks for reminding me about that cylinder needing attention in the first place - too much going on so it didn't even end up on the list. Now it will.
 

alpine44

Member
397
16
18
Location
Asheville, NC - Elkton, MD
Thanks for that tip, alpine! Sounds like you've been through that one yourself.
And thanks for reminding me about that cylinder needing attention in the first place - too much going on so it didn't even end up on the list. Now it will.
I had the cap leak issues with a rebuilt cylinder on my skidloader.

The backhoe bucket and left swing cylinders that are leaking on my SEE unfortunately need a complete teardown and also a new rod for the bucket cylinder. Still hunting for parts but will have to attack this repair soon.
 

Foxyjosh

Member
53
0
6
Location
Northeast /OH
My tilt cylinder for the backhoe leaks.

On another issue, I decided to tear into the transmission myself. Two bearings are destroyed so I'm glad I decided to pull the unit out. I ordered a gasket kit. I just need to find some bearings now. I think I have a source for that though.
 

The FLU farm

Well-known member
Steel Soldiers Supporter
3,286
1,213
113
Location
The actual midwest, NM.
I decided to tear into the transmission myself. Two bearings are destroyed so I'm glad I decided to pull the unit out. I ordered a gasket kit. I just need to find some bearings now. I think I have a source for that though.
Bearings are usually standard issue, so if you can find any kind of numbers on them they should be available from several places.
If you have a good bearing supplier nearby, the measurements alone should be enough.
 

FarmMOG

New member
42
1
0
Location
Texas/Oklahoma
I had to pull the bottom outlet on the front hydraulic tank and replace the gasket due to a large leak since purchase. Found out they don't sell the replacement gasket, but found a local shop that would make one. After draining the fluid and removing the old gasket, it turns out the home made cardboard gasket was in bad shape so I just bought some new rubber gasket material and made a better replacement myself. Leak check all looks good, so hopefully no more drips. Almost every fluid except hydraulic has been changed. Only have the brakes and transmission oil and I will call it finished. Looking on line for transmission fluid, I found Red Line Synthetic MTL 75W80 GL-4 Gear Oil or equivalent. Does anyone know if this is the type to use? Thanks.
 

rtrask

Active member
332
220
43
Location
San Luis Valley, Colorado
Only have the brakes and transmission oil and I will call it finished. Looking on line for transmission fluid, I found Red Line Synthetic MTL 75W80 GL-4 Gear Oil or equivalent. Does anyone know if this is the type to use? Thanks.
That is similar to the stuff I bought after Speedwoble pointed me in the right direction. The main thing is GL-4 or lower. Below are the relevant posts from back around page 308.

Hey rtrask. I see you are planning on 2.5 gallons of gear oil. I take that to mean you plan to do transmission oil as well. They use different fluids. With brass synchro sin the trans, it requires a GL4 or lower lube while the portals require a gl5. There is a good discussion on benzworld as to the reasons, and an even better write-up on a corvair forum out there. Suffice it to say, you need to find a transmission lube safe for brass synchros.
Thanks for catching that Speedwoble. I was just going by LO 3-2420-224-12 that shows the same GO-80/90 for the transmission, front and rear differentials and the front and rear axle hub drives. Is this the article you referred to?

https://www.google.com/url?sa=t&rct...6FGRNGcLx3cL-U9Eg&sig2=cbwdgiKxWVngSVw-ylDsLw
 
Last edited:

alpine44

Member
397
16
18
Location
Asheville, NC - Elkton, MD
Getting tired having to clean the fuel strainer about 5 to 10 times a day, I finally drained the tank, pulled it out, and pressure washed the inside after soaking it with ZEP de-greaser. All the bacteria/fungus crap came off and only some slight surface rust remained. Taking out the fuel level sensor allowed access to all areas of the tank's inside with the pressure washer wand.

After cleaning the filter screen that is part of the fuel pickup I decided to shorten the fuel pickup pipe by 1/2". This reduces the usable tank capacity by about 1.2 gal but should provide a little more margin against sucking up crud or water from the bottom of the tank. After a short test drive, the strainer was still clean. Once the remnants of Irma have moved out of Western North Carolina, I will take the SEEfor a couple mile long cruise down the road to see whether the fuel supply is now reliable.

The cleaning procedure is described in the TM but the warnings about the weight of the tank are a little over-exaggerated, IMO. While not exactly light, the steel tank is definitely manageable by one person.
 
Last edited:

FarmMOG

New member
42
1
0
Location
Texas/Oklahoma
That is similar to the stuff I bought after Speedwoble pointed me in the right direction. The main thing is GL-4 or lower. Below are the relevant posts from back around page 308.
Thanks. A friend sells oils and lubes, so talked to him and he came back with Shell Spirax S6 GXME 75W80 is what the engineer told him. I am getting a 5 gal bucket (smallest size they sell), and will have some left over for the next service. Shelf life is two years, so hopefully shouldn't have any problems. I am ready to finish working on this machine and start working with this machine.
 
Top
AdBlock Detected

We get it, advertisements are annoying!

Sure, ad-blocking software does a great job at blocking ads, but it also blocks useful features of our website like our supporting vendors. Their ads help keep Steel Soldiers going. Please consider disabling your ad blockers for the site. Thanks!

I've Disabled AdBlock
No Thanks