• Steel Soldiers now has a few new forums, read more about it at: New Munitions Forums!

  • Microsoft MSN, Live, Hotmail, Outlook email users may not be receiving emails. We are working to resolve this issue. Please add support@steelsoldiers.com to your trusted contacts.


FMTV Water Pump Belt Replacement

NDT

Well-known member
Steel Soldiers Supporter
10,146
5,807
113
Location
Camp Wood/LC, TX
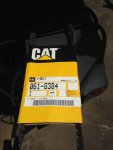
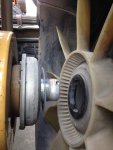
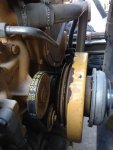
I tackled this today as my belt was OE Cat from 1998. That's runnin' on borrowed time. As usual, this was not a simple task. Yes the fan blade has to come off. If you are familiar with working with fasteners you cannot see, you can unbolt the fan by reaching through the blades. Otherwise, the shroud has to come off, and also the charge air cooler lines. That makes the task much simpler. The belt is also a bit tricky to get over the harmonic balancer. You'll figure it out, but at first I thought it would not go over it. I would suggest you do this PM before the belt shreds and you are doing this on the side of the road. That would suck.
 

Attachments

dmetalmiki

Well-known member
5,523
2,026
113
Location
London England
Fact is, the older you get the harder these jobs (seem to) become. In fact As you recommend I now make sure these sort of tasks are carried out after regular checks and before making a journey "in doubt".
 

Andyrv6av8r

Well-known member
Steel Soldiers Supporter
1,198
453
83
Location
Spartanburg,SC
NDT
A question about your fan assembly; with everything bolted up tight to the clutch, can you man-handle the fan and turn it? My 1079 had the fan hub wallowed out when I got it and I ended up making a new Adapter/hub where the rubber compression piece is eliminated. If you look in the TM's, the services ditched the rubber piece also and went to a rigid bolted setup.
 

NDT

Well-known member
Steel Soldiers Supporter
10,146
5,807
113
Location
Camp Wood/LC, TX
Andy, yes I could turn the fan without turning the crank. I was worried I would snap off a blade though. Good to know about the design change, I had not seen that.
 

NDT

Well-known member
Steel Soldiers Supporter
10,146
5,807
113
Location
Camp Wood/LC, TX
There are 6 ea 5/16" socket cap screws that take a 1/4" hex wrench if I remember correctly.
 

Lmtv772

Banned
651
18
0
Location
Florida
Did you replace the Alternator belts as well? Can you remember the part number or where you bought it from?
thx
 

spankybear

Well-known member
808
805
93
Location
WA
Thank you NDT!!! You are awesome and have saved me a headache. Just know it's going to be a PIA to replace!

Speaking of Gates... are they made in China now?
 

coachgeo

Well-known member
4,956
3,325
113
Location
North of Cincy OH
Thank you NDT!!! You are awesome and have saved me a headache. Just know it's going to be a PIA to replace!
..
For future reference the belt part #'s (and many other part #'s) are in the yellow parts spread sheet linked in the sticky/pinned thread at top of this forum and probably in Guido's sheet too. (Awesomeness)
 
Last edited:

spankybear

Well-known member
808
805
93
Location
WA
For future reference the belt part #'s (and many other part #'s) are in the yellow parts spread sheet linked in the sticky/pinned thread at top of this forum and probably in Guido's sheet too. (Awesomeness)
Yes sir... the parts 24P TM is also an awesome source part numbers 🧸
 

Reworked LMTV

Well-known member
1,451
1,124
113
Location
TN
Honestly, for a little more effort, pop the AC pulley on for a later build and change that front engine seal. Easy peasy if you are already in there.
 

spankybear

Well-known member
808
805
93
Location
WA
I am having a hard time getting my fat paws and arms in... I took a look and has anyone tried to take the bottom shroud off? Kind of looks easier to take off if you can get it past the drain on the bottom.
 

Ronmar

Well-known member
3,242
6,567
113
Location
Port angeles wa
Andy, yes I could turn the fan without turning the crank. I was worried I would snap off a blade though. Good to know about the design change, I had not seen that.
When you turned the fan by hand did it slip where the rubber spacer is, or did it slip at the clutch? I have put quite a bit of force on mine and it does not slip/rotate...

I think the sandwiched rubber was done as an attempted safety to keep something that jams the fan from completely destroying it by sacrificing the rubber ring...

There are a few who have posted on here about removing the rubber material entirely. There are holes on the fan disc that line up with machined holes on the clutch/hub and the two pieces can be hard bolted together without the rubber with some different/shorter hardware... This needs to be done before the rubber ring fails because as soon as it does, the fan dances around on the aluminum center hub and destroys the holes in the fan disc as they are close to the edge of the center hole.

when this happens you have to replace the whole fan/clutch assembly with the new style, or find an old style assembly to re-use...
 

Ronmar

Well-known member
3,242
6,567
113
Location
Port angeles wa
...or it launches thru the radiator.

:)
After the rubber descintigrated, the fan would have to rattle around in there for quite a while to wallow out the fan center hole big enough for it to get past the lip of that center hub.

I think the ones that go thru the radiator are the ones where the bearings, retainer or center shaft in the freewheeling portion of the clutch assembly fail, releasing the fan and front half of the clutch to propel themselves forward into the rad...
 
Top
AdBlock Detected

We get it, advertisements are annoying!

Sure, ad-blocking software does a great job at blocking ads, but it also blocks useful features of our website like our supporting vendors. Their ads help keep Steel Soldiers going. Please consider disabling your ad blockers for the site. Thanks!

I've Disabled AdBlock
No Thanks