donalloy1
New member
- 673
- 1
- 0
- Location
- Martinez Ca
Had a feeling that was the shortcut. Wish me luck tamecrow! Will report back. Thanks...
Steel Soldiers now has a few new forums, read more about it at: New Munitions Forums!

Just be careful removing the bolts from the small hole. If they fall in, you have to remove the timing cover or oil pan to retrieve them. I put a piece of blue shop towel or masking tape over the socket, then push it over the bolt to hold the socket to the bolt.Had a feeling that was the shortcut. Wish me luck tamecrow! Will report back. Thanks...
Oh MY! Received Loud and Clear. Proceeding with caution.Just be careful removing the bolts from the small hole. If they fall in, you have to remove the timing cover or oil pan to retrieve them. I put a piece of blue shop towel or masking tape over the socket, then push it over the bolt to hold the socket to the bolt.
Thank you all very much for coaching me. Have never been down this trail.donalloy1, I just finished this procedure myself, so here are my observations and suggestions -
I will assume you have disconnected both batteries. If not, DO IT NOW. Lay an old blanket over them to prevent accidental arcing.
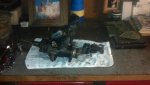
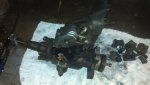
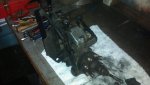
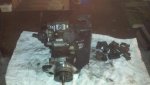
You must be very carefull when removing those 3 bolts behind the oil fill tube. The tube removes easy, just remove the 2 nuts holding it on and it can simply be pulled out of the rubber grommet. Once you get the tube off, you will need a mirror to look directly into the opening, and then get a buddy to turn the engine slowly with a pull handle and socket attached to the crank pulley nut. Rotate the engine while looking into the mirror, until one of the 3 bolts lines up with the opening. Stuff a rag inside the opening along the bottom and sides to prevent the bolt, one removed, from accidiently falling down into the engine. If this happens, you will have to remove the entire front of the engine to get the bolt. I used a properly-sized socket magnet to hold the bolt in the socket while removing it (see photo). When you get the first bolt out through the opening, get your buddy to turn the crank again while you watch the mirror. Rotate the engine until the next bolt comes around and centers up with the opening. Remove it the same way, rotate again, and remove the third bolt. This will free the pump and allow it to be removed from the engine.
Hope this helps.
I don't know what truck you have but since this is the CUCV thread I would assume its a GM 6.2Well here I go Fellow SS's. Hoping this Tread will help others? Reason for Fuel System Overhaul. Want to start running WMO/WVO. Any input is greatly appreciated as always.
Have M1009 w/27 Gal Cell. Have been blending fuel without problems so far. Once fuel system has been totally gone through. Why not take it up a notch? The Power Pack seems to like compressing most combustables. WILL filter filter filter!I don't know what truck you have but since this is the CUCV thread I would assume its a GM 6.2
Your tank is a 20 gallon tank, In my past experience and others I would not run more than 5% WMO in the diesel mix. The 5% is there to lubricate the Ip since the diesel fuel has changed since the mid 80s and has less lubricity. I feel you may be asking for trouble with the WVO as well. In the winter you will have problems when its below freezing.
I am not picking on you, In fact I applaud your enthusiasm. I would leave the WMO to the multi fuel and even that I would Filter, Filter, Filter....!