• Steel Soldiers now has a few new forums, read more about it at: New Munitions Forums!

  • Microsoft MSN, Live, Hotmail, Outlook email users may not be receiving emails. We are working to resolve this issue. Please add support@steelsoldiers.com to your trusted contacts.


goldneagle's M923 plus M109 Camper hybrid mod thread...

4x4e350

Member
292
5
18
Location
Vestaburg, Mi.
No sir, I wasn't aware there are no pre-existing holes on your frame.
My big concern with adding a receiver hitch, was ground clearance and interference with the pintle when it rotates, those are the biggest reasons I wanted it removable. Probably would never be a problem, but I wanted the extra assurance.
Nice work by the way!
 

goldneagle

Well-known member
4,428
858
113
Location
Slidell, LA
I have been reading up on air brakes and how they function so I can fix the air leak in my braking system. I was loosing a lot of air from the secondary air tank when I depressed the brake peddle and then the Primary tank would start to drain as well. We shut off the secondary air tank by closing the valve on top of it. This kept the air from draining from the Primary tank.

When I studied the air braking system I understood how the system was set up. Google rules! I found out that by having the secondary tank cut off I was driving without the front brakes and fan clutch operating. Both of them are fed from the secondary tank. That told me that my air leak problem was in the front brake system. I turned the secondary air tank back on and let the air compressor fill the tanks. I shut off the engine and pressed on the foot brake peddle. i could hear the air escaping up the intake stack. I decided to disconnect the discharge hoses from the front brake chambers and listed for air escaping into the intake stack. No sound of air escaping into the intake stack. Tried to reinstall one hose at a time. Could not tell which was at fault. Had the wife assist. I took the passenger side discharge hose off and used my finger to plug the discharge port. Could not hear air escape at that location. Tried it on the driver's side. Heard air escaping from the brake chamber.

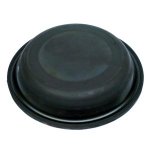
I think the diaphragm is torn on the driver's side brake chamber. Looked it up in the manuals and then Googled the part number. I was able to order 2 diaphragms from NAPA. Will be there in the morning. It should be an easy repair. Just remove the bolt from the band around the cylinder and replace the diaphragm. Will do both sides if the diaphragm is torn as I suspect. $7 each is a cheap fix! Type 12 Air Brake Chamber Diaphragm (part # 234226 / AD17544)
 

Attachments

238
0
16
Location
Las cruces nm
This was the exact problem on my truck when I got it. It is about a 5 minute fix for each wheel. Airbrake diagnostics can be a pain but it looks like you had better luck than me finding the problem. Now I carry an extra diaphragm in the truck at all times just in case one goes out.
 

goldneagle

Well-known member
4,428
858
113
Location
Slidell, LA
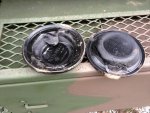
Went to NAPA and picked up 4 diaphragms Type 12 for my trucks. Ended up getting a discount so $4.50 each. Using a 3/8" ratchet with a deep 1/2" socket and a 1/2" closed end wrench I removed the bolt from the bottom of the retaining ring on the brake canister. Once the bolt was removed I popped the canister open and removed the damaged diaphragm. I could see where the rubber cracked and separated from the fabric reinforcement. I installed the new diaphragm and closed the canister. I needed to get a c clamp and a longer bolt in order to re-secure the band around the canister. I also did the same thing to the other brake canister on the passenger side. There I found that they installed the diaphragm inside out and it was torn. Replaced the diaphragm and secured the canister.

When I tested the brake system I heard and saw no more air leaks. Well that was a cheap fix for the air brake system! I'm psyched!
 

Attachments

goldneagle

Well-known member
4,428
858
113
Location
Slidell, LA
I managed to install new LED headlights on my latest truck. Need to finish the hardtop. Sand, seal, prime and paint the hardtop Desert Sand color. Still waiting on news about the trailer hitch and alternator mod.
 

goldneagle

Well-known member
4,428
858
113
Location
Slidell, LA
Will the 250 amp HMMWV alternator fit with out modification?
I have not seen one in person, but they look a lot smaller than the 400 AMP version. So they may fit (may need a different bracket) without major modifications. I saw some on line but a lot more than i paid for the 400 AMP version.
 

goldneagle

Well-known member
4,428
858
113
Location
Slidell, LA
I have been thinking of how to tackle the battery relocation on my truck. I was planning to relocate the batteries to the tool box below the passenger door. I wanted to be able to use 4 batteries not 2. I realized after measuring the batteries in my Crown Vic that i could get 4 of the same batteris inside the tool box. The issue to me is accessibility to the wiring without shorting out.

I realized that if I was able to remove the top of the tool box to access the batteries it would solve my concern. I am also thinking of possibly raising the top of the step a few inches to make more space over the batteries. I want to hinge the top in the back and have overlapping metal on the sides and front. This could be done by making the side and front edges like a thin upside down U shape. The walls top edges would fit inside the U when closed.

This is still in the planning stage -so it may change.
 

350TacoZilla

Member
263
0
16
Location
Hancock MD
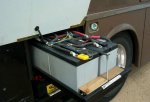
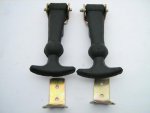
I have been planning to move my 923 batt's into the box under step also, I looked into a rail system like some motorhomes have their batts on. When it is mounted the batts are secured to the drawer bottom and the whole tray is then secured with rubber straps similar to some hood straps when it is pushed back in.

I had one battery + terminal short to a bolt head under pass seat few weeks back and that just reinforced my decision to move batts out of cab, other good part about that is I can then put air seats in both sides and either console in middle or another seat.
 

Attachments

Last edited:

goldneagle

Well-known member
4,428
858
113
Location
Slidell, LA
I have been planning to move my 923 batt's into the box under step also, I looked into a rail system like some motorhomes have their batts on. When it is mounted the batts are secured to the drawer bottom and the whole tray is then secured with rubber straps similar to some hood straps when it is pushed back in.

I had one battery + terminal short to a bolt head under pass seat few weeks back and that just reinforced my decision to move batts out of cab, other good part about that is I can then put air seats in both sides and either console in middle or another seat.
I plan to do the same in my cab. 2 Air ride seats and maybe a Cooler or Small fridge as the center console. Good for snacking on long drives. As far as the battery trays. Very nice, but pricy! Nothing that is RV related is cheap. :beer:
 

Vintage iron

Active member
1,123
14
38
Location
Falmouth Ma.
Spoke to the sales rep. For the company that makes the alternators for our military. He said that one of those 400amp units takes 30hp to run it! He also said the 60 amp units are rated a constant duty, so a 60 amp alternator will at least put out 60 amps!
 

goldneagle

Well-known member
4,428
858
113
Location
Slidell, LA
Spoke to the sales rep. For the company that makes the alternators for our military. He said that one of those 400amp units takes 30hp to run it! He also said the 60 amp units are rated a constant duty, so a 60 amp alternator will at least put out 60 amps!
I've seen the spec's on the 400 AMP alternator. It does not put out 400 AMP at idle. I think it is approximately 200 AMP. It should pull more HP as you increase the electric load. (I have a 50 HP Diesel motor with a 42 KW head on it). 50 HP will not run a 42 KW head at full load. It should be able to handle almost 30 KW and then give up. I do not plan to pull 400 AMP with the loads on that truck. But it is nice to have the capacity if you need it.
 

goldneagle

Well-known member
4,428
858
113
Location
Slidell, LA
Did some searching today and I am leaning towards Type 34 batteries. Although 78DT's would be nice if I could get them for the right price! I am planning on going to the Interstate Warehouse and get some reconditioned or Blemished batteries. They are $45 each which is at less than 1/2 the price of the new ones. I may also pick up 4 Marine Deep Cycle batteries for the camper section. It's a 3 hour round trip to the warehouse -so I don't feel like doing it again a couple of months later!

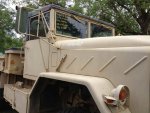
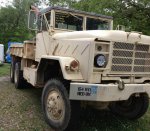
I asked Jeff Davis for advise about how to modify the tool box below the passenger door to give me better access to the batteries. He suggested i should build a cover similar to the M809 series truck. I really like the concept! I will have to iron out the details but it should work great. Here are some current pictures of the truck after stenciling the VIN on the side of the hood for the lifetime tags.
 

Attachments

goldneagle

Well-known member
4,428
858
113
Location
Slidell, LA
Went to Interstate Battery today. Picked up 4 Group 34 batteries for my truck. 10-1/4" L by 6-7/8" W by 7-3/4" H CCA 700 and CA 875. Almost identical output as the 6TL batteries. The tool box dimensions are: 25-1/2" L by 16" W by 13-1/2" H inside. So if you do the math here is what i come up with: 2 batteries end to end is 20-1/2" Long (that leaves 5" free space length wise). 2 batteries side by side is 13-3/4" Wide (that leaves 2-1/4" free space width wise). 7-3/4" H (that leaves 5-3/4" free space height wise)

I still have to decide if I will make the top of the box removable or leave it the way it is.

I am also thinking of running the starter cable, ground wire and the NATO receptacle wires through a junction box in the center of the cab between the driver and passenger seats. I can still put the fridge or cooler on top of it. I will install the kill switch on the side of the j-box. I am thinking of also housing the fuse panels and possible Battery Equalizer in it as well. I am talking 18" by 18" or even 24" by 24" in size. Still in the early planning stage. I already purchased 2 sets of terminal blocks that can handle some large battery cables. One arrived today and one will be here next week.
 
Top
AdBlock Detected

We get it, advertisements are annoying!

Sure, ad-blocking software does a great job at blocking ads, but it also blocks useful features of our website like our supporting vendors. Their ads help keep Steel Soldiers going. Please consider disabling your ad blockers for the site. Thanks!

I've Disabled AdBlock
No Thanks