• Steel Soldiers now has a few new forums, read more about it at: New Munitions Forums!

  • Microsoft MSN, Live, Hotmail, Outlook email users may not be receiving emails. We are working to resolve this issue. Please add support@steelsoldiers.com to your trusted contacts.


Gun Ring M36 / M49

blisters13

Active member
Steel Soldiers Supporter
454
68
28
Location
Beaumont in SoCal
Yep! Thanks for bringing it up!!

I’m considering it, but the additional costs including a pneumatic riveter make it a bit expensive.

If I off-roaded a lot, it would be on there soon.

If I was able to regularly fire an M2 .50 cal., it would already be installed.

Maybe by the end of the year.
 
Last edited:

WillWagner

The Person You Were Warned About As A Child
Super Moderator
Steel Soldiers Supporter
8,385
2,389
113
Location
Monrovia, Ca.
Blisters, you shoulda called me, I know where there are cradles and can mounts.
 

blisters13

Active member
Steel Soldiers Supporter
454
68
28
Location
Beaumont in SoCal
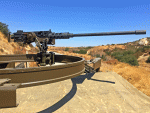
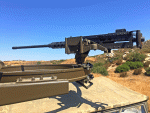
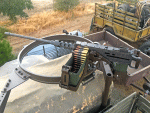
I now needed a replica gun.

Do I want the real thing? Hell yes. IF I could get permission to own a working .50 cal machine gun in
California, they are still about $15,000. Each.

An M60 would have been appropriate for this era vehicle.

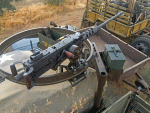
I chose an M2 Browning.

IMG_9612_web.gif
The kit I purchased for less than $900 in June 2020.
NOTE: I am NOT advertising for, promoting, nor reviewing this product. I am only stating the fact that
this is what I purchased after several hours of looking at different replicas available. Do not take this
posting as some kind of persuasion to purchase it!


IMG_9880_web.gif
My 17-year-old called this "Legos for adults".
IMG_9883_web.gif
Note the rivets welded inside.

I found that all edges should be smoothed with a grinder flap disc, for better appearance.

IMG_0259_web.gif

IMG_0263_web.gif

IMG_0420_web.gif
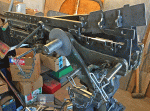
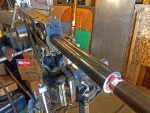
The barrel is removable. I have wrapped the barrel at the front and rear of the support tube with
aluminum can shim, while the support tube is being welded to the frame. This method was used
to keep the tubes centered on each other while the welding was being performed.

IMG_0423_web.gif

IMG_0323_web.gif
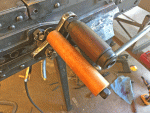
I purchased a set of NOS handles. While the kit handles are functional and look fine from
a distance, I preferred the correct appearance.

IMG_0427_web.gif
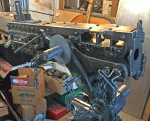
Assembly complete. Approximately 99 steps, approximately 15 hours.

IMG_0428_web.gif
 
Last edited:

blisters13

Active member
Steel Soldiers Supporter
454
68
28
Location
Beaumont in SoCal
IMG_0982_web.gif
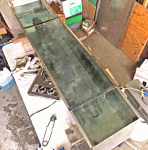
Parkerizing: This took 14 gallons of distilled water and half gallon of solution. It took me 3
hours to get the water from 75 F to 200 F because I used the wrong frickin heating equipment.
A propane or natural gas burner would have been more appropriate. The assembly was bead-
blasted to "white metal" finish before immersion.

IMG_1126_web.gif
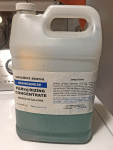
This is the compound solution I used.
NOTE: I am NOT advertising for, promoting, nor reviewing this product. I am only stating the fact that
this is what I purchased after several hours of looking at different products available. Do not take this
posting as some kind of persuasion to purchase it!


IMG_0988_web.gif
The barrel tip still needs the "blaze orange" painted plug.

IMG_0998_web_2.gif

IMG_1006_web.gif


IMG_1007_web.gif

IMG_1108_web.gif

An earlier post shows an adapter I made to hang the ammo box tray onto the yoke.
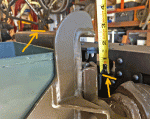
This adapter was off by 2 5/8". I had to modify it to get the tray down to the correct level.
IMG_1131_web.gif

IMG_1132_web.gif
 

Attachments

Last edited:

blisters13

Active member
Steel Soldiers Supporter
454
68
28
Location
Beaumont in SoCal
IMG_1316_web.gif
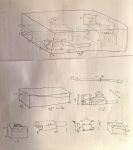
I measured the outside dimensions of the various assemblies, then estimated the size
box I would need.

IMG_0659_web.gif
This is what I ended up with. The reason it's not 48" wide, is because I can make the lid from the
standard 48" width sheet steel without a large remnant. The lid had 3/8" lips on three sides.

IMG_1127_web.gif

IMG_1129_web.gif
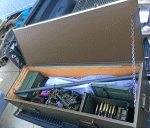
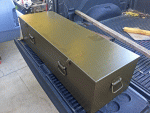
This is a custom steel storage case I made. It could have been an inch lower
in height. But it holds every part including two .50 cal. ammo cans.
Built 11" H x 16" D x 47" W, 14 gg mild steel; 16 gg would have been fine.

I have a vinyl gun cover coming (which technically means the gun is not "displayed" while driving
down the street).
IMG_1098_web.gif
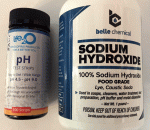
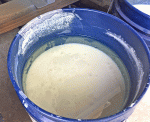
Parkerizing solution disposal: I could have stored almost 15 gallons of solution for who knows
how long (this stuff is supposed to be able to treat several times), but I don't have the space.

Using the products shown above, I neutralized the solution and will dispose of it at the next city
neighborhood chemical disposal day.
NOTE: I am NOT advertising for, promoting, nor reviewing this product. I am only stating the fact that
this is what I purchased after several hours of looking at different products available. Do not take this
posting as some kind of persuasion to purchase it!

IMG_1102_web.gif
Post-neutralizing. The solids settle a bit.
IMG_1096_web.gif
Pre-neutralizing.

IMG_1097_web.gif
Post-neutralizing.
 
Last edited:
blisters13

Active member
Steel Soldiers Supporter
454
68
28
Location
Beaumont in SoCal
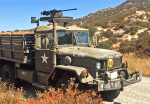
PROJECT COMPLETE

I was really satisfied with how this all turned out (unusual for me).

Thanks for your patience reviewing this. I hope at least some of it was useful!
 
Top
AdBlock Detected

We get it, advertisements are annoying!

Sure, ad-blocking software does a great job at blocking ads, but it also blocks useful features of our website like our supporting vendors. Their ads help keep Steel Soldiers going. Please consider disabling your ad blockers for the site. Thanks!

I've Disabled AdBlock
No Thanks