• Steel Soldiers now has a few new forums, read more about it at: New Munitions Forums!

  • Microsoft MSN, Live, Hotmail, Outlook email users may not be receiving emails. We are working to resolve this issue. Please add support@steelsoldiers.com to your trusted contacts.


High on CARC Paint Question!!!

99nouns

Member
816
17
18
Location
Ocala, FL
I have done some spot treatment on my truck for old CARC paint about 4-6 months ago between March and May of 2015...

20150702_110205.jpg

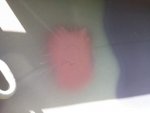
The above picture was done by taking 0 degree pressure washer at the flaking paint,
than using a drill with wire brush wheel to scrape the edges of spots,
than sprayed with Rust Oleum Rust Convertor with tar paint to seal out moisture, but they recommend to paint over with something else and not leave it alone (I said ok)
than sprayed with Rust Oleum rusty metal primer (that's the reddish rust color)

But...

20150702_110225.jpg

The spots that I couldn't/didn't treat with wire brush because either it was in a tight corner, weird angle or I skipped high on CARC :roll: begun creeping rust from underneath.

So I am asking all the experienced wolfs any advice, how can I stop that creeping rust from under that paint with out investing 500k on tumbler size of my house with steel balls... (I dont even know if that exist)

or

Getting high on CARC every 4-6 months... (which I might start to like however probably I should not)

Thank you in advance for responses...
 

Attachments

Ferroequinologist

Resident railroad expert
Steel Soldiers Supporter
4,806
724
113
Location
Liberty Hill, SC
It is pretty much impossible to get a showroom new car paint job on most MVs. They just have too many weird angles, blind brackets, bad welds, etc. Unless you could dunk the body in a vat of paint when it was brand new before the rust in said places has a chance to set in. I have found it is a loosing battle, another reason why a lot of trucks have lots of paknt jobs on them. Private, go paint that truck.

Others might have better ideas on how to combat the issues.
 

jpg

Member
610
13
18
Location
boston
Needle scalers are pretty good at getting awkward spots. Then Naval Jelly will soak into the rust that the needle scaler can't get. Then water to flush out the naval jelly, WD40 to flush out the water, brake cleaner to flush out the WD40, and Rust Reformer to get any remaining corrosion.

If a weld is so lumpy that it provides crevices for rust, I've been known to grind it off and re-weld it myself, just to get rid of the rust.
 

99nouns

Member
816
17
18
Location
Ocala, FL
That's great, with all that chems I will get even higher :jumpin: but thank you for great tips.

I have seen trucks from other people like Boyce and others had trucks with perfect paint, how do they do it?
 

MtnSnow

New member
1,466
14
0
Location
NSL, UT
Sand blasters can also be used with good results for those tight areas.

For most of those places reselling referb'd trucks those pictures are taken right after it comes out of the paint booths....In a year or two depending on where the trucks go and how they are used/stored they will start bleeding rust again as well.
 

99nouns

Member
816
17
18
Location
Ocala, FL
I have no problem with working hard, instead of getting stressed out in front of TV news of crumbling world, I prefer to prepare and work on my truck...
 

m16ty

Moderator
Moderator
Steel Soldiers Supporter
9,576
210
63
Location
Dickson,TN
I know a lot of people just don't have the room but the absolute best way to preserve your truck is to build a shed to park it in. If it can't get wet, it won't rust nearly as bad.
 

99nouns

Member
816
17
18
Location
Ocala, FL
Needle scalers are pretty good at getting awkward spots. Then Naval Jelly will soak into the rust that the needle scaler can't get. Then water to flush out the naval jelly, WD40 to flush out the water, brake cleaner to flush out the WD40, and Rust Reformer to get any remaining corrosion.

If a weld is so lumpy that it provides crevices for rust, I've been known to grind it off and re-weld it myself, just to get rid of the rust.
Hi JPG,

Will you please give details on what are the chem work times, I would like to try your method...

How long is the Naval Jelly soak should be?
Never used Naval Jelly so should it be rinsed long time to be able to successfully flush it out?
How long WD40 should sit for removing water successfully?
I used Brake Cleaner a lot before so I know it has a high VOC, but any tips would be appreciated.

Thank you in advance
 

jpg

Member
610
13
18
Location
boston
In a nutshell, you have to remove whatever is protecting the rust, including paint, grease, and sometimes poor welds. Then you mechanically remove as much rust as you can. Then you chemically remove what's left. Then you protect your rust-free metal.

Naval Jelly eats rust. Soak time depends on how much rust you have, and how "accessible" that rust is to the Naval Jelly. Last time I used it, I had 4 rusty small parts. I soaked them overnight in Naval Jelly, hosed them off for about 30 seconds each until all jelly was gone, doused them immediately with WD40, and tested the bearings. 3 of them spun freely, with no sign of rust. One of them required tools to turn, and the WD40 coming out of the bearing area was clearly rusty. I worked the bearing back and forth, and blasted the gunk and rust out as best I could with the WD40. Then I cleaned it with Brake Cleaner and returned it to the Naval Jelly for another night. The next day, it was as clean as the others.

For big parts, you will coat them with Naval Jelly, rather than soaking small parts. The Naval Jelly is working when it's "wet". Once it dries, it's far less chemically active. So put it on thickly enough to stay wet long enough to eat your rust. If it doesn't get all your rust, hose off the old Jelly, wire brush as best you can, and coat it with Naval Jelly again. I've never needed more than 2 sessions of Naval Jelly, assuming I can mechanically remove most of the rust.

When using WD40 to get rid of the water, you are also inspecting to be sure the rust is all gone. I use things like stainless steel wire brushes to probe into the nooks and crannies to see if any rust remains. If this probing and brushing turns the WD40 rusty, then you need another session with the Naval Jelly. If the WD40 stays clean, you've eliminated the rust.

I had left the bearings coated with WD40. Once they were all clean, I used brake cleaner to remove the WD 40, and as soon as they were completely dry of the brake cleaner, I sprayed them with rust reformer. Once that was dry, I painted them. You want to minimize the time the metal is unprotected, so I leave it covered with WD40 until I'm ready to paint, then I brake clean and paint as soon as the brake cleaner dries.

The Naval Jelly can take days to kill the rust. Once it's done, it's a matter of minutes to hose off the jelly, WD40 to remove the water, brake cleaner to remove the WD40, and Rust Reformer to protect the metal. I let the Rust Reformer dry before painting, maybe half an hour to half a day, depending on the weather.

Naval Jelly is nasty stuff. Please be sure to use eye protection, especially when hosing off the Naval Jelly.

If you want to see before and after pictures of my bearings, you can check out
http://www.steelsoldiers.com/showthread.php?135493-M1010-for-my-daughter-the-field-biologist/page24 #235
http://www.steelsoldiers.com/showthread.php?135493-M1010-for-my-daughter-the-field-biologist/page25 #245

Hi JPG,

Will you please give details on what are the chem work times, I would like to try your method...

How long is the Naval Jelly soak should be?
Never used Naval Jelly so should it be rinsed long time to be able to successfully flush it out?
How long WD40 should sit for removing water successfully?
I used Brake Cleaner a lot before so I know it has a high VOC, but any tips would be appreciated.

Thank you in advance
 

99nouns

Member
816
17
18
Location
Ocala, FL
Sir, thank you very much for your lenghtly explanation, you have changed my life about how I handle rust issues, I never knew any of those, this is a mile stone for me....
 

jpg

Member
610
13
18
Location
boston
Sir, thank you very much for your lenghtly explanation, you have changed my life about how I handle rust issues, I never knew any of those, this is a mile stone for me....
Happy to help. There are lots of books out there that talk about things like how to maintain steel ships that live in salt water. Rust is a cancer that you must eliminate or it will spread. Once you eliminate it, you protect the steel from rusting. Sounds simple, right?

The tough parts with our trucks are the inaccessible body cavities that can conceal rust, and the degree of disassembly required to really get at all the parts to clean and protect them.

If you see a naval helicopter that lives on a ship, it has a team of support personnel including metalsmiths. Their job is to systematically disassemble, clean, coat and reassemble every last screw. They have a schedule they go through, and they take on small sections at a time, so they can minimize down time and still maintain the machine. That's the only way to really prevent corrosion in a high salt environment.

On my truck, one of the rusty areas is all the steel brackets under the dash. It's only mild, surface rust, but it still bothers me. But I'd have to completely tear down the dash and disassemble all the pedal linkages in order to really clean this up. I'm not up to that task yet... So I focus on other maintenance tasks that are within my capabilities.
 

NovacaineFix

Member
662
1
18
Location
San Diego, California
I think what jpg & MtnSnow stated is good, when I redid my M1009, I sanded the outside down to the original CARC and used that as a base before re-painting it. For the inside and hard to reach areas I used a sandblaster and/or a product called http://rustdoctor.com/.

Not trying to give them a plug or hype up the product but I have used it and it works great. The only issue I have with it is when I have to sand it in the middle of a panel, it tends to easily clog up most sandpaper from my experience. The cool thing about it, is that it transforms the rust into black magnetite, which probably explains why it clogs up the sandpaper.

Sandblasters , in my opinion are great, because they get right down to the bare metal, but they are messy and you need access to an air compressor and a shop-like area due to all the sand that comes out. For small areas, you can use a spot blaster, but they are very limited on where and what they can remove due to their size and pressure.
My '67 Mustang had undercoating applied underneath 40+ years ago and the sand blaster took it right off and the inner fenders look brand new.
If you have or suspect that a panel has body filler aka Bondo, then don't use a blaster as it will blast that away like nothing. In that case, it may cause more work then you wanted.

Good Luck!
 
Last edited:

NovacaineFix

Member
662
1
18
Location
San Diego, California
I was trying to find the photos last night of when I used one of my sandblasters to remove some rust and 40+ year old undercoating.
It's not a military vehicle, but rusty just the same.

20150201_115533.jpg20150201_115538.jpg20150201_120147.jpg

As you can see with a sandblaster, as long as you can directly hit the area that is rusty or covered, the aggregate will do the work for you, but leave it there too long and it may burn through the metal, especially if it is rusty and weakened.

Again, Good Luck

Disregard the photo of the camera, I thought I deleted that one.
 

Attachments

Top
AdBlock Detected

We get it, advertisements are annoying!

Sure, ad-blocking software does a great job at blocking ads, but it also blocks useful features of our website like our supporting vendors. Their ads help keep Steel Soldiers going. Please consider disabling your ad blockers for the site. Thanks!

I've Disabled AdBlock
No Thanks