• Steel Soldiers now has a few new forums, read more about it at: New Munitions Forums!

  • Microsoft MSN, Live, Hotmail, Outlook email users may not be receiving emails. We are working to resolve this issue. Please add support@steelsoldiers.com to your trusted contacts.


HIGH SPEED GEAR SWAP With Photos, 1995 A-0

Pointman0853

Member
Steel Soldiers Supporter
319
13
18
Location
Gardnerville, NV
As I suspected...

Thanks to Steve6x6x6 for clearing this up for me. Figure 132 of the TM is ambiguous in regards to the Stub Axle Seal that faces the brake backing plate. Steve confirmed that it is the same as the seal in the end of the axle #1205-D-2344. The newer one ends in an S and I confirmed with Meriton/Finditparts.com that they are the same. 2 are on the way.

Next up I will pack the inner Wheel bearings and install the inner hub seal. Keep moving forward.

Pointman
 
Last edited:

Pointman0853

Member
Steel Soldiers Supporter
319
13
18
Location
Gardnerville, NV
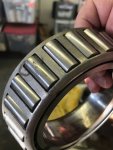
As I am now getting close to installing the spindles and then hubs, I decided to take one last close look at everything before the major load bearing bits go back together. That is when I found this..

Pitted inner bearing.jpg

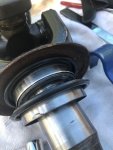
A very close look revealed one of the inner bearing rollers had severe pitting. I then examined the bearing cup in the hub, but found no damage there. I immediately order a new one from Timken. Had this one piece failed under load, the results could have been quite expensive..

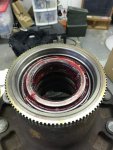
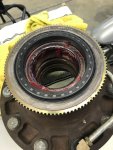
Up next was greasing and inserting the left side bearing and installing the large hub seal.

Inner bearing.jpg

Hub with seal.jpg

The hub inner seal went in with little drama using a dead blow hammer. Now that I have my spindle seals, installing these on the truck will be the next step before we get to the fun part, setting the hub clearance!

Pointman
 

Pointman0853

Member
Steel Soldiers Supporter
319
13
18
Location
Gardnerville, NV
Well... Last evenings attempt at inserting the front half shafts into the axle housing did not go well. It appears that the half shafts are not fully inserted in the axle housing, which makes it impossible to install the spindles in the knuckles.

Left Spindle 2.jpg

At this point I am looking for ideas on how to get the half shafts fully inserted. I will try again this week as I would like to get this back off the jacks this weekend..

Pointman
 

tennmogger

Well-known member
Steel Soldiers Supporter
1,576
527
113
Location
Greenback, TN
Well... Last evenings attempt at inserting the front half shafts into the axle housing did not go well. It appears that the half shafts are not fully inserted in the axle housing, which makes it impossible to install the spindles in the knuckles.

View attachment 739711
At this point I am looking for ideas on how to get the half shafts fully inserted. I will try again this week as I would like to get this back off the jacks this weekend..

Pointman
I had the same issue. I could feel the splines start to engage and the axle stopped turning, but the splines would not slide together. I started 'clocking' the spline engagement one at a time until they slid together easily. Conclusion, all splines are not created equal, have to find an alignment that fits. The splines probably have tight tolerances and are not worn enough to fit in all positions.
 

Pointman0853

Member
Steel Soldiers Supporter
319
13
18
Location
Gardnerville, NV
Thank you to everyone who provided ideas on how to reassemble the front universal joints and spindle. I tried a method sent to me by Steve6x6x6 as he has just put a new axle back together. This involved using guide bolts as noted in the TM, but tapping the edge of the spindle with a 15# hammer as it goes on. I got the left side almost seated on the knuckle, but at that point the axle/u-joint would not turn inside the spindle. I am hoping now that the seals that were installed were not ruined.

It initially felt like the axle was not fully inserted in the main assembly due to the new seals being a tight fit. I had greased everything up before starting to install the spindle, but as the spindle became seated and nearly tight on the knuckle, the axle was not able to turn.

I guess I will keep tapping and tightening and see if this will seat itself into the housing. It does not appear to be a problem with the splines.

Pointman
 

Pointman0853

Member
Steel Soldiers Supporter
319
13
18
Location
Gardnerville, NV
Eureka! Swami magic works!!

Feeling kinda dumb, but relieved the project is now again moving forward.
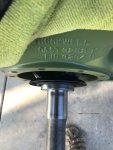
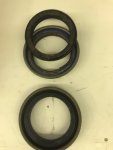
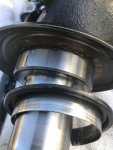
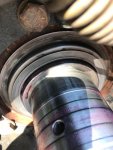
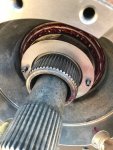
After taking the previous evening off to rest my brain, I found the problem this afternoon. It involves the 'double' seal that is the A-1205-D-2344. I recall reading that this is actually a seal within a seal. So, I pulled one of my axles out and found this.

axle two seals.jpg

When I did the original disassembly, the inner seal pulled out and I had mistakenly thought is was maybe a grease slinger or was meant to be there. I had been trying to install two seals!
After this revelation, I pried the extra seal off and put the inner part of the seal back where it belonged and everything went together easy-peasy.

Here is what the seal looks like apart, and in one piece..

axel seals.jpg

..and a shot of the what the axle looks like without the inner seal on top..

axle bare.jpg

Before I closed up shop this evening, I had one spindle installed with the brake backing plate and all 10 bolts torqued down. Now I feel confident we will be rolling soon as there is a long weekend coming, so we can wrap this post up!

Pointman
 

Pointman0853

Member
Steel Soldiers Supporter
319
13
18
Location
Gardnerville, NV
The Home Stretch.

Although I have enjoyed this project somewhat, its time to get back on the road. This would end up being a fairly productive day and always begins with this..

Nope.jpg

Starting with the spindles having been installed the next steps are hubs and shimming!

Again after a first installation attempt on the left side, I found remnants of a separated old seal.

Spindle seal.jpg

As previously noted, these may come apart when disassembling and can be tough to spot. There is no way you will install anything with double seals present.

Going through all of my cleaned parts I noticed this again.

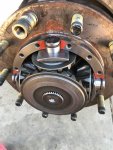
Hub hammered.jpg

These indentations match the pattern on the spider gears, so I'm thinking this side had previously suffered a catastrophic failure during service..

Moving on after pushing the hubs on we get to this..

Hub w shims.jpg

I had borrowed a cut hub cover from member J Messmer, (Thank you again!!) and used it to set the clearance. At first I wasn't sure what '10-20 thousands' felt like, but once buttoned up its fairly obvious that I would need to add shims. Torque anyone? Yes per the TM, initial torque for the big spindle nut is 50 ft/#. You rotate the hub as you apply torque so nothing is bound up. Then back it off 1/4 turn and tighten to 10-15# and you are done.

When installing the inner drive gear you may need to back the big nut off up to one spline so that in aligns with the locating pins on the gear, but no more.

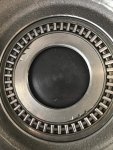
That done, time to get the RTV and seal it up. I also added a touch of wheel bearing grease to keep the thrust bearing and shim in the hub cover as it went on.

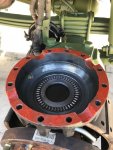
spider mess.jpg

Cover RTV.jpg

Again, you don't need any more that just a light application of the sealant. I just tap a bit on and move it around with a finger to get an even coating with no globs.

Torque for the hub cover bolts? (12 each side). Per the TM, 40-50 ft/#. I also used Loctite red..

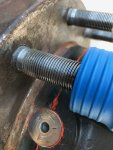
Lastly, got to use the cool stud cleaning tool to freshen up the studs before reinstalling the wheels. (Note the minimal amount of RTV ooze..)

Stuc clean.jpg

Wheels go on this morning, then we'll have first driving impressions.

Pointman
 
Last edited:

Pointman0853

Member
Steel Soldiers Supporter
319
13
18
Location
Gardnerville, NV
Epilog, Monday Sept 3, 2018

Although some trees here in Northwestern Nevada have begun turning, today was hot. After consistent highs of high 80's, low 90's all last month, I filled the front diff, got the wheels on and the beast off the jacks early this morning. By afternoon things had cooled off and it was time for a test drive.

At first I just went for a quick putt around our Neighborhood. The first hint I had of any difference was in how the transmission engaged. Almost no 'jerkiness' when placed into drive or reverse.

The second big notice was in accelerating. Zero shifting drama and no 'bang-in-the-back-of-the-head' when shifting into third or fourth under hard acceleration.

After about 3 miles I stopped and hit the front hubs with a hand held infrared thermometer. Both were around 97-98 deg.

Now for a highway run into town for diesel. Here the biggest difference was seen. Normally the truck would accelerate all the way up to 7th, and howl away trying to get to 54-55 mph. Now this speed was reached in 6th with no howl. The engine seemed to just purr along without the usual noise and the fuel pedal was only 3/4 of the way engaged! Holy smokes...:clinto:

After filling up the primary tank, I headed back home at 55-60. Normally when heading south from town, the fan will engage even at moderate temps as there is a slight incline on south Hwy 395 leaving Gardnerville. This time the temp gauge stayed under 200, with no fan engagement.

After parking, I checked the hub temps again. Both were around 100-107 after the highway run.

In summary, I would do this again in a heartbeat. Best mod. to this truck yet.

Per request, below is a list of seals used and all are available from Find-it-parts/Meritor, and popular online auction sites. I would suggest not scrimping on Chinese made seals and go with Meritor products. Feel free to PM me with specific questions, and thanks again to all who contributed comments to this project, you are greatly appreciated. :beer:

Pointman

Axle replacement seal list for M-1078
Part # Description Quantity per wheel
A-1205-D-2344 Axle Seal 2
2297R6648 Seal, Plain plastic 2
A-1205-Q-2435 CTIS Seal 2
A-1205-R-2254 Hub seal 1
 

Attachments

Last edited:

coachgeo

Well-known member
4,972
3,341
113
Location
North of Cincy OH
Axle replacement seal list for M-1078
Part # Description Quantity per wheel
A-1205-D-2344 Axle Seal 2 1
is this the seal that goes in the axle tube end and on the spindle on each side?

UPDATE: upon reading back thru this thread that seems to be the case. They are spendy at over $50 each. Ordered 4 (two per side) though probably could leave the one at end of the axle tube..... as it was holding back axle lube just fine.
 
Last edited:

Pointman0853

Member
Steel Soldiers Supporter
319
13
18
Location
Gardnerville, NV
Cost?

Cost of the project...

The gears were worth every penny.

Time? Several days, including the stuff I had to do over. It'll go faster next time and I hope there is not a next time...

Parts? I'd guess a couple of hundred in seals and cleaning supplies, RTV, etc.

Pointman
 
Top
AdBlock Detected

We get it, advertisements are annoying!

Sure, ad-blocking software does a great job at blocking ads, but it also blocks useful features of our website like our supporting vendors. Their ads help keep Steel Soldiers going. Please consider disabling your ad blockers for the site. Thanks!

I've Disabled AdBlock
No Thanks