• Steel Soldiers now has a few new forums, read more about it at: New Munitions Forums!

  • Microsoft MSN, Live, Hotmail, Outlook email users may not be receiving emails. We are working to resolve this issue. Please add support@steelsoldiers.com to your trusted contacts.


Home at last: 94 M998A1

114
6
18
Location
NH
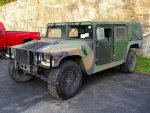
At around 5:00PM this afternoon, my M998A1 was delivered to NH. EUC cleared a couple weeks ago but pickup had proven a bit tricky as the lot in Indianapolis was only available 7AM-8AM on Fridays. I have picked up a lot of parts in the last 3 months while i have waited and I will update the post as I go. I didn't try starting as my driver told me it was dead on pickup. First thing tomorrow I am doing all fluids and then have two Optima red tops going in.
uploadfromtaptalk1442894627055.jpg
 
Last edited:

bikeman

Well-known member
Steel Soldiers Supporter
2,894
501
113
Location
Ft. Bragg, NC
Wow.. one hour is insane for pickup....

One thing, Just remember that it won't even attempt to crank if it's in gear. It acts like it's completely dead. So just make sure it's in Neutral.
 
114
6
18
Location
NH
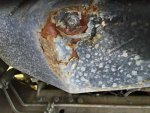
I changed all of the fluids except engine oil. The oil pan is dented and I have the replacement to do in the next day or so.

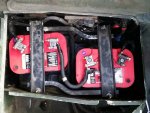
I played with a couple different ways of mounting the batteries, but ultimately this setup seemed to work the best for the time being. I think i will build some adapters on my own for a more secure fit. With the height adapter attached, the redtops are the same height as the 6TLs.

With the batteries installed, it fired right up. A quick ride around the parking lot and smiling ear to ear. I think I'm going to like my new HMMWV.

uploadfromtaptalk1442954886982.jpg
 

fnpurist

New member
187
2
0
Location
BR,LA
Looks good! It's an awesome feeling to finally have it in your hands after anxiously waiting for what seems a year
 
114
6
18
Location
NH
That feeling of relief must have been terrific. Good outcome. Well done, nice looking truck.
Hearing it crank over and fire up immediately was a big relief. I didn't expect any issues, but you never know what can happen in a few months of sitting. Motor sounded great and the truck drove sweet.

Hopefully I will have more time to play tomorrow. The truck is still at my shop and today I was able to get the fluids and batteries done in between stupid work things. The goal is to get the oil pan done. I had a M1009 which I did the same job on so I don't expect too much drama there.
 
114
6
18
Location
NH
The trays are a good thing to have. Also the red rubber terminal covers for safety.
I went with Retiredwarhorses's battery trays for the Optima batteries and just added the terminal covers to my shopping list.

Unfortunately due to a dental emergency with my daughter, my HMMWV time was be minimal today. I did get a few things checked off:

-Checked function on the interior and exterior lights and found all lights were operating properly.
-Removed the engine oil pan and filter
-Removed the tranny oil pan as it was soaked

I also got in a short 3 mile test prior to putting it on he lift. This thing is AWESOME!! I have some actual work to do before I go home, so it's staying on the lift for the night.

20150923_160253.jpg20150923_161639.jpg
 
Last edited:
114
6
18
Location
NH
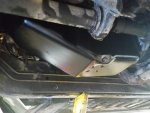
Oil pan is done and tranny pan is resealed. I took the time to change the tranny filter while I had the pan down.

uploadfromtaptalk1443147927580.jpg

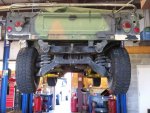
I also got all 4 wheels pulled and took the tires off the rims. Originally I had planned on reusing the run flats, but I didn't really take into account the difficulty of removing them and reinstalling in my new tires. As such I have ordered double beadlock PVC inserts and am stuck on the lift until they arrive.

uploadfromtaptalk1443148269867.jpg

So instead of mounting the tires, I moved onto changing the fluid in the geared hubs. Tomorrow I hope to get the airlift bumper and spare tire carrier done.
 
114
6
18
Location
NH
Now with a lift, start to finish was about 2 hours at a very leisurely pace. The only issue that I had was with the dipstick tube. The dipstick tube was too large to fit into the opening on the new oil pan, so I had to open up the inlet on the oil pan a bit. As far as doing it on my back, I wouldn't be looking forward to that either. That being said it's a very straight forward change and all bolts are easily accessible. I used the front seal from a Fel-Pro gasket kit and used RTV for my gasket.
 
114
6
18
Location
NH
Got the airlift bumper mostly installed. Just need to tighten everything down. The install was an absolute nightmare. While the holes on the brackets matched up nicely with one another, the holes on the frame rails were about 5/32" closer together.

So to make it fit, I had to open up 2 of the holes on all 8 pieces. Got it done and went through 3 titanium 9/16" drill bits in the process.

uploadfromtaptalk1443218319650.jpg
 

Retiredwarhorses

Well-known member
Steel Soldiers Supporter
4,264
3,885
113
Location
Brentwood, Calif
Got the airlift bumper mostly installed. Just need to tighten everything down. The install was an absolute nightmare. While the holes on the brackets matched up nicely with one another, the holes on the frame rails were about 5/32" closer together.

So to make it fit, I had to open up 2 of the holes on all 8 pieces. Got it done and went through 3 titanium 9/16" drill bits in the process.

View attachment 583829

thats an A2 bumper...Does not use this loop shackles except on the ends. That bumper uses the new type drip loop shackles....unless you drill a large releif in the frame box bracket, it won't sit flush.
unles you already have the correct A2 frame box bracket...that's the large outer one, the infers are reversible.
also, did you install the 4 shim plates between the frame brackets?..if not use large washers.
 
114
6
18
Location
NH
thats an A2 bumper...Does not use this loop shackles except on the ends. That bumper uses the new type drip loop shackles....unless you drill a large releif in the frame box bracket, it won't sit flush.
unles you already have the correct A2 frame box bracket...that's the large outer one, the infers are reversible.
also, did you install the 4 shim plates between the frame brackets?..if not use large washers.
I already ran into the issue with the frame box brackets long before install. When I had it all laid out on the floor and assembled in my mind prior to the HMMWV's arrival, I realized the brackets that I had did not have the holes to accommodate the A2 bumper. I looked the needed part #'s up in the TM and got them from Kascar. I believe they are civilian H1 parts as they are a shiny black and not the CARC everything is painted. I did use the 4 shim plates as well. Had to open up 2 of the holes on all of them.

I wanted to give some better eyes a chance to look before I tightened everything down. The shackles do not sit quite flush to the bumper due to the holes for the drip shackles you mention. That being said, I kind of like the way they look now and think I may just grind down the shackle mount some to make them fit.
 
Top
AdBlock Detected

We get it, advertisements are annoying!

Sure, ad-blocking software does a great job at blocking ads, but it also blocks useful features of our website like our supporting vendors. Their ads help keep Steel Soldiers going. Please consider disabling your ad blockers for the site. Thanks!

I've Disabled AdBlock
No Thanks