- 2,113
- 563
- 113
- Location
- Davis County, UT
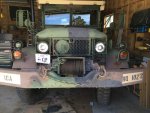
Not a new thing for most, but I'm sure some have not seen, or would like to see, the "lollipop" lights on a deuce. These mount to the same two bolts that the front blinker lights mount to, but face reward instead. Due to some recent trips on crowded highways, and traffic moving much faster than I; I really felt that I would benefit having these, especially for the very reasonable cost (thanks machinist75!). Before, only the brake lights of the deuce would signal to drivers behind me of my low speed on hills, turning direction, and/or lane change intentions.
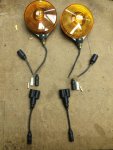
The "lollipop" lights I received came with 2 pre-wired NOS lights (package of one said 4/90) and the metal hoop mounting/protection bracket.
First, I cut the end off the light because the male end was too fat to fit through the mounting hole on the metal hoop guard, and there would have been no way to pull the nut and lock washer off. Also, I wanted a female Packard connector end on it anyway. As a note, I only added more wire and the female connector after I put the light on the mounting bracket. In the bottom of the picture can be seen the 'Y' splitter I made to run the light off the blinker circuit, in parallel with the existing front blinker.
A closer view of the short splitter.
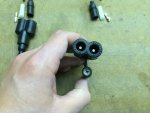
The splitter made this a completely unobtrusive installation that didn't change any factory wiring and can be removed just as easily. Well, the old CARC that came off the mounting bolts is another story.
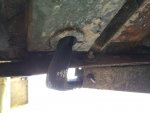
Closeups of it mounted.
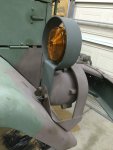
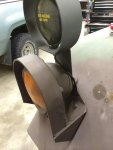
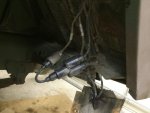
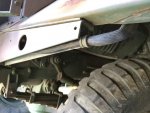
The wire routing path. I did have to add about 9" of more wire to the light, here you can sort of see the heat shrink covering the butt connection (visible near the upper right). Since this is exposed, I technically need some wire sealant to put over the heat shrink seams to be 100% water sealed. Though, it's not bad as is. What I typically do with the heat shrink is put a larger one over the butt connector, and then a smaller one on either side to seal the ends.
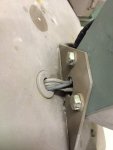
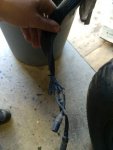
There was some old woven cloth wrap over this part of the front wire harness leading to the side blinker light that was pretty dry rotted. Good thing the wire bundle was wrapped with electrical tape underneath.
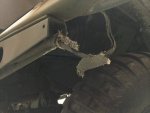
I covered it with some of this plastic woven mesh that is the modern equivalent, and just used a zip-tie at either end. (I didn't remove the old, brittle woven cloth cover, just put the plastic mesh over top).
The "lollipop" lights I received came with 2 pre-wired NOS lights (package of one said 4/90) and the metal hoop mounting/protection bracket.
First, I cut the end off the light because the male end was too fat to fit through the mounting hole on the metal hoop guard, and there would have been no way to pull the nut and lock washer off. Also, I wanted a female Packard connector end on it anyway. As a note, I only added more wire and the female connector after I put the light on the mounting bracket. In the bottom of the picture can be seen the 'Y' splitter I made to run the light off the blinker circuit, in parallel with the existing front blinker.

A closer view of the short splitter.

The splitter made this a completely unobtrusive installation that didn't change any factory wiring and can be removed just as easily. Well, the old CARC that came off the mounting bolts is another story.

Closeups of it mounted.


The wire routing path. I did have to add about 9" of more wire to the light, here you can sort of see the heat shrink covering the butt connection (visible near the upper right). Since this is exposed, I technically need some wire sealant to put over the heat shrink seams to be 100% water sealed. Though, it's not bad as is. What I typically do with the heat shrink is put a larger one over the butt connector, and then a smaller one on either side to seal the ends.

There was some old woven cloth wrap over this part of the front wire harness leading to the side blinker light that was pretty dry rotted. Good thing the wire bundle was wrapped with electrical tape underneath.

I covered it with some of this plastic woven mesh that is the modern equivalent, and just used a zip-tie at either end. (I didn't remove the old, brittle woven cloth cover, just put the plastic mesh over top).


Last edited:


