• Steel Soldiers now has a few new forums, read more about it at: New Munitions Forums!

  • Microsoft MSN, Live, Hotmail, Outlook email users may not be receiving emails. We are working to resolve this issue. Please add support@steelsoldiers.com to your trusted contacts.


Lots of Deuce Work

Clay James

Member
524
4
18
Location
Reno/NV
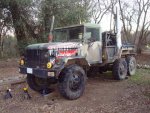
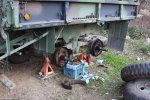
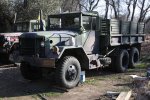
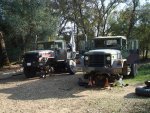
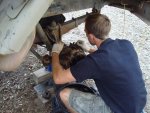
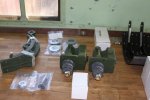
Been working the past few months on this project and took pictures along the way so I thought I'd post some up.

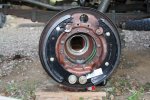
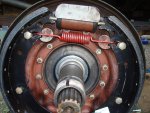
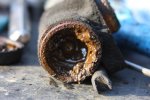
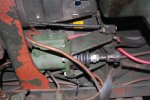
My buddy and I decided it's time to completely overhaul our brake systems. His turned out to be really bad. The soft lines all had cracking and the brake fluid that came out was black and gray. One of the brake pads on the passenger side front wheel wasn't even working.

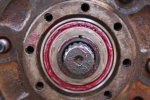
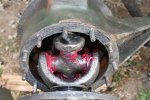
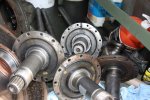
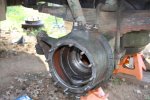
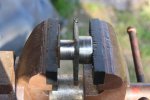
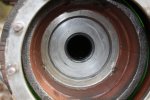
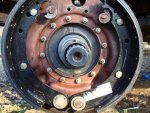
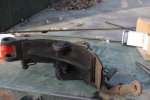
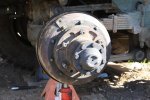
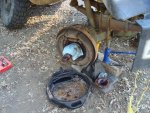
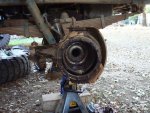
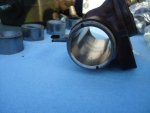
Both of our front axles were leaking too. I had redone mine a few times already but it still leaked so after some research I decided to replace my spindle and kingpin bushings. The spindle bushings had a lot of play and the knuckle had a lot of end play. I didn't know too much about this stuff last time(probably neither did the military mechanics when they had it) so this stuff went unnoticed before. After doing this job 4 times now, I'm very familiar with the Rockwells:D

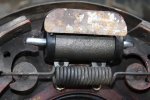
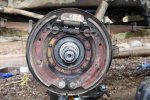
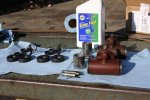
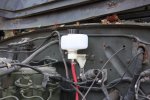
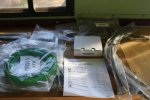
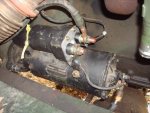
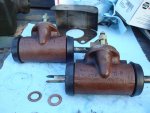
So the total job is, front axle seals on both trucks, new wheel cylinders on his truck and rebuild mine, new master cylinders, new soft hoses and a few hard lines that rusted, new knuckle boots, repack all bearings, remote brake fluid reservoirs, rotate tires on my truck, new starter solenoid on my truck(still clicks just as bad), new front brake pads on my truck, two new races and one new bearing on my front axle, rebuild the air cylinder on my transfer case, new parking brake on my truck. I'm doing all the work now because my buddy got a boat he's been working on. I get paid in M855 though:D I was a little too optimistic thinking a few weeks was all it would take. I started back in October.
 

Attachments

Clay James

Member
524
4
18
Location
Reno/NV
Pile of axles and spindles after getting the new bushings reamed. Improvised a press for the kingpin bushings:D New brake pads. All new nuts and lock washers for the studs on the knuckles. All the wheel cylinders had the plain ended springs which caused them all to leak a little and the master cylinder had an axle breather. Also the brake pad hold down studs on the middle axle left wheel had the washer under the top studs so the brake pads stuck out too far on the top and would fall off the adjuster about half way out. This is another in a long list if incorrectly done things I've found on this truck. These trucks will be SAFE when I'm done with 'em.

On rebuilding the wheel cylinders, I couldn't find the correct springs anywhere except NAPA part #UP45 which also has the correct cups but the dust boots have too small a hole. Erik's rebuild kits have the correct dust boots and cups but not the correct springs. I would up mixing the kits to rebuild the wheel cylinders.

I put wheel bearing grease behind the thrust washers so I didn't have to fill up the knuckles with grease. Seemed like the best option since it will stay put pretty well. Also used it to grease the spindle bushings.
 

Attachments

Last edited:

Clay James

Member
524
4
18
Location
Reno/NV
My buddy's front axle done and mine ready for assembly. That spring was a major PITA to get on. I like these new brake pads because they have a long weld bead at each end. I've seen in another thread how the wheel cylinder can break the weld and bend the top of the pad which causes the brakes to fail.

For the wheel bearings I found it's better to do it by feel. I torque it tight to seat it then back off to where I can feel a little play, then I torque the lock nut down to 120ft lbs and check for play again, if its good I bend the lock tabs. The inner lock nut only winds up being finger tight. The last time I followed the military procedure of torquing it to 55ft lbs and backing off a quarter turn or so and it was too tight, I found one of my wheel bearings had heat discoloration on it after only a few short trips and the hubs got real hot. They should do better this time.

Installed remote brake fluid reservoir and LOVE how easy it is to check and refill the brake fluid now.

Working on the parking brake now. Turned out to be a lot easier to replace than I thought. The hardest part was removing the self locking nut from the 6" of threads on the cable. Broke an E clip while putting it back together and NAPA didn't have any that big, so now I gotta order one.
 

Attachments

Last edited:

Clay James

Member
524
4
18
Location
Reno/NV
FINALLY DONE! Now to finish the other one. My M109A3 needs this too, but that's gonna happen in the summer. I'm about burned out on doing this for a while.
 

Attachments

Last edited:

eagle4g63

Well-known member
1,544
34
48
Location
North/west Indiana
Sweet......So how hard is it to take apart the front axle? I need to get off my lazy butt and replace one of my boots. Figure you are doing it like I want to......the right way!
 

Clay James

Member
524
4
18
Location
Reno/NV
It's not too hard. Took me a few days the first time I did it. Although this time took longer with doing all the bushings and waiting for parts to get here. The hardest and most time consuming part is the clean up if it hasn't been done recently. After you do it a few times you'll be able to do it in an afternoon. I skip taking the tie rod off the knuckles, I just have someone lift the knuckle on the other side and it will slide over the kingpin. This saves some time and the headache of trying to get it off.

I definitely tried to do it the right way this time and went through everything meticulously and made sure I got it right since I don't want to have to do this again. My new philosophy is do it right or don't do it at all.
 
Last edited:

silverstate55

Unemployable
Steel Soldiers Supporter
2,068
855
113
Location
UT
Thanks for sharing the photos; your quality of work is outstanding! You've motivated me to get mine done before it hits the road.
 

Clay James

Member
524
4
18
Location
Reno/NV
Thanks! All the deuces out of GL really should be gone through before they hit the road, especially the brakes. I don't want to drive my M109A3 anymore until I do the same to it because of all the stuff they messed up on my A2. It looks okay from the outside but I still can't be sure.
 

rosco

Active member
Steel Soldiers Supporter
2,102
27
38
Location
Delta Junction, Alaska
You don't have to work on too many of these trucks, before you start seeing all kinds of bugs in them, not to mention, the deferred maintenance.

Were did you find, to be the best source of parts?
 

Clay James

Member
524
4
18
Location
Reno/NV
Updated.

Finished yesterday. Drove it 20 miles today with no problems. I didn't get pics yet but I put in new shocks and it rides WAY better now. I drove it down a really bumpy road near by and it was like night and day compared to the old shocks. They took out the really bad jolting it would do when it hit bumps before and really smoothed the ride out.
 

Splbuy

New member
6
0
0
Location
South Carliona Woods
Great post pics. very helpfull ..Like the fact you were carring your 1911 when turning wrenches ...I always do !!! Ever consider a road trip ? I am working the brakes on my truck now ..Never gonna be done working on it !
 

Clay James

Member
524
4
18
Location
Reno/NV
Great post pics. very helpfull ..Like the fact you were carring your 1911 when turning wrenches ...I always do !!! Ever consider a road trip ? I am working the brakes on my truck now ..Never gonna be done working on it !
I always have it on me unless I'm crawling under the truck. The creek behind me in the picture attracts lots of predators and I have a bunch of animals so its necessary. A mountain lion ate a deer about 20 yards from where I was in the picture too. There's also been skunks that walk by completely casual like I'm not even there to get to the barn and dig out under the foundation.

I'm planning on going to the Tower Park meet next year. I felt like I would never finish mine either but it's such a good feeling now that the brakes are done.
 

Clay James

Member
524
4
18
Location
Reno/NV
What part numbers did you use for the shocks? I have seen some conflicting numbers posted.
I read through those threads and decided to go with the Monroe 66903s. Haven't measured them but they're pretty much the same size as the original shocks, except I think the studs are a little thinner.
 
Top
AdBlock Detected

We get it, advertisements are annoying!

Sure, ad-blocking software does a great job at blocking ads, but it also blocks useful features of our website like our supporting vendors. Their ads help keep Steel Soldiers going. Please consider disabling your ad blockers for the site. Thanks!

I've Disabled AdBlock
No Thanks