• Steel Soldiers now has a few new forums, read more about it at: New Munitions Forums!

  • Microsoft MSN, Live, Hotmail, Outlook email users may not be receiving emails. We are working to resolve this issue. Please add support@steelsoldiers.com to your trusted contacts.


M1007 - CUCV Suburban Clone Build Thread

Barrman

Well-known member
5,163
1,576
113
Location
Giddings, Texas
Another week and another update.

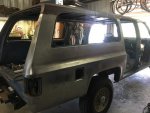
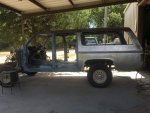
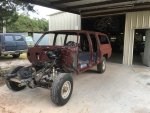
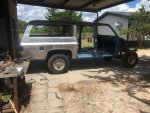
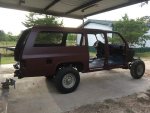
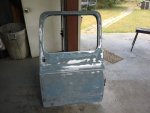
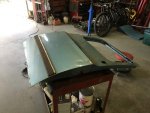
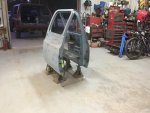
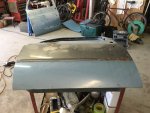
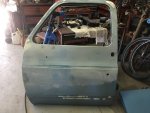
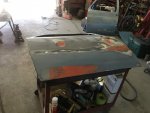
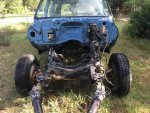
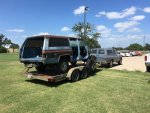
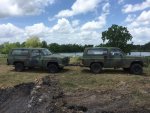
I trailered the Cowdog to the house yesterday behind the Blue Bomber. I got pictures that will get posted later. I spent an hour or so trying to degrease and clean the front frame once home without much success. I think a late night car wash visit with a roll of quarters will be needed.

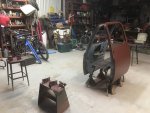
We got the GEP 6500 fired up this morning. It sounds great with really good oil psi. Now we are swapping the IP cover and starter over to 12 volts to everything will be on the same level.

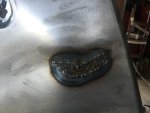
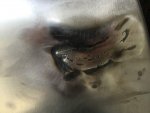
Once it ran for a minute or so we pulled the glow plugs and did a compression test on #3. Last week it would pump up to 100 or so. Today after running it was at 200. It should be good. I will run it some more and test again next week to see if it is still going up.
 

Barrman

Well-known member
5,163
1,576
113
Location
Giddings, Texas
I also have gotten pretty good at moving dead M1009's and suburbans around with a tow bar with this project. A M1009 is the perfect "yard mule". I have a 2x4 I cut to just the right length and can pretty much hook up in one or two attempts now.

With the the legs all the way short and the towed vehicle steering wheel locked or tied straight. Backing up slowly lets me put it exactly where I want to. I normally do this in 4 low because backing is effortless with the gear reduction.

I took this this shot the other day while organizing my fleet. I am not sure which truck doesn't have the standard pattern cameo but one is off.
 

Attachments

cucvrus

Well-known member
11,279
9,624
113
Location
Jonestown Pennsylvania
Cool beans. I have a great 1987 1/2 ton Chevrolet 4 X 4 pick up I am going to be making a transformation out of. I want it to be just as handy as an M1008 without the screaming gears on the highway. i have everything I need but time is always a constraint. I sold the truck twice and received deposits and then they never came back. It keeps getting parts sold out of it and I have surpassed the asking price of the entire truck thus far. I still never removed anything that will be needed to turn it into a running CUCV fake. The guys that were deal breakers really did me a favor and helped pay for it and left me keep it. I can't call it win win. But I am OK with it now. The 700 R went for $550. and the transfer case brought $300. So I still have the entire no A/C plain Jane 1987 Chevrolet truck that is real easy to be a diesel 1/2 ton pick-up. that will easily fetch $3500. when done and running. Like I said. being it is a plain Jane model will make the entire wiring harness and other parts a piece of cake. I can see it stripped out to a bare shell painted and the inside wiring being in a week when I get started in it. I am watching this build you are on will anticipation. Let me know if you need anything.DSCF6628 (1).jpgDSCF6627 (1).jpgDSCF6626 (1).jpgDSCF6625 (1).jpgAnd I was going to throw in a turbo for good measure. DSCF6623.jpg
 
Last edited:

cucvrus

Well-known member
11,279
9,624
113
Location
Jonestown Pennsylvania
I finally have acces to my pictures. Getting it home, making a clean spot, the miles and miles of surface rust on the roof and what an hour with a 36 grit DA pad will do.
Sir just a word of caution. Carefully tow that vehicle with the tow bar and no front bumper. You can and will bend the frame horns if you go any distance. I have a center section of a bumper that I use to add strength to the frame. I know first hand how weak the front frame horns are without a bumper to keep the frame width in check. It cost me a nice frame once. It bent back and forth from Georgia till it cracked both flanges at the front cross member. Lesson learned. I ruined a few that I was scrapping also using the tow bar but that was not an issue. The crusher ate them anyway. I just wanted to help out.
 

Barrman

Well-known member
5,163
1,576
113
Location
Giddings, Texas
I have seen the bent frame horns on Gimpyrobbs M725 10 years ago at an off road park we had a M715 gathering at in Tennessee. If I am going to pull on the road, a bumper will be installed.

I got got almost all of the roof down to bare metal today. I should get it primed tomorrow. Any suggestions on how to paint the roof? The first coat will be ok, but I don't know how to do the follow on coats without leaning on the edges.
 

cucvrus

Well-known member
11,279
9,624
113
Location
Jonestown Pennsylvania
I would put some scaffold up with ladders and paint it from the sides. i would recommend an acid wash primer to stop that rust and the a sanding primer to fill the pits. Then after you sand it use an epoxy sealer after I sanded the primer smooth and go at it from there. What paint are you using? If it is CARC. Skip the sanding primer and use the epoxy sealer and then put the basecoat CARC right on. Just some advise. But the step ladders make nice scaffold. Run some 2 X 10 pine boards and you will be good in that short span. C clamp the boards to the ladder rungs.
 

Barrman

Well-known member
5,163
1,576
113
Location
Giddings, Texas
Gilispie red oxide primer and 383 paint. I have gone direct to bare cleaned up metal with just the paint before and 10 or more years later all is still good. Putting the primer on should make it even better.

I thought about the scaffold idea and even started setting it up today but I didn't like the stability and still couldn't reach the middle of the roof without touching the edges. So I used a pair of stools. Standing in the back hatch I primed the middle not all the way to the back end. Then three different stool placements on each side let me shoot all but the outboard foot or so for the first two coats. Then the third coat on the middle got shot with the first coat for the outsides.

It worked good. Except 32 ounces in a cup is a lot of weight to hold at full arm extension yet not enough to do three coats on a suburban roof. At least I can shoot the outermost coats from the ground when I am shooting the sides once I start sanding them down of course. When I do paint it will probably be with a 18-24 ounce load in the cup and just the middle 2/3's with a planned break for water and mixing paint for the outside and side.

I also found out yesterday my air compressor has issues with the heat. Pretty much one hour straight sanding in 100° heat with the sun shining on the motor had it shut down. I didn't do more than 10 minutes straight today without letting it sit for a few. Easier on the machine and much better on me too.
 

cucvrus

Well-known member
11,279
9,624
113
Location
Jonestown Pennsylvania
Sounds like you need a trip to Harbor Freight for a pressure pot set up. I use Harbor Freight paint guns now. The idea of spending and hour and $20. worth of cleaner sends a chill up my spine. I use the guns and clean them until they don't work. If it's with in 90 days of purchase. I have them warranted. if not I toss the head onto the scrap pile. I keep the cup and use it as a speed loader for full body paints. I have had great results. I have my Devilbliss and Sharp guns all messed up after 30+ years of use and have no desire to get them properly fixed. 15 years ago my one Devilbliss cost me over $150 to have it repaired. That's not going to happen again. I have an aluminum walk ramp scaffold and am surefooted so I know what you mean about a wooden ramp. Good Luck. Keep us posted.
 

Barrman

Well-known member
5,163
1,576
113
Location
Giddings, Texas
I have been sanding and sanding and sanding all weekend. The roof got rust free and primed last Sunday. I couldn't touch the truck until Thursday of this week. I almost got both quarter panels down to bare metal though.

My arms gave out a little bit ago and I will get back to it tomorrow.

I did find some actual rust besides the surface rust. I cleaned it out and stuffed it full of kitty hair. I don't like using any filler of any kind, but this is such a complex curve it might take me a week to make a weld in metal replacement. I have had good results with the fiberglass in the past.

I still haven't figured out how to deal with the "smile" yet. If it was just a cut, I would fill it with weld beads and smooth. But the entire panel is pushed in some too. I will worry about it tomorrow.
 

Attachments

86m1028

Active member
1,687
16
38
Location
Murphy TEXAS
I still haven't figured out how to deal with the "smile" yet. If it was just a cut, I would fill it with weld beads and smooth. But the entire panel is pushed in some too. I will worry about it tomorrow.
Ive got a burb up here, if you want that whole section, your welcome to it.
 

Jozseph

Member
216
0
16
Location
New York
Post in the commet area on you tube;

"The device seen in this video is a cleanLASER CL 1000, the most powerful model manufactured by Clean Lasersysteme GmbH. It's used for cleaning metal surfaces. Not only does it remove rust, it can also strip paint from cars. The price from a distributor is about $450,000.000."


Web Site: http://www.cleanlaser.de/wEnglish/produkte/high-power-cl-1000.php#

1000 W average power

manual-paint-stripping-with-CL1000.jpg

https://www.youtube.com/watch?v=dZ_90920Zbg
 
Last edited:

Barrman

Well-known member
5,163
1,576
113
Location
Giddings, Texas
I took off work today to get this bare metal finished and primed before any surface rust comes back. I was doing good welding a little, doing other things on the truck, welding a little, etc... The pictures show I had it filled pretty good. I went to add just a little more metal and the panel popped. I tried to beat it back, but it didn't want to go without getting worse.

I ground it it down as best I could and did kitty hair to make the best of it.

It it came out ok. But it could have been better.

I did get to prime the entire truck. 60 ounces of primer shot. I could not get the spare tire well shot without making a mess of myself and everything else. Maybe tomorrow.

Now on I get to wet sand and wet sand and wet sand.
 

Attachments

Barrman

Well-known member
5,163
1,576
113
Location
Giddings, Texas
Monday was prep and prime the body day. Tuesday was hinge pins, bushings and strip the four forward doors day. Wednesday was sand middle row doors and prime them. Along with the cargo door hinges.

Today was was going to be front door sand and prime day. Why Chevy put those stupid stick on rubber moldings and stick on pinstripes on I can't figure out. Nobody else made a full size 4 door SUV. Style wasn't what got the things sold from the dealers.

30 years later I hate those stick on rubber moldings and the mess they leave behind. I did develop a system though. Heat gun, plastic wedge, pull, repeat. Then 3M adhesive remover, more heat and the plastic wedge to get most of the residue off.

Working in 100° plus heat makes this not much fun. Today I thought was going to be doing both front doors. Joe had a set of nice, straight and rust free doors. I was going to use all 4 of them. Mainly because the Cowdog had so much sun burned off paint that the originals had surface rust like the body. I am tired of that.

A few hours into the drivers door this morning I kept hitting waves and bondo. Turns out that door had a reason for feeling so heavy besides the window motor still inside. It was mostly filler and beat up pretty bad underneath. Out came the original Cowdog door, surface rust and all. Once I got the rubber moldings off I figures out that door was bondo covered as well. The molding was some previous geniuses way to cover up really shoddy body work.

A few hours later I had it down to mostly metal, had smoothed out what looked like metal tractor tire track and filled in the big dents with some filler. By that time the heat got to me and I stopped for a few hours.

Here are pictures of things to now.
 

Attachments

Recovry4x4

LLM/Member 785
Super Moderator
Steel Soldiers Supporter
34,014
1,814
113
Location
GA Mountains
Sorry Tim. While I really appreciate the level of work going into this machine, the thought of working in 100° weather makes my teeth itch. I'm dreading going back to FL to tidy up details on the house sales. Can't imagine the personal he77 of working in a hundred degree shop.
 

cucvrus

Well-known member
11,279
9,624
113
Location
Jonestown Pennsylvania
Looking good. I feel the heat also. I have been setting lower goals in this latest heat wave. A little Cadillac work and then the CUCV work. I must stay clean to work on the Cadillac. The CUCV that's a different story. Can't seem to stay clean on that job. Good Luck.
 

Barrman

Well-known member
5,163
1,576
113
Location
Giddings, Texas
I actually got to make some things green this morning. Inside of the middle row doors, underside of the cowl cover, inside of the fuel door and the underside of the barn door hinges. Then it was back to making the drivers door somewhat straight.

I didn't want to get the heat issues again today so I came into work for the afternoon to catch up on paper work and such.
 

Attachments

Top
AdBlock Detected

We get it, advertisements are annoying!

Sure, ad-blocking software does a great job at blocking ads, but it also blocks useful features of our website like our supporting vendors. Their ads help keep Steel Soldiers going. Please consider disabling your ad blockers for the site. Thanks!

I've Disabled AdBlock
No Thanks