• Steel Soldiers now has a few new forums, read more about it at: New Munitions Forums!

  • Microsoft MSN, Live, Hotmail, Outlook email users may not be receiving emails. We are working to resolve this issue. Please add support@steelsoldiers.com to your trusted contacts.

M1009 restoration day 1..lights working, floorbeds need help, and lots of sand....

linx310

New member
478
0
0
Location
texas
Well I worked on my M1009 for over 8 hours today in the hot Texas sun.

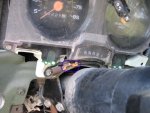
Got my lights working, some one installed a melted looking fuse.

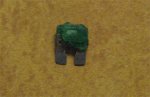
I am starting to suspect someone melted it with a lighter and then inserted it on purpose, and put my glow plug controller card in backwards to give the appearance that the truck was not operable. I replaced the fuse and everything works just fine.

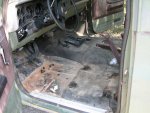
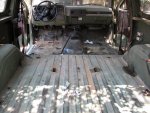
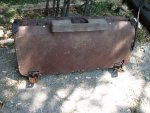
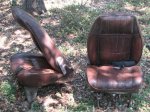
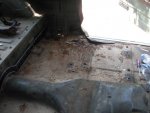
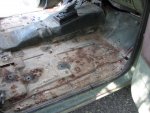
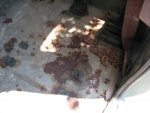
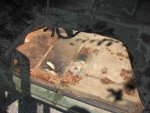
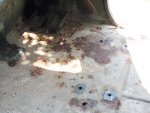
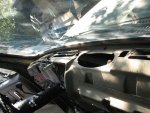
Pulled the seats and radio rack out. Then I yanked that nasty plastic mat out and found a ton of sand, a grenade launching blank, air soft pellets, pieces of paper with numbers on it, and some officer’s rank insignia.

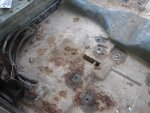
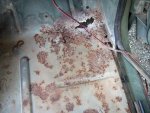
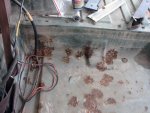
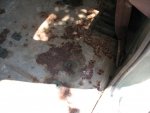
Vacuumed up the sand and got a good look at the condition of the floor boards. The front passenger side floorboard will need to be replaced. Several spots behind the passenger seat will need to be patched up and the passenger side running board will need to be replaced because it is rusted through in one spot.

part 2 below
 

Attachments

Last edited:

linx310

New member
478
0
0
Location
texas
The driver side has an area along the running boards that it is rusted through. Behind the driver seat area are a few spots rusted through but they can be cut out and patched up also.

Areas where the rust is not completely through will be wire wheeled, bonded, and then covered with a rust converter.

I took apart the console and dash also.

I found out why my gear indicator wasn’t working. The little orange piece has broken off.

Anyone have an extra one of these orange things from a parts truck I can have?

I have seen mixed reviews of the floor pans from LMC. Are there other places that make accurate floor pans?

What type of steel should I buy (gage) to replace the areas I cut out and then patch it up?
 

Attachments

coyotegray

Member
492
10
18
Location
Oklahoma City
If your 1009 ever belonged to a SeaBee CBHU during Desert Storm I may be responsible for the rust..

When we packed up and left Bahrain in 91' the guy inspecting our equipment for sand and other contaminants was really picky and made us clean everything twice.

Me and another guy hooked up a fire hose to a fire truck and ran it on low pressure to flood the interiors to wash out all the sand. We had 1009's, 1008's, M1010's, HMMWV's backhoes, a shiny green Fire Truck, and other equipment. I had to shove that hose up under the dash to flush out all the sand.

Everything got wet and was probably shipped and stored that way for an extended period of time..

Andy..
 
Last edited:

linx310

New member
478
0
0
Location
texas
I also had a broken orange shift indicator on my M1009. Picked one up at LMC and it went in real easy.
Do you know what page of there catalog it was on? All I see is the entire assembly, but all I need is the orange part.

Also does any one know what gage of sheet metal I should use to patch the floor? 14 or 16?
 

ABN173

Active member
1,842
11
38
Location
FT Bragg, NC
I found out why my gear indicator wasn’t working. The little orange piece has broken off.

Anyone have an extra one of these orange things from a parts truck I can have?
:ditto:Mine was broken off too it came that way from GL. I have learned to just "feel" the gears without a problem. I would like to fix it though.
 

NDT

Well-known member
Steel Soldiers Supporter
10,187
5,925
113
Location
Camp Wood/LC, TX
That floor mat did not do the floor boards any good. Most 09's I have seen have the mat removed. I would sandblast the floor and then put patch panels over the holes before I would cut out the entire floor. After you rhino-line and paint everything, the patches are not easy to detect.
 
"I yanked that nasty plastic mat out and found a ton of sand"./QUOTE]

When I did the doghead relay mod there must have been a quater cup of sand fall down from behind the dash.
Just did the mod on another one of my too many (according to my wife)CUCVs today. I used this setup by Davo727 found in this thread here: http://www.steelsoldiers.com/cucv/34085-another-start-relay-option.html

Connect the purple with white stripe wire to the S terminal. The small black ground wire is connected to the case ground of the relay with the bracket attach bolt.

I also crimped in another wire in with the ground that I ran to a ground lug on the inside of the firewall near the base of the steering column.

Do not connect anything to the terminal marked ( I ) on the relay or bad things will happen .

Red Power in to the B terminal, purple power out to M terminal.


Top
AdBlock Detected

We get it, advertisements are annoying!

Sure, ad-blocking software does a great job at blocking ads, but it also blocks useful features of our website like our supporting vendors. Their ads help keep Steel Soldiers going. Please consider disabling your ad blockers for the site. Thanks!

I've Disabled AdBlock
No Thanks