• Steel Soldiers now has a few new forums, read more about it at: New Munitions Forums!

  • Microsoft MSN, Live, Hotmail, Outlook email users may not be receiving emails. We are working to resolve this issue. Please add support@steelsoldiers.com to your trusted contacts.

M109A3 Restoration/Remodel

Ozarker

New member
84
0
0
Location
Springfield, MO
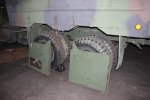
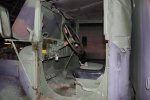
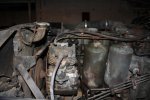
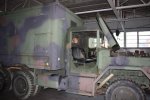
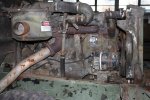
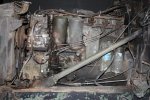
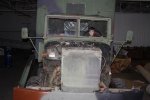
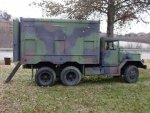
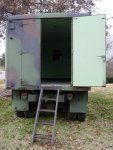
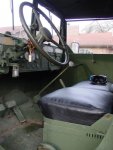
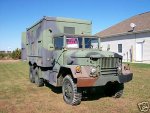
New guy here. I purchased a 1965 Kaiser Jeep M109A3 from another member of this site after losing out on a couple of Deuce auctions. I drove it home about 100 miles without a hitch. Just driving it sure brought back some memories (including muscle memories)!

My plan is to take the exterior back to as close to original condition as I can, keeping in mind that this is the first motor vehicle project I have ever done other than minor engine repairs. I've never done body work, paint, or major system rebuilds. So, I plan to learn a lot.

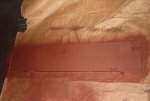
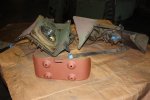
So far, I've removed the doors to start working on them and cleaned some minor parts. Today I removed the Jerry can holder, cleaned it with a wire wheel, sanded it, and applied a coat of Rusty Metal primer. While some may consider it work, for me it is a welcome retreat from my desk jockey office job.

Here are the initial pictures of the truck. I hope to update time to time with photos, and probably with questions! Thanks for having me.
 

Attachments

Last edited:

MWMULES

Well-known member
Steel Soldiers Supporter
In Memorial
5,580
344
83
Location
DESOTO, KANSAS
Nice looking truck. My M109 restore work is on hold till spring as it won't fit in my shop. I think the vinyl is better than the cloth military seat covers. The last 2 pictures don't open, but even small, the inside of the box looks good. Is it a gaser? Good luck on the restore.
 

Ozarker

New member
84
0
0
Location
Springfield, MO
No, it's multifuel. The prior owner cleaned up the back of the box and put down a vinyl floor.

Fortunately, my boss owns a huge building that is only partially leased and has a large overhead door. So, I have a place to keep the truck indoors and work on her over the winter. I did have to squeeze her around a ceiling-hung exhaust fan just inside the overhead door to get it in, though. She sure is big boned!
 

BKubu

Well-known member
Steel Soldiers Supporter
4,727
1,096
113
Location
Gaithersburg, MD
Very nice truck. Good luck with the restoration! I see the truck has the older style box seat. I actually like them better than the air-ride (actually spring-ride) driver's seat.
 
598
0
16
Location
Karlsruhe, Germany
Congratulations, looks great! I was also a newbie to most of the work I did on my truck and without the great support and information on StSo this would have been very difficult.

Will you keep the CARC or go for a contemporary sixties look?

Mark
 

Ozarker

New member
84
0
0
Location
Springfield, MO
Thanks all. I'm going for the sixties look. OD semi-gloss with the white stars and letters. I'm trying to find a picture of a sixties M109A3 paint job. I can't tell whether the stars on the sides should be on the box or the doors of the cab. My read of the manual on military paint job back then seems to indicate the sides and top of the box, but I've never seen any pictures like that.
 

wreckerman893

Possum Connoisseur
15,612
1,984
113
Location
Akenback acres near Gadsden, AL
I have a 109 that I bought to flip but it is beginning to grow on me. Mine has twin antenna mounts on the front. It has a bench installed in the front where radios were mounted. There is also a desk and small bench, padded with a genuine GI wool blanket.
I have taken it to the local flea market to show it to potential customers and it has received rave reviews as a "redneck hunting and camping special".
It may end up in the stable.
 

Ozarker

New member
84
0
0
Location
Springfield, MO
Update on my M109 project. I've removed both of the doors, the front fenders, the side engine access panels, and the headlight assemblies. There were some tough bolts and nuts on that truck! I was unable to get the top hinge pin on the passenger side out, even after much penetrating oil, elbow grease, and mini-sledge blows on a steel punch. So, I settled for removing the hinge bracket from the cab.

There are rust spots in front of each door just above the fenders. On each side, when I was removing the fenders, the bolt closest to the door with the built-in nut (not sure what those are called) was rusted such that the nut just spun in place. I ended up having to wrench those out in place. That will call for some body work later. I'm going to have to learn to weld. Thankfully, I have a buddy who has offered to teach me.

I'm a little sore from the experience, being somewhat unused to beating greasy knuckles against cold steel!

I didn't take any pictures today showing the latest bit of work, but here are some from the other day.
 

Attachments

Ozarker

New member
84
0
0
Location
Springfield, MO
Continued my new exercise regime today. The breaker bar got a lot of work removing the brush guard. You can see some drivers in training in the picture of the cab. I'm thinking a new wiring harness may be in order. Any tips on replacing the wiring harness would be appreciated!
 

Attachments

dependable

Well-known member
1,720
187
63
Location
Tisbury, Massachusetts
I have sugestions , take them or not,; put some penetrating oil, like kano, crc or liquid wrench on everything you plan to take apart, and let it sit & do it again. be organized with parts and fastenings as you dissasemble , put copper based anti siezing compound threaded fasteners as you reassemble. Unless you plan to do a frame off restoration, do it a section at a time and you won't be too swamped. Good luck.
 

Ozarker

New member
84
0
0
Location
Springfield, MO
Good advice, I am trying to stay organized as I would like to be able to reassemble. So far, I'm just replacing the fasteners into their holes with a few twists to keep them where they need to go. Many of them need replaced though. I'll check out the fasteners you suggested, as I'm not familiar with them.
 

littlebob

New member
1,548
26
0
Location
Baton Rouge LA
I have sugestions , take them or not,; put some penetrating oil, like kano, crc or liquid wrench on everything you plan to take apart, and let it sit & do it again. be organized with parts and fastenings as you dissasemble , put copper based anti siezing compound threaded fasteners as you reassemble. Unless you plan to do a frame off restoration, do it a section at a time and you won't be too swamped. Good luck.
:ditto:

I took mine all apart to change the cab and there are a lot of pieces to keep track of! If you don't have to kae the cab off, just do it a couple of pieces at a time. I spent more time searching for the part than actually working on the truck when I first started going back together with it.

Good Luck!
littlebob
 

ohnuts

Member
156
1
16
Location
indianapolis in
Just a note PPG makes a self etching epoxy base primer that is a total oxygen barrier. The paint above it can take a rock but the primed wont come off without a grinder. Great stuff.
 

SCSG-G4

PSVB 3003
Steel Soldiers Supporter
5,315
3,218
113
Location
Lexington, South Carolina
When you start working on the box, check the windows carefully. I had a couple that were starting to come apart. Fixed them by dripping a small hole from the inside to the outside down near the bottom and running a #8 1.5 in long bolt through them, then tightened it up and re-installed the glass. I will be doing it to all the windows this spring and will post pictures as I do them. With the screw head to the outside and a dab of OD paint, they are almost invisible.
 

ralbelt

Active member
1,056
9
38
Location
West Warwick, R.I.
Plastic ziplock bags for loose hardware with an index card in it stating where they were removed from sure beats looking through a coffee can. Slow and steady and organization will make the reassembly much more enjoyable.
 
Top