• Steel Soldiers now has a few new forums, read more about it at: New Munitions Forums!

  • Microsoft MSN, Live, Hotmail, Outlook email users may not be receiving emails. We are working to resolve this issue. Please add support@steelsoldiers.com to your trusted contacts.

M109A3 Shelter Conversion

RECONJON

New member
96
16
0
Location
Putnam CT
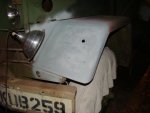
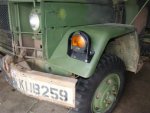
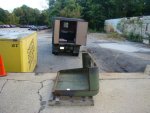
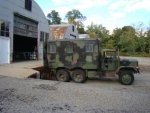
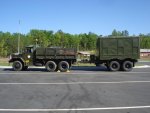
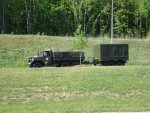
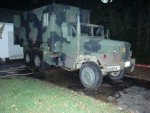
It began at the show in Chester. My now wife (Rosie) saw an M109A3 at the show, and informed me that this is what we "needed". I loved my M35A3 and enjoyed every minute driving and working on it. After searching the country I found a few M109A3's all in pretty good shape. One in Florida and one in Maine were what I had it narrowed down too. Both Trucks were right on budget but the distance was the decider. 311 miles or 1100 miles? We drove to Maine and drove home in it. That was Sept 2nd 2012. The begining.
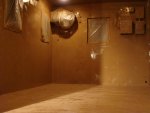
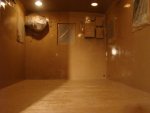
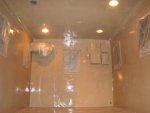
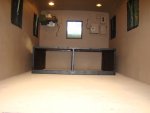
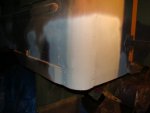
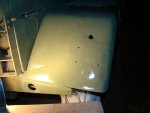
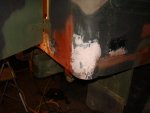
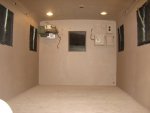
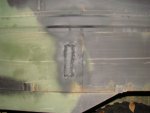
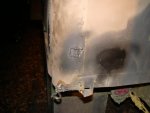
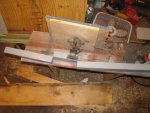
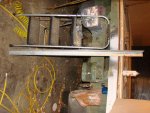
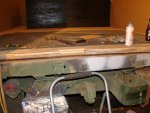
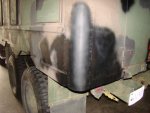
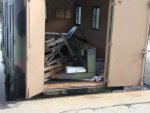
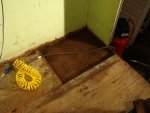
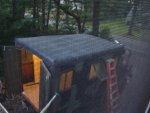
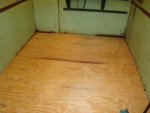
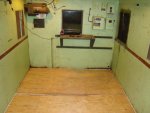
The truck's van compartment was in rough shape, water had gotten in and buckelled the floor during the winter and the water that got in setteled in the corners and most of the metal floor was junk. 1st task was to get roof waterproofed, easy on that one, rubber roofing membrane on top.
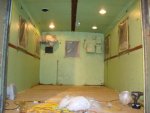
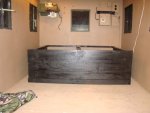
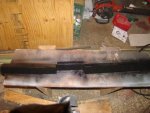
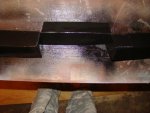
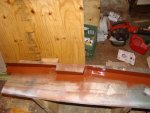
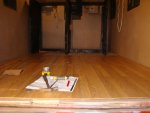
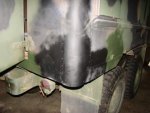
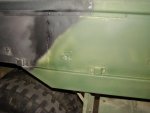
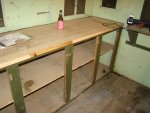
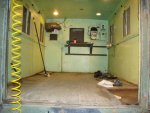
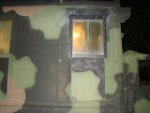
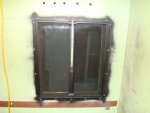
Then old out and new in. Floor was replaced on frame with 16 gauge sheet metal primed and rustproofed, welded and bolted to existing tie down holes. The walls were taken down old fiber insulation removed inner walls recoated for rustproofing, insulation board used to replace old fiberglass. Two windows rebuilt from single pane to completed window. Happy to report, as it wasnt easy to rebuild them but the finished product with fresh wood spacers and new silicone caulking work great
As of right now, I am very early into this conversion, but have a will, a way and a truck. Stay tuned.
 

Attachments

FatBuddhaBoo

Member
330
8
18
Location
Jacksonville, Fl
isn't that an A2?
No, the shop van deuce and a half were classified as M109A3, with the newer ones with the Cat 3316 and Allison tranny an M109A4.


@ RECONJON - Great start on the project. I was going to go a similar route but have decided I'm wanting to crew cab the deuce I get, then go for a box build.

Looking forward to following your build.

Is that a Sam Adams in the coozy? :beer:
 

RECONJON

New member
96
16
0
Location
Putnam CT
Hello All!
Thanks for the great words of encouragement and support. It was a great week, I learned to shoot paint. Wow, was that fun! SO I launched a full assault on the van compartment today. Rosie got in the van and washed the entire box. I then went in and masked the interior. I then gave the surfaces another bath with thinner to prep the surface. This took the most time of all. I got my weapons ready. Behr Ultra Premium (A3 Brown/Tan) $39.00 and a cheapo $24.99 HVLP Sprayer from HF. I got the compressor all set up for paint and mixed up a batch. 10% H2O for thinning. Worked very well, much better than I expected. And we began...and finished. Too much fun to stop, wasnt going to but I even shot the floor.
Last night we had rain so I built the platform that will be the bed and storage area. That will go in next week. I have a lot to say but Ill just show some pics. Last pic anyone know what this is? Two white wires connected to nothing? Any help is appreciated.


Frag Out!

:driver:
 

Attachments

Lextreme

New member
244
0
0
Location
SGV Ca.
Nice...... One recommendation I would suggest is to do all of the wiring first. Like 110V and 12V if you plan to run. It is much easier to run the wires now than later when everything are in place.
 
Last edited:

Scooteerr

Member
313
0
16
Location
Toney, Alabama
In That last pic, is that 2 wires are comming out by your battery box?... The wires look too snail to power anything substantial... Could it be for the battery gage?... Idk
 

SCSG-G4

PSVB 3003
Steel Soldiers Supporter
5,314
3,214
113
Location
Lexington, South Carolina
If you are going to leave the GI ceiling lights, open them up, take out the glass, tape up the socket and spray high temp flat white paint inside everywhere. Make it much brighter. And if you are using filament bulbs, get some rough service 130 volt bulbs. If you use the white paint, 60 watt will produce as much light as the standard 75 watt bulbs they usually come with, and the 75's will produce as much light as 100's would in the bare metal enclosures.2cents
 

RECONJON

New member
96
16
0
Location
Putnam CT
All guages work so I dont think its for that. Ill get some more pictures of where it leads to.

I am going to leave wiring intact. When I redid the inside of the exterior walls I inspected everything, looked very new. I did think about changing over to 12v, but I have a switch on the wall that does that. If I want 24 from truck throw switch and slave jumper sends power to van, if I want the 110 I get power from the plug in, from generator or house power. Not sure I can call it shore power as the hook up is a simple extension cord pigtail, circuit panel in box has 1 20 amp and 3 10 amp breakers. I thought of changing to over, but now I can run all my tools,music, compressor and fans with the shop outlets. Maybe change the 10's to 15 or 20. All this connected to a main with on24/on110 options.

I like the idea of painting the inner fixture.

Thanks for all suggestions. I actually have a drawing, started to make up a cad diagram, but that turned into real time trap.
 
Last edited:

RECONJON

New member
96
16
0
Location
Putnam CT
Yes everything in the box works great. Blower, heater, all lights, black out option. Defaulted when does are opened, the black out comes on, and the interior lights go off. and when you close the door the black out goes off and the lights come back on. I love they way the army thinks, well use to think anyway.
 

RECONJON

New member
96
16
0
Location
Putnam CT
Great week for progress but lousy for weather. Rain 6 of the last 7. We took a ride into Massachusetts this week. This week was fun filled, we welded in a few patches where there was some rust through. I used the jack to Straighten feft fender, took the park lamp assy apart and refinished it. Used the jack to push out a dented rear tail sill, hammered the fender and sill plate, put on some filler and got it ready for paint. I did rust proof and refinish the underside of the fender and it looks pretty good I think. I finaly got around to sealing up the top and roof fixtures, I used a bead of silicone all around the drip chanel where the rubber membrane meets the drip chanel, for the roof lift mounts and other hardware I used the silicone asphault goop, messy but pretty formidable. Bed frame has been painted and put in box, this will have two compartments. one for batteries and power converter for the solar panel. The other is for guns and ammo accessed from under mattress by lifting mattress support. No front access. Oh, here are the pics of this weeks journey into Joy.
 

Attachments

quickfarms

Active member
3,495
24
38
Location
Orange Junction, CA
If you are going to leave the GI ceiling lights, open them up, take out the glass, tape up the socket and spray high temp flat white paint inside everywhere. Make it much brighter. And if you are using filament bulbs, get some rough service 130 volt bulbs. If you use the white paint, 60 watt will produce as much light as the standard 75 watt bulbs they usually come with, and the 75's will produce as much light as 100's would in the bare metal enclosures.2cents
I will have to try the paint.

I would caution against using an incandescent bulb that is larger than the rated wattage. Fixtures are rated for a certain wattage to keep them from getting to hot and potentially causing a fire.
 

RECONJON

New member
96
16
0
Location
Putnam CT
Not a lot today, time was short. My first fabrication. Sill/Kick Plate for door way. More fun!
 

Attachments

RECONJON

New member
96
16
0
Location
Putnam CT
Great week so far. I purchased a hardtop from Tweeter166, very happy with it. Thanks for the asistance on getting it shipped Tweeter!
Also grabbed two of the 2049 24 volt Remote Golights. Plan on one for the front and the otherfor the rear as a back up/spot light. These are very cool, and have great functionality. Those two items are on hold for install, right now focusing on getting the shelter off grid capable. May be looking for some help on that, plan on using a solar/wind recharged battery operation. Two 12v marine/gel batteries for power and the solar/wind for recharge. It works in theory, anyone have real application data? So in preparation for this, floor has been laid, needs minor adjustment and to cap the sill plate near the door. I plan on using existing but covered ports to pass wiring and plumbing trough. All of this hardware is slated to go under the bed in the right compartment which is 38"X56"25"H, hope this is adequate for my purposes. Other compartment will have EMP Proof box the size of compartment to store, comunications (hand held) all electronics, tac lights, guns and ammo.
I plan on having hot water but not a designated shower, most likely be an external use one. I have seen some very impressive shower set ups but I am not willing to afford that space to such a "luxury" item. We will have electric cook top and electric hot water. Propane can be carried but doesnt last forever. So I am not going with it for any uses. We will have communications, entertainment and very little in the lines of luxury items.

Fender and park lamp came out pretty good.

A couple pics for visually stimulated.

:driver:
 

Attachments

Top
AdBlock Detected

We get it, advertisements are annoying!

Sure, ad-blocking software does a great job at blocking ads, but it also blocks useful features of our website like our supporting vendors. Their ads help keep Steel Soldiers going. Please consider disabling your ad blockers for the site. Thanks!

I've Disabled AdBlock
No Thanks