- 1,964
- 435
- 68
- Location
- Culver City, CA
A bit over two and a half years ago I converted the battery box on my M818 to an M915 upgrade battery box. If you missed the thread here it is...
https://www.steelsoldiers.com/showthread.php?148460-M915-Battery-Box-on-M809-series
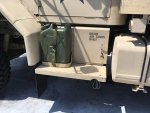
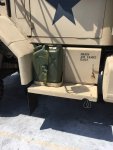
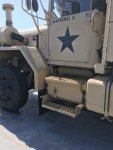
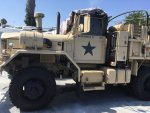
I consider it one the best upgrades I have completed. The upgrade boxes are very well built, convenient to work with and make climbing in and out of the cab much easier. I have been wanting to convert the drivers side under cab tool box over to this style of box. The local supply of the boxes had been depleted by the time I decided to upgrade. All the boxes that I located on-line were going to require a grip of cash for freight. After posting a want ad here on SteelSoldiers, I located a box in Arizona from another member and we worked out a very convenient private party shipping method. I picked up the box a little over a week ago and finished up the install this past Saturday. Here's the before and after...
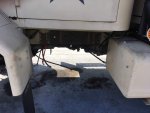
Before...
After...
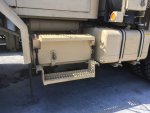
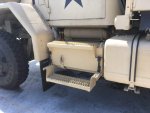
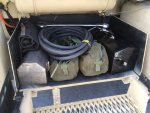
Plenty of storage space...
The installation of this box was similar to the battery box with just a few differences...
1) One of the original driver's side air tanks was swapped to the passenger side and re-plumbed as the secondary (The other [primary] was retained on the driver's side with the same type of mounting)...
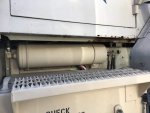
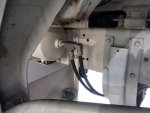
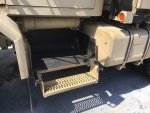
2) Since it will not be used, the NATO salve plug was removed and the hole in the box was blanked over with a scrap piece of aluminum riveted and caulked into place...
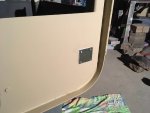
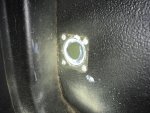
3) The mounting arrangement on the driver's side is a little more tricky due to other items behind the frame rail, master cylinder/brake/clutch pedal lever bracket and transfer case mount.
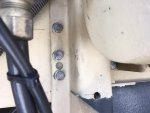
A) The forward mounting holes on the forward box saddle bracket were re-drilled for the three 3/8" bolts that go to the master cylinder/brake/clutch pedal lever bracket. The rear holes are as drilled for 1/2" bolts. Be warned though, space is tight back there.
B) The rear box saddle bracket holes are also as drilled. However, the bottom right hole lines right up with the transfer case bracket so I eliminated using this hole. It's not a problem as the other three are more than enough for support.
NOTE: I made a template with large sheets of graph paper to mark all locations to be drilled on the frame.
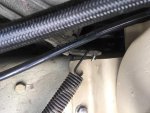
C) The clutch pedal return spring retaining plate needs to be bent up 1/2" - 3/4" to clear the top of the forward saddle bracket.
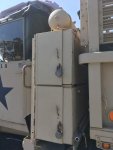
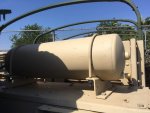
4) Both primary and secondary tanks have a supplementary tank. The secondary supplementary tank fits nicely behind the passenger side fuel tank. There is little space on the driver's side due to the offset position of the drive line, i.e. transfer case and front driveshaft, to mount the supplementary tank inside the frame. So, I mounted the tank on top of the toolbox stack behind the cab...
https://www.steelsoldiers.com/showthread.php?148460-M915-Battery-Box-on-M809-series
I consider it one the best upgrades I have completed. The upgrade boxes are very well built, convenient to work with and make climbing in and out of the cab much easier. I have been wanting to convert the drivers side under cab tool box over to this style of box. The local supply of the boxes had been depleted by the time I decided to upgrade. All the boxes that I located on-line were going to require a grip of cash for freight. After posting a want ad here on SteelSoldiers, I located a box in Arizona from another member and we worked out a very convenient private party shipping method. I picked up the box a little over a week ago and finished up the install this past Saturday. Here's the before and after...
Before...


After...


Plenty of storage space...

The installation of this box was similar to the battery box with just a few differences...
1) One of the original driver's side air tanks was swapped to the passenger side and re-plumbed as the secondary (The other [primary] was retained on the driver's side with the same type of mounting)...


2) Since it will not be used, the NATO salve plug was removed and the hole in the box was blanked over with a scrap piece of aluminum riveted and caulked into place...


3) The mounting arrangement on the driver's side is a little more tricky due to other items behind the frame rail, master cylinder/brake/clutch pedal lever bracket and transfer case mount.
A) The forward mounting holes on the forward box saddle bracket were re-drilled for the three 3/8" bolts that go to the master cylinder/brake/clutch pedal lever bracket. The rear holes are as drilled for 1/2" bolts. Be warned though, space is tight back there.
B) The rear box saddle bracket holes are also as drilled. However, the bottom right hole lines right up with the transfer case bracket so I eliminated using this hole. It's not a problem as the other three are more than enough for support.
NOTE: I made a template with large sheets of graph paper to mark all locations to be drilled on the frame.
C) The clutch pedal return spring retaining plate needs to be bent up 1/2" - 3/4" to clear the top of the forward saddle bracket.


4) Both primary and secondary tanks have a supplementary tank. The secondary supplementary tank fits nicely behind the passenger side fuel tank. There is little space on the driver's side due to the offset position of the drive line, i.e. transfer case and front driveshaft, to mount the supplementary tank inside the frame. So, I mounted the tank on top of the toolbox stack behind the cab...


