• Steel Soldiers now has a few new forums, read more about it at: New Munitions Forums!

  • Microsoft MSN, Live, Hotmail, Outlook email users may not be receiving emails. We are working to resolve this issue. Please add support@steelsoldiers.com to your trusted contacts.


mep-003a teardown and refurb

Jimc

Member
725
1
18
Location
Mullica, nj
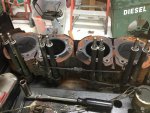
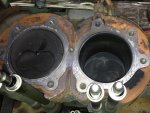
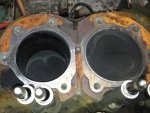
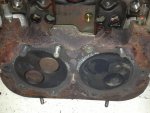
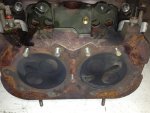
ok, i figured i would start a new thread on this. just to update, i picked up an 003 from someone privately selling. he managed to get the thing running but it didnt run well at all. i got to his place to pick it up, it was about 20 deg out and i saw him standing there with an ether can which made me cringe. he did get it running while i was there. tons of white smoke even after a warm up and after 5 min it shut down by itself. so the point i am at now.... i pulled the fuel tank. the fuel didnt really smell to fresh. i dumped the fuel out and it had some water and about 1/2 of mud in the bottom. i have that all clean up and i acid washed the inside so its nice and clean now. checked the facet pump strainers and surprising those were all clean. i pulled the factory fuel and water filters canisters out of it. those will be replaced with spin ons. the previous owner said he sent the injectors out to a company. they rebuilt 2 of them and clean and checked the other two. i am assuming at this point that the injectors are ok. i am a little nuts when it comes to stuff like this and usually go overboard on everything. i cant just try and get this running and then use it. i have to go through every part and piece on this thing and know everything is good to go so i continued to do a tear down on the fuel system and top end on the engine just to check the cylinder bores. especially since this other guy has done work to it which is sketchy at best and because he had that can of ether in his hand. here are some pics on where i am now.

cyl number 1, from gen end was a little wetter than the others. 2,3,4 were kinda dry. i am assuming thats probably from the ether. the bores are smooth. even some cross hatching still visible. there are some vertical lines in one spot on 2 & 3 but they are smooth. no scratches and i cant feel them with my fingernail. they almost seem more like a polished vertical line. anyone think thats a problem?

003a-djf-cylinders.jpgcyl-1-and-2.jpgcyl-3-and-4.jpgcyl-head-1-and-2.jpgcyl-head-3-and-4.jpg
 

leedawg

Member
270
10
18
Location
Napa / CA
Looks great I respect your OCD.. However part of me wonders if its worth getting this deep into the motor when you can probably source another 400 hz unit for pretty cheap and canabalize the motor from it if needed. Looks good though. Where do you get the head gaskets and new stretch bolts for these motors? Are they pretty easy to come by? I am looking into a mep 002 pray to god I dont have to tear the motor down but if I had to good to have an idea in the back of my head on where to source the parts from. Keep us updated I do love seeing pictures.

Lee
 

Jimc

Member
725
1
18
Location
Mullica, nj
i started digging around for head gaskets and im finding them all over the place. 2 guys have them on ebay and i also found them at atleast 2 or 3 other places including delks. i got mine from onanparts.com because they were only about $8 each. that 1/3 of everywhere else. as for the bolts, i could be wrong but i dont think they are one shot use stretch type. most military stuff isnt set up as like that so you arent SOL if you have to do a tear down in the field. in any case to get the engine to this point its pretty quick and easy. couple hours. i wouldnt want to get into the lower end if i didnt have to but for me to put time and money into getting this thing 100% i simply gotta know first plus i just cant trust the work the guy did before me. i think i forgot to mention he pulled one head and valve cover himself also. there was rtv everywhere. for a piece of machinery that i will rely on in a pinch it has to be reliable.
 

leedawg

Member
270
10
18
Location
Napa / CA
i started digging around for head gaskets and im finding them all over the place. 2 guys have them on ebay and i also found them at atleast 2 or 3 other places including delks. i got mine from onanparts.com because they were only about $8 each. that 1/3 of everywhere else. as for the bolts, i could be wrong but i dont think they are one shot use stretch type. most military stuff isnt set up as like that so you arent SOL if you have to do a tear down in the field. in any case to get the engine to this point its pretty quick and easy. couple hours. i wouldnt want to get into the lower end if i didnt have to but for me to put time and money into getting this thing 100% i simply gotta know first plus i just cant trust the work the guy did before me. i think i forgot to mention he pulled one head and valve cover himself also. there was rtv everywhere. for a piece of machinery that i will rely on in a pinch it has to be reliable.
Ah that makes sense of the hit had already pulled a had probably worth taking s look never know..... thanks for the info in the head gaskets I'll keep that in the back of my mind of I end up being to do this. Looks like a fun project at any rate. Good luck with the rebuild...
 

Jimc

Member
725
1
18
Location
Mullica, nj
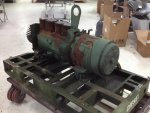
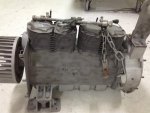
ok guys, so i got a few more hours tonight to work on the gen. i pretty much got her all torn down. had a couple surprises that ill have to take care of but nothing too bad i guess. well here is a pic of her now lol.

IMG_0904.jpg

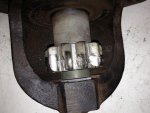
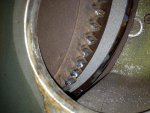
ok so i found three problems....starter is shot. the bushing were so worn out in that thing that the teeth didnt line up with the flywheel anymore and of course that wiped out the flywheel in a couple spots.

IMG_0892.jpgIMG_0891.jpg

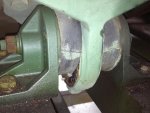
jerry has been kind enough to help me out with some parts. hopefully he has a starter and flywheel. i also noticed the mount under the generator end are wiped out. they are sagging. i'll need to track down a set of these too.

IMG_0906.jpg

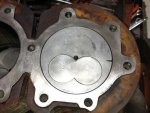
once i got everything torn down i started cleaning things up a bit. gave it an initial degreasing. cleaned the carbon from the pistons and the gasket mating surface.

IMG_0902.jpgIMG_0911.jpgIMG_0913.jpgIMG_0912.jpg

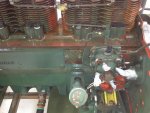
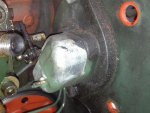
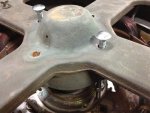
one question for you guys on the pic below. this is supposed to be some kind of start control switch. what does this thing do?

IMG_0907.jpg

so basically i got this thing down pretty far. so far its just been disassemble of components. nothing too complicated. after reading the new post about the guy with the 002 and the gummy injector pump, should i be pulling the injector pump and doing some kind of cleaning on that or just leave it? i was kind of hesitant to pull it off and take it apart since i dont really know what i will find in there. can it be disassembled without the need for any new parts like gaskets, seals, orings or anything like that. once it comes off are there any adjustments that have to be made once it goes back on? same thing goes with this start control switch, should that come apart? any cleaning or maint needed on that?
 

Jimc

Member
725
1
18
Location
Mullica, nj
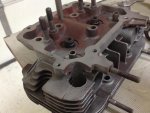
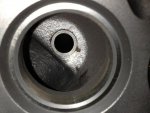
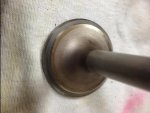
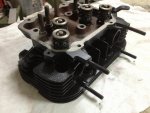
ok so tonight it was time to tackle the heads. the carbon buildup was so thick in the exhaust ports it was terrible. it was atleast 1/8 thick and on such a little port it had to be choking it off pretty good. the injector port wasnt pretty either. so i pulled the valves and injectors. i found out why that #1 cylinder was wetter than the other 3 on the first day of teardown. the guy i bought it from sent the injectors out to be rebuilt and when he reinstalled #1 injector i guess he just decided to leave the gasket out of that one. lol. obviously not enough compression on that cylinder to fire right. anyway i glass beaded the head and all the parts to clean them up. as you can see no the ports look brand new. after glass beading i blew out all the ports and holes in the head with compressed air to clean out the media. lapped all the valves so they are sealing right and reinstalled them.

IMG_0923.jpgIMG_0926.jpgIMG_0928.jpg


once i got the valves all back in i put them in the spray booth and did some satin black ceramic coat. ill put these on the shelf now so they will be ready to intall when the time comes.

IMG_0929.jpg
 
178
16
18
Location
Jackson NJ
Hey how's it going. Good luck with your project. If you need a flywheel I may be able to help you out. I have a dead 003 engine that will be stripped down for anything salvagable. metalworker393
 

Jimc

Member
725
1
18
Location
Mullica, nj
Metalworker, jerry got me covered on the flywheel. Your here in nj so ill keep you in mind for maybe some other spare or needed parts.

jerry i am a custom painter by trade so i do all kinds of graphics, airbrushing and stuff like that on motorcycles and cars but i also do classic car restorations and hotrods so its kinda in my nature when i do something to restore every single nut bolt and washer. I very rarely get to do something for myself so i am enjoying the whole thing. I could have bought a brand new gen with a perkins or kubota or something like that but there is an element of coolness to these things.
 

Jimc

Member
725
1
18
Location
Mullica, nj
ok so i figure i would give you guys an update. i pulled the engine and gen off the skid. i separated the two of them so i could replace the flywheel. jerry was kind enough to help me out with one of those and a good starter. i got my puller out and a small handheld torch. heated up the old flywheel while there was some puller pressure on it and it came right off no problem.

IMG_0933.jpgIMG_0932.jpg

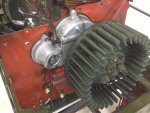
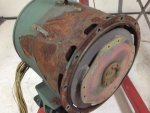
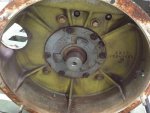
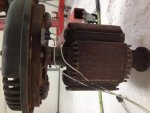
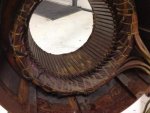
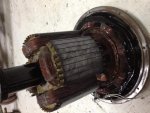
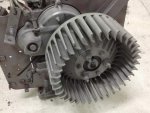
while apart i decided to take a close look at the gen. i pulled the flex plate off and the fan. the windings all look good. nothing burnt or anything like that so that a good sign but man this this is rusty. the water just lays in the bottom of these things and tears up the outer casing.

IMG_0937.jpgIMG_0934.jpg

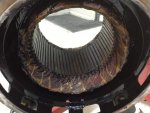
i wasnt about to blast it since the abrasive would wipe out the epoxy and could damage the windings. unfortunately i had to clean it up the best i could with a small 2" grinder with a 3m nylon bristle disc on it. it does a good job without damaging anything. when i was done i coated the inside with some por15.

IMG_0943.jpgIMG_0940.jpg

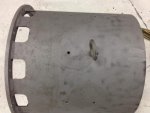
since i had it this far apart i really wanted to get the bearing end of the gen off. you can see in the pics its still attached. that bearing was tight in there and i couldnt get it off. for those of you that ever need to do this i have a little trick i used and it came off with ease. you will need 2 - 1/4" bolts atleast 3 1/2" long and a couple nuts for them. only thing i had that long were carriage bolts. when you remove the 4 bolt in the end housing that holds the bearing retainer ring on, the ring will move forward some and give you some room. drop your long bolts through 2 of the holes like i have in the pic below. put the nut on the bolt on the inside as shown. you will need a short 7/16 wrench to hold the nut from spinning. turn the retaining ring 45deg so the bolts dont line up with holes. hold the nut and start tightening the bolts until they press against the ring then do 1 turn each side and go back and forth. you are basically jacking the end housing off that bearing.

IMG_0944.jpg

if there is one thing i hate to do its media blast. what a crappy job. we had some nice weather today so i decided to take advantage of it and go outside to get some of these parts cleaned up.

IMG_0949.jpgIMG_0948.jpgIMG_0947.jpg

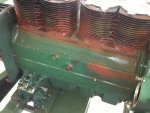
i got everything that i blasted today in the booth and got a couple good coats of epoxy primer on them and 3 good coats of semi flat od green. the cylinders got flat black ceramic coated for the heat. the aluminum frame and skid went to my buddies shop to be powdercoated in the same color
 
Top
AdBlock Detected

We get it, advertisements are annoying!

Sure, ad-blocking software does a great job at blocking ads, but it also blocks useful features of our website like our supporting vendors. Their ads help keep Steel Soldiers going. Please consider disabling your ad blockers for the site. Thanks!

I've Disabled AdBlock
No Thanks