• Steel Soldiers now has a few new forums, read more about it at: New Munitions Forums!

  • Microsoft MSN, Live, Hotmail, Outlook email users may not be receiving emails. We are working to resolve this issue. Please add support@steelsoldiers.com to your trusted contacts.


mep-003a teardown and refurb

Jimc

Member
725
1
18
Location
Mullica, nj
Hahaha i told you i am a bit nuts with this stuff. When i start restoring something, no matter what it is it will really get restored. Especially when is something for myself.
 

simpleserf

New member
17
1
0
Location
Sherman, NY
Lookin' Good!!

I have always liked tearing down the Onan engines. I have done some JB's, JC's, a JA, and more C series than I care to remember (including a Cotton wound CW). To me, they are just plain fun teardowns.

I have always thought it would be cool to setup a Onan generator trailer for some antique equipment shows, but I just don't have the time.

Thanks for all the pics!
 

Jimc

Member
725
1
18
Location
Mullica, nj
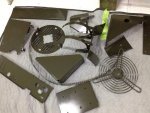
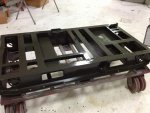
ok so tonights progress.... this afternoon i got back the skid/platform and some of the other parts i decided to have powdercoated instead of paint. they all look real good.

IMG_0955.jpgIMG_0954.jpg

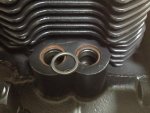
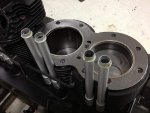
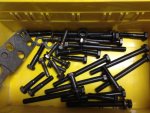
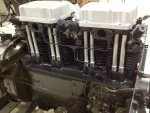
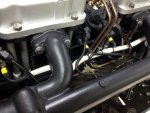
i took the engine and set that back on the skid and mounted it so i could begin putting some parts back together. i started by working on getting the heads bolted down tonight. first step of that was the pushrod tubes. i ceramic coated them and the valve covers the other day in a flat silver. not quite standard issue but i gotta hotrod this thing a little. i will note for any of you guys in the future that have the heads off, you will see in the pic below there is the o-ring seal with 2 washers on top of it to seal the tubes that goes into the block. one washer will come out when you pull the tube the other will prob stay in the block because its rusted in place. be sure to pull that top washer and wire wheel it and clean the rust and stuff from around where it seats. that o-ring is soft and considered a packing. that top washer has to move freely. the spring on the tube pushed on it and squishes the o-ring so it seals around the tube. i cleaned mine up and put a little grease around where it sits. since i had my wire wheel out on the bench grinder i also cleaned up all the head and valve cover bolts. i ran a tap in all the bolt holes as well to be sure everything was clean and i got accurate torque readings when i bolted the heads down.
IMG_0959.jpgIMG_0960.jpgIMG_0956.jpg

ok so heads are bolted and torqued. i have the valves loosely installed. tomorrow i will adjust the valves, bolt down the valve covers and bolt in the injectors. in the pics they are all just sitting in place for now.

IMG_0962.jpg

i also installed the flywheel tonight. had an interesting situation with that. as previously mentioned my original one was toast so i got another from jerry. so all was good. i installed it and put the bolt in. its keyed on a tapered shaft. now i looked through the tm and could not find a torque spec for that center bolt. if someone can find it or knows what it is it would be greatly appreciated. so as i am tightening i hear BING. of course wouldnt you know the $%#@'in flywheel cracks!! the wonderful onan engineers made the keyway slot line up with puller hole making a weak area. it only went from the key slot to the hole but being on a tapered shaft that is just gonna spread the more i tighten. sooo i had to grind that out on both sides and weld it up. i built the weld up heavier in that area so it should be stronger than is was before or atleast equal to. not exactly what i was looking to do tonight though. again if someone can find me that torque spec that would be great!
 

Jimc

Member
725
1
18
Location
Mullica, nj
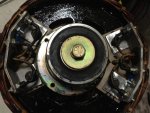
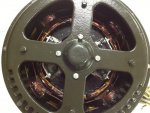
ok quick update. i did a little work on the gen tonight. slowly getting pieces cleaned up and put back together. the other day i got the generator end all buttoned back up and ready to go back on. before i reassembled it and put the rotor back in i went ahead and replaced all the diodes. the ones in it were all goo but everything in this thing was so rusty that i dont want to risk any bad connections not to mention i got it this far apart it would be stupid to put it back together with old diodes just to svae $3 a piece. as you can see i took the heat sinks off and cleaned them up and put new wire ends on the two wires and soldered the others to the new diodes. i clearcoated everything to protect from corrosion when i was done. i put the end plate back on the gen and bolted everything in place. now that the bearing and end plate were all cleaned up it slipped onto the bearing with no trouble at all. i can easily pull the end off now without having to use the jacking screws to press it off the bearing. thats good if i have to service it down the road.
IMG_0969.jpgIMG_0970.jpg

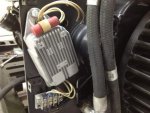
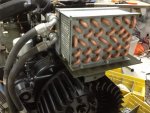
got the voltage regulator mounted as well as the oil cooler. the wire lead broke off the capacitor that gets mounted next to the regulator. i tried to solder a new lead on but whatever the short wire is coming out of it was made out of it would not accept solder. that thing is quite expensive. i have a civ version on the way that i will try out there because the milspec one is stupid expensive.

IMG_0985.jpgIMG_0981.jpg

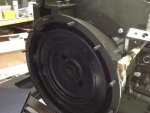
also got the flywheel on this time with no issues. i was sure not to tighten it so much this time. i put a little red loctite on the bolt.

IMG_0984.jpg
 

LuckyDog

Member
393
10
18
Location
Freedom, NH
Jim, You are fixing this up so well I'm afraid you're making a trailer queen. :popcorn:

You gonna start taking her around to rallies to show off? Be one of them thar looksee but donna touchsee displays.:not worthy:
 

Jimc

Member
725
1
18
Location
Mullica, nj
well thanks!! you know i had a friend over the other day who also builds hotrods and restores cars and he told me i was half a$$in it because i didnt polish and clearcoat the copper fuel return lines. Lol. He wasnt kidding either. I am surrounded by nutty people so it just wears off on me i guess.
 

Jimc

Member
725
1
18
Location
Mullica, nj
Just thought i would post, i was on a hunt for a new over temp switch part # 309-0277. I did a search online and found it at a few places but no one had it in stock or it was backordered. I looked it up on sears parts direct. I typed in the pt number there and it came up but all the description was "switch". Not even a manufacturer. I placed the order anyway hoping that the right thing would show up and it did. If anyone is looking for this part then you can order it from sears and you will get the right part even though the description is terrible.
 
Last edited:

Jimc

Member
725
1
18
Location
Mullica, nj
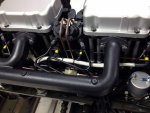
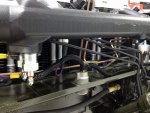
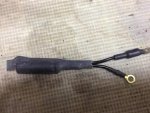
past few days i have just been blasting and painting the last of all the parts. everything is done and all ready for reassembly now. tonight i decided to get my fuel lines back on and the wiring done on that side of the engine. my wire in the harness for the glow plugs was a bit crispy. had a few burn spots in it that i wasnt too happy with. i unsoldered the wire from the pin in the canon connector. i made a new glow plug harness with this cool high temp fiberglass braided sleeving and soldered it into the pin where the old wire was.
IMG_1015.jpgIMG_1018.jpgIMG_1019.jpg

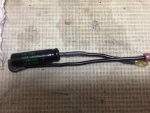
in the other thread i had going on, i had an issue with the capacitor on the dc voltage regulator. the price of the military one was nuts so i got a civ version. i soldered that up and put heat shrink tube around it. once i get this thing running ill let you all know how that works out. i just strapped it to the stator wires.

IMG_1013.jpgIMG_1012.jpgIMG_1014.jpg

i got the mufflers and starter all mounted and in place and the new over temp switch.

IMG_1020.jpg
 
Last edited:

Jimc

Member
725
1
18
Location
Mullica, nj
Harley, yeah that was the right part from sears. It came from an onan dealer in south carolina.

lol luckydog, actually in our line of work our madness serves us well. Problem is it overflows into everything else we do.
 

Jimc

Member
725
1
18
Location
Mullica, nj
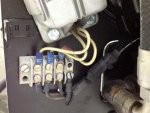
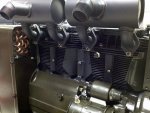
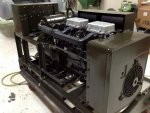
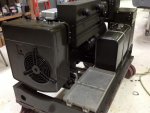
ok guys well this is where i am at with this thing. not too much more to go.

IMG_1039.jpgIMG_1038.jpgIMG_1036.jpgIMG_1035.jpgIMG_1033.jpg

i have been reassembling the control and power box today. the control box was totally taken apart. the power box i unbolted everything that was fastened to the outer case on the back and sides but didnt remove any of the components. the power box would have been quite the job to rip all that out so i just worked around it. i replaced all the screws and nuts with all stainless fasteners. originals were just rusted away. many just snapped removing them. i probably replaced about 85% of the original nuts, bolt and washers with all new. its just easier and better than sitting there cleaning the threads on old rusty hardware.

to finish up i still need to mount and connect the fuel pumps, fuel filters which i converted to spin on. wire harness, make battery cables and last thing will be to permanently mount the sheetmetal. im sure there are few things i am forgetting lol.
 

JOateyNV

Member
59
1
6
Location
Henderson NV
Man, you do nice work. I just got done replacing the motor and painting an MEP-003, but it looks like a kid did it compared to the job your doing. A little lesson I learned is make sure you have a good clean mating surface for all you grounding straps. Or it allows the Gremlins in. Again, Great job.
 
Top
AdBlock Detected

We get it, advertisements are annoying!

Sure, ad-blocking software does a great job at blocking ads, but it also blocks useful features of our website like our supporting vendors. Their ads help keep Steel Soldiers going. Please consider disabling your ad blockers for the site. Thanks!

I've Disabled AdBlock
No Thanks