• Steel Soldiers now has a few new forums, read more about it at: New Munitions Forums!

  • Microsoft MSN, Live, Hotmail, Outlook email users may not be receiving emails. We are working to resolve this issue. Please add support@steelsoldiers.com to your trusted contacts.

Nelson Off-Road Tours Build Thread

acme66

New member
349
8
0
Location
Plains, Montana
Tires, bed and air.

I started off trying to diagnose my random slow blowoff whistle at the air dryer. I did manage to find and fix a leak at a tank regulator but I doubt that was the problem.

100_0014.jpg
After that it was off to think about how to mount the spare I have been reading up on how to mount a 20x14.00 behind the cab of a M923. Looking at ways to squeeze it in and the alternative of moving the bed. I am thinking of moving the bed back 3 inches and remounting the frame attachment points. It would require drilling 10 holes in the frame and that has always been taboo for me. The center point is bolted and the ends are riveted.

100_0013.jpg
There is more at play than just mounting the spare. I am really thinking of mounting a lift gate as a simple solution to how to load my people into the back. That might also require moving the bed and I don't want to move it twice so for the moment the spare can ride in the back. Of course a spare in the back is as good as useless because while I can get it out, there is no way I can get the flat one back up. Speaking of the spare, its a Michelin and it is flat. I put the air to it and went around it with soap.

100_0009.jpg
The rim joint wasn't the issue, it was plain old bead leaks. The front side stopped with air pressure and soap seeping in, the back didn't. First my helper and I marked all the spots it was leaking. This wasn't necessary but he found it fun.

100_0012.jpg
I then drove a tire spoon down and in all the way around about 3 inches apart as demonstrated by my helper. Twice.

100_0010.jpg100_0011.jpg
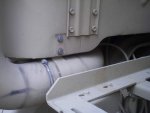
It never came off the bead, I guess that was a good thing but I would have liked to clean it properly. I blew it out real good with air and more soap. The same thing I would have done to a tractor or skidder tire with a bead leak. The fates smiled on our endeavor and she aired up without any bubbles. Took it to 55psi and I will check it in a few days to be sure. As long as I was on a tire kick (and to put off more thinking on the bed) I inspected the rest of them. They are all matching tread Goodyears. The front two are clearly newer than the rears and have had a softer life. I noticed some cupping on the outer edge of both fronts but can't say if it was or was not there when I picked the truck up. I drove it 1000 miles to get it home on mostly dry pavement so I am sure that could have cupped them...now I need to find out why.

100_0019.jpg
I also have a damaged rim but I doubt there is anything really wrong with it.

100_0015.jpg
The rear's are chunking very badly. As long as they wear evenly...who cares?

100_0018.jpg100_0017.jpg
I need to look up how to read the tire codes then find out how old they all are and some of the marks on the spare make me think it sat flat on a truck for a while but for the most part I am satisfied. I think I will look into liquid balancer because when all the heavy spots line up it is like a trotting horse.

-Ken
 

Suprman

Well-known member
Supporting Vendor
6,847
663
113
Location
Stratford/Connecticut
Tire codes are 4 digits ie 0402 would be 4th month 2002 the numbers are usually by themselves not in a string of other numbers on the tire. They may only be on one side of the tire usually hen it me looking for them they are on the inner side
Will
 

Suprman

Well-known member
Supporting Vendor
6,847
663
113
Location
Stratford/Connecticut
There is a small relief pop off safety valve on the bottom of the air dryers of 939s that have abs I think it is 150 or 160 psi you need to look at the air pressure and see if you are building too much pressure or that valve could be bad it is a standard part though I don't know the replacement number
 

silverstate55

Unemployable
Steel Soldiers Supporter
2,068
855
113
Location
UT
Tire codes are 4 digits ie 0402 would be 4th month 2002 the numbers are usually by themselves not in a string of other numbers on the tire. They may only be on one side of the tire usually hen it me looking for them they are on the inner side
Will
Actually the "04" in your example means that the tire was manufactured in the 4th WEEK of 2002...the first 2 digits should read 1 - 52.
 

acme66

New member
349
8
0
Location
Plains, Montana
Spare Tire Woes

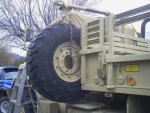
I want the spare back in the rack and was planning on moving the bed back to do it. I had all the mud flaps off when the neighbor stops by to see the truck. Now he is the type of guy who is an *expert* at everything but this time he was right. When I tell him what I am doing he asks why I don't just move the intake stack forward. Um, well, why don't I? So I did. Loosened the first boot clamp at the air cleaner canister, pivoted the whole stack out some and cinched it back down. I stripped the vent line from the stack and flipped the bottom mount over so that it bolts to the inside edge of the cab. I used a 3/4" PVC spacer to get the distance I needed.
IMAG0003 2.jpg

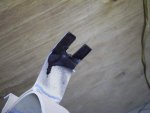
I then took the top mount off and to the vice. I reworked the ears so that it looks like a man going to one knee with his other leg out behind him. I slotted the rear hole and bolted it back to the cab.
IMAG0001 4.jpg

Moving the vent line to the other side of the stack was easy and keeps it hidden better.
IMAG0004 1.jpgIMAG0005.jpg

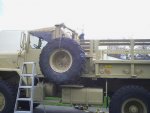
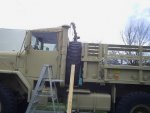
A test lift of the tire illustrated the boom wasn't up to the task really. I added another tube clamp to the back of the hand winch and hooked a strap up and over to brace it better. It picked the tire up but clearly it didn't want to. I must be missing something to keep the pulley at the end of the boom, so I chained it.
IMAG0007.jpgIMAG0008.jpgIMAG0009.jpg

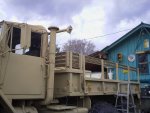
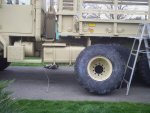
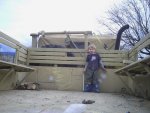
I got it in and it fit fine fully inflated. I will need to find a way to rework the boom and a way to hold the tire in. For the moment I have the lift cable wrapping around the tire and hooked to the rack to hold it in. It will need something better before I drive it however. As always I had help with the project.
IMAG0010 1.jpg

When I put the mud flaps back on I spaced the front set forward 1 1/2" with more PVC so they don't drag on the tires anymore.
IMAG0002 3.jpg

It was a good day.

-Ken

PS: Quick question, your 5 ton has been sitting for a week and you go to start it, 55 degrees outside... how long does it crank before coming to life?
 
Last edited:

acme66

New member
349
8
0
Location
Plains, Montana
Getting shafted.

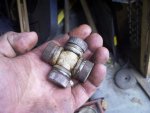
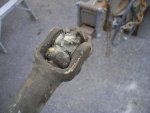
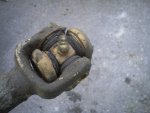
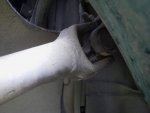
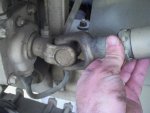
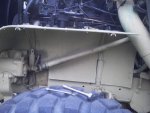
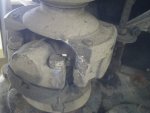
I know I am going to earn aDOT inspection as soon as they see me pulling a 5th wheel camper so doing some maintenance to assure I pass. The truck had a steering shaft rattle because the u-joints were bad. Pulled it apart and pressed the joints out. Given the shape of the yokes they didn't fit in the press well. Thought I was going to crush them before they came apart but got it in the end.
IMAG0006 1.jpgIMAG0005.jpgIMAG0004 1.jpgIMAG0003 2.jpgIMAG0002 3.jpgIMAG0001 4.jpg

NAPA couldn't seem to come up with what I am sure is a very standard little joint so I had to order them online. Shipping and handling was half the total. Buying as little as possible from that place for sure. Since I got shafted on that one, and since it clearly failed from lack of grease I decided to grease everything while I was thinking about it. Got all but the intermediate shaft. That must take a special tool. I used a die grinder and a face mask to chamfer the yokes some. Good thing I did, they hadn't seen grease in a long time.
IMAG0007.jpg


-Ken
 

acme66

New member
349
8
0
Location
Plains, Montana
I got the steering shaft u-joints in last night and that was an unexpected hassle. They are those little joints that you have to take all 4 caps off and insert them into both yokes before pressing them back together. I wish I had tested that before assembling one side... Anyway, they were also some low quality joints, deformed seals and nearly dry caps. I know it was an anomaly because all the others from that company have been good stuff. In the uber low speed enviroment of a steering shaft it will be fine but if I was working on a PTO they would have to be replaced. I also got the backup alarm mounted and one backup light. I have to look up if two are required on a truck, I know they are on school buses. I really, really don't want to put the big reflective stripes on the bed. Might play dumb/pay the ticket on that one.

-Ken
 

acme66

New member
349
8
0
Location
Plains, Montana
Battery Woes

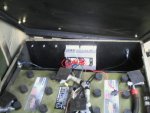
Finished wiring the backup light and alarm. I am using some big relays to build the aux power system. I tapped into the line to the voltage meeter to trigger the two solid state relays. One switches 24v the other 12v. Well it will switch 12v when I get the converter. I salvaged these out of some equipment and they are big, 100amp 480v big but they had two important things going for them... One, I didn't pay anything for them and two I had them handy.
IMAG0001 5.jpg

Besides the holes in the heat sink lined up exactly with the hinge bolt holes, it was meant to be. I know they will not need that sink in this application but since they were already mounted...

Went to start the truck and it would just turn over slowly. Strong smell of sulphur from the batteries. Tested the four, lone low one. I think I have a bad battery. Put a 12v charger on just the bad one and she fired off after a few min. Let them charge then disconnected each one. In a few days I will know for sure which ones are bad.

-Ken
 

Suprman

Well-known member
Supporting Vendor
6,847
663
113
Location
Stratford/Connecticut
100a 480v solid state relay sounds like an AC load relay they are different than the DC load type they both use DC control t switch the load but you will have issues trying to switch pure DC with an AC relay. It will be marked on the relay both control and load ratings.
 

acme66

New member
349
8
0
Location
Plains, Montana
As long as the trigger voltage is good (6 to 28vdc in this case) the other switching side is simply a contact load. In this case they were a DC trigger and an AC contact. It is true that these relays will latch on to DC an not release properly but in this application it is running as a simple on/off link with mechanical breaks up stream at the battery switch and down stream at the reverse switch. It would never work with fast pulsing DC like say ABS but to trigger continuous power when the battery switch is on they will work. It is like hanging a picture frame with a sledge hammer, unnecessary for sure but that picture is still good and hung. Tested up and running fine, I suppose time will tell.

-Ken
 

Csm Davis

Well-known member
4,152
376
83
Location
Hattiesburg, Mississippi
Okay Ken just a few things, the reason the bead didn't break loose is a beadlock in the tire next time let any air out and take the wheel apart to clean the bead, and as to the lifting of the wheel, I like your spunk but a chain fall is what's called for and the roller goes on top so when the tire is lifted enough to clear the holder it can be rolled in or out from position. Do yourself a favor read the -10 it will save your back and some time in the long run. As to loading and unloading people build a loading dock it will be safer if you set it up correctly and you could use it for other things if you want or need to.
 

acme66

New member
349
8
0
Location
Plains, Montana
Been spending a lot of time talking with DOT. Montana has recently accepted Federal DOT rules verbatim for all intrastate trucks. At issue is whether or not they feel I need to meet the same standards as a charter bus. Some things have been easy to hash out like drive line hoops or the lack of a standing line. I have a cab therefore no standing line, hoops are easy to build. Others have been more...interesting. For instance, all buses have exhaust that exits within 15 inches of the rear. It specifically uses the term bus. For trucks it says muffled stacks are fine. They want me to match the bus standards not the truck standards on this issue. I wonder if I should argue because if I bow down to this one will the decide they all should fit, like say bumper height or slathering the side of the truck in reflective tape. The other issues are things like bathrooms if you are hauling more than 14 people. I am going to just point to the trees. My research had lead me to find out that the other similar operations simply do so in violation of DOT rules. God I hope my looking into it didn't just screw all these people who have been dodging inspection all these years. That will not endear me to my fellow operators. It also makes me wonder how often trucks are checked off the beaten path. Not in anyway trying to run unsafe, just wondering if I would have been better off just keeping my mouth shut rather than trying to do it "the right way". I couldn't bring myself to simply inquire about the fines for running without like EVERYBODY else.

Two remaining hurdles with DOT exist: passenger loading (they have yet to decide what standard if any I need to meet but I know I can figure out how to do it) and the brand sparkling new insurance requirements. I have great timing, this even caught my agent off guard. If you are going to haul more than 16 passengers you have to have $5,000,000 in insurance. When I talked with our school bus provider he indicated that statewide the bus services are talking a walkout (or drive out?) and/or lawsuit over this change. I would pay the same in insurance for driving at a jogging pace for three months as our bus provider pays to insure his FLEET of buses year round. So far they haven't budged despite acknowledging that it might be overkill for my operation. The solution is to register the truck as only hauling 12 people or less and pay for a mere $1,500,000 in insurance. Ether way the rates are going to at least double for me.

Just for something to do while people a long way away argue about their how their own rules work I am looking into relocating the exhaust. I used the search but under body doesn't seem to be a popular choice. Lots of room down there so I hope it will not be too complicated. The last few days I have been modifying cargo cover hoops to make them tall enough to walk around under and I traded lumber cut on our mill for all the bus seats I can ever use. I wonder if he will let me salvage the exhaust from under the bus going to scrap... that would be a major savings.

-Ken
 
Last edited:

acme66

New member
349
8
0
Location
Plains, Montana
Primarily it will be on BLM graded roads. You know the type they do maintenance on every few years. It will not be 'off road' in any hardcore sense, just in a touristy way.

-Ken
 

acme66

New member
349
8
0
Location
Plains, Montana
No never. We would not go faster than 10mph with people in the back or ever on any hwy. Like a safari tour but with history instead.

-Ken
 
Top
AdBlock Detected

We get it, advertisements are annoying!

Sure, ad-blocking software does a great job at blocking ads, but it also blocks useful features of our website like our supporting vendors. Their ads help keep Steel Soldiers going. Please consider disabling your ad blockers for the site. Thanks!

I've Disabled AdBlock
No Thanks