1800 Diesel
Member
- 768
- 26
- 18
- Location
- Santa Rosa County, FL
Lee,So first thing I would do is take out the float switch from the day tank. Then flip the start switch to run flip the battle short switch on and then look in there and see if fuel is coming out of the solenoid at the top of the day tank. Slide the top float up and see if it stops if that is working then you are getting fuel to where it needs to be and you just need to bleed the filter canister so you can get fuel to the IP. It is gravity feed after day tank all the way to the IP.
Check it out.
Restarted after fixing oil leak..adjusted RPM/freq to 60...oil pressure not as high as I would expect (under 40 psi)..everything looking/sounding good after about 2 mins run time and then I hear a clattering sound up front--sounding like fan hitting some of the newspaper I had in the "bilge" soaking up the oil. Then I noticed coolant leaking onto the batteries...shut it down right away & was saddened to see some damage to an otherwise perfectly good radiator. Can't tell what happened but obviously a bolt or nut was laying somewhere close enough to the fan to get pulled up and it impacted the lower right (alternator side) of the radiator tubes. Leak is repairable but sure didn't need the aggravation & added cost of a radiator removal & repair...found a 3/8" nut & lock washer down below the oil pan, but can't identify where these came from...I didn't remove any fasteners, only did the filter work. I also checked the fan hub and found four hex bolts in place securing the fan.
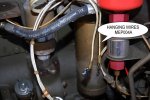
On the bright side, engine sounded very good, voltage & freq stable & alternator charging good...still need to figure out the two wires hanging next to the ether canister...
Last edited: