QUADJEEPER
Member
- 797
- 8
- 18
- Location
- Winter Springs, FL
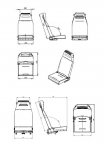
Nice 109. Looks like what I started with. Check my thread on my 109 build. "Survival 109 Build". Might give you some idea's.Here is my project truckView attachment 518407
Steel Soldiers now has a few new forums, read more about it at: New Munitions Forums!


Nice 109. Looks like what I started with. Check my thread on my 109 build. "Survival 109 Build". Might give you some idea's.Here is my project truckView attachment 518407
Do you have any more of these enclosures?? I've got two gauges already. Thanks!Gauge Enclosure:
Here is one of the Steering Column mounted gauge enclosures I made as first posted here: http://www.steelsoldiers.com/showth...Boost-Gauges&p=1278514&viewfull=1#post1278514
I've really found it helpful when I turned up my fuel a tad to offset the extra weight I've added to the truck. It gives a great spot to mount a couple gauges and has a built in 24v-12v converter to run the gauges as well as other 12v items like the weather proof cigarette style socket. It has 3 warning lights on it. I have mine wired so the small super brite LED blinks with the turn signal so I don’t keep forgetting to turn it off (this idea thanks to member BONES1), and the other 2 LED lights are warning lights for low air and Parking brake/dual circuit brake issue warning). I have a weatherproof dual USB power socket installed in the dash as well for charging cell phones or GPS. This one also has a weatherproof key switch that disables the starter button when selected (also BONES1's idea).
On my gauge unit, I'm using VDO brand "vision" series boost & EGT/Pyrometer gauges. I couldnt find any Matching Stewart Warner ones that came in a 0-15psi boost gauge and couldnt ever even find a picture of the Stewart Warner HD pyrometer that would match the gauges I'm using on the dash.
Feel free to PM me if you are interested in an Enclosure setup. I still make some they come with 12v converter, warning lights and labels, mounts, circuit breaker, 2 gauge holes, & 12v cigarette style outlet


PM Sent (none left)Do you have any more of these enclosures?? I've got two gauges already. Thanks!
I don't have any additional pictures that I know of, just the ones here in POST 26 & 27 and POST 128 I'll try to get some more (sometime) as I probably get the most questions on the front bumper stuff. Pm me if you have any specific questions. Thankscan you post some pics of the space between the front bumper and the grille?

")
Sorry to butt in, just wanted to say how informative and awesome this thread is... And of course, your camper build project!
Giving my lots of ideas... That will undoubtedly cost me lots of money in the future

Thanks a ton for the kind words. Its easy to spend a lot of money, or a lot of time. The wheels/tires cost a lot of money regardless how cheap you get them for, but everything else can be had pretty reasonably if you instead put the time into finding the deals on ebay, craigslist, and the various surplus sources. When I did most of this project I had more time than money and my kids were really young so there was several hours a day they were napping and I could work on it...... But now they are old enough that I don't have the extra time for projects of this scale.Sorry to butt in, just wanted to say how informative and awesome this thread is... And of course, your camper build project!
Giving my lots of ideas... That will undoubtedly cost me lots of money in the future
Hey Jerry. Its only been a couple years since I started the m109 conversion but my kids no longer take naps (although they should sometimes), so I get nearly nothing done these days it feels like.When my kids took naps, I got a lot done too, like you. However, a few decades later, I find my naps more in the way of my projects. As an aside, did you do any more mods to the trailer in regards to the 395s and fender/rubbing issues. Or were there any issues at all? Thanx. Jerry
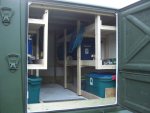
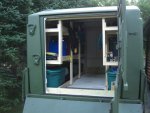
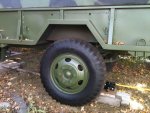

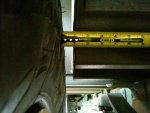

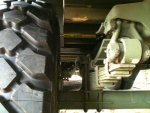

The expression as I remember it is:Below are some of the related pictures again so you don't need to try to find them in some previous posts.
