• Steel Soldiers now has a few new forums, read more about it at: New Munitions Forums!

  • Microsoft MSN, Live, Hotmail, Outlook email users may not be receiving emails. We are working to resolve this issue. Please add support@steelsoldiers.com to your trusted contacts.

re-wiring my MEP-004a for different voltages, including single phase

276
22
18
Location
Hobart, WA
I will check out the fuel flow tomorrow which might be the issue since it took me quite a while to bleed out the system to get fuel to the injection pump.

You mention the governor arm on the outboard side of the injection pump - currently mine has a section of twisted stainless steel safety wire on it but wasn't hooked to anything - it is currently set towards the control panel end of the set...

I don't see anything that it would hook to?

Otherwise what controls the speed of the engine beyond the venier throttle cable?
 

sewerzuk

Member
524
10
18
Location
Seaside, OR
I will check out the fuel flow tomorrow which might be the issue since it took me quite a while to bleed out the system to get fuel to the injection pump.

You mention the governor arm on the outboard side of the injection pump - currently mine has a section of twisted stainless steel safety wire on it but wasn't hooked to anything - it is currently set towards the control panel end of the set...

I don't see anything that it would hook to?

Otherwise what controls the speed of the engine beyond the venier throttle cable?
Nothing controls engine speed, beyond the throttle arm and the governor arm on the injection pump.
I have seen lots of governor linkages that were not safety wired to anything...they seem to still work fine. But, movement of that arm does affect engine speed. I would start your set up, run it to about 1/2 throttle, and them move the governor through its range of motion. If you get no change in engine RPM, you likely have a fuel delivery or injection pump issue.
 
276
22
18
Location
Hobart, WA
Good news and an interesting twist... So I went to test the governor arm and while fiddling around with everything connected to the injection pump I unscrewed the knurled knob that sits parallel to the injector head piece and right next to the fuel inlet (anyone know for sure what this controls?) Started the set and all of a sudden I have full RPM control at the throttle cable now.

For good measure I unwired and cycled the governor arm and somewhere between 2/3 and 1/2 sweep the RPM falls off rapidly - so I reset the arm in the position towards the head piece end of the pump.

I can now get 60 Hz and higher on the panel meter by adjusting the throttle cable (I am around 1/3 to 1/2 stroke when I see 60 hz indicated) - the voltage adjustment seems to work between 120 and 240v

Now for the twist - I pulled out the fluke and measure only 54 hz to 55 hz when the panel is showing 60 hz - I checked both at the convenience outlet and the main lugs with the breaker closed - if I run the RPM up to make fluke read 60 Hz I am indicating more than 63 Hz on the panel... Hmmmm - so where is the varience coming from...

Along these same lines I measured the voltage at both locations and was reading higher than the panel meter was showing as well ~12v to 14v higher depending on the location (outlet vs main lugs)...

Any thoughts?

It seems to me at this point if I were to get the Hertz readings resolved and convert the lathe to 240 3 ph I would be ready to put the unit into service - the only concern I have would be supplying the house in case of an outage off two legs of the main buss - rather than doing the split phase conversion.

Thanks for the help so far

Matt
 

sewerzuk

Member
524
10
18
Location
Seaside, OR
Good news and an interesting twist... So I went to test the governor arm and while fiddling around with everything connected to the injection pump I unscrewed the knurled knob that sits parallel to the injector head piece and right next to the fuel inlet (anyone know for sure what this controls?) Started the set and all of a sudden I have full RPM control at the throttle cable now.

For good measure I unwired and cycled the governor arm and somewhere between 2/3 and 1/2 sweep the RPM falls off rapidly - so I reset the arm in the position towards the head piece end of the pump.

I can now get 60 Hz and higher on the panel meter by adjusting the throttle cable (I am around 1/3 to 1/2 stroke when I see 60 hz indicated) - the voltage adjustment seems to work between 120 and 240v

Now for the twist - I pulled out the fluke and measure only 54 hz to 55 hz when the panel is showing 60 hz - I checked both at the convenience outlet and the main lugs with the breaker closed - if I run the RPM up to make fluke read 60 Hz I am indicating more than 63 Hz on the panel... Hmmmm - so where is the varience coming from...

Along these same lines I measured the voltage at both locations and was reading higher than the panel meter was showing as well ~12v to 14v higher depending on the location (outlet vs main lugs)...

Any thoughts?

It seems to me at this point if I were to get the Hertz readings resolved and convert the lathe to 240 3 ph I would be ready to put the unit into service - the only concern I have would be supplying the house in case of an outage off two legs of the main buss - rather than doing the split phase conversion.

Thanks for the help so far

Matt
That knurled knob adjusts droop (how much RPM/frequency drops off as the set is loaded). You must have had some sticky linkage inside of the injection pump that was freed up by moving that knob...
The difference between your actual voltage and frequency is a common problem...most of the sets I have worked on have had inaccurate meters. Trust your fluke, ignore the set meters!
Each meter has a "zero" adjustment on its face; its a small flat screw right at the pivot point of the indicator. That has a limited range of movement, but you might be able to adjust your meters into spec with it.
The frequency meter gets its signal from a frequency transducer. That unit is inside of the control cubicle, near the top. It should be a black box about 2.5" square and about 3" high (just going from memory). If you remove the 4 screws that hold it to the enclosure wall, you should be able to move it enough to see the bottom. Most (but not all) of these transducers have 2 adjustment pots on the bottom. Most times the pots are locked into place with a dab of glue. You can just pop the glue off with a small knife and make adjustments with a precision screwdriver. It is best to make the adjustments with the set running at a known 60 hz; but do be careful when you do this as there is high voltage inside of the control cubicle.
 
276
22
18
Location
Hobart, WA
Ok - that sounds good - I'll see what I can come up with for adjustments - so what is the story with the frequency adjustment knob if it really doesn't make any adjustment to the engine RPM and generator frequency output?

Also what would be a good droop setting to start with - I gather the farther in the knob is the less responsive the set is to adjusting to rapid changes in load?

Matt
 
276
22
18
Location
Hobart, WA
Latest Update - ran the set today with the fluke meter to set the voltage and hertz to 240v and 60 Hz (off the main buss with the breaker shut)

I was able to adjust the instrument panel voltage meter to read in sync with the fluke by using the slotted cam screw on the face of the meter - so the voltage is being displayed correctly now.

I do not have enough adjustment in the frequency meter adjustment cam to correct the meter error - I am running off the end of the panel meter and the needle is pegged at 62 Hz while the RPM is set to indicate 60 Hz on the fluke meter - (the cam gives about ~.5 Hz adjustment)

Looking behind the instrument panel I don't see any other adjustments - the meter itself is stamped "sealed - do not open" and I don't know what all I can to with the frequency transducer box mounted behind the instruments on the bulkhead...

How would I make a coarse adjustment to the frequency panel meter indication?

Matt
 
Last edited:

PeterD

New member
622
6
0
Location
Jaffrey, NH
The meter has a 'sender' module located on the back of the instrument panel. Small black box with four wires, two in (120 volts) and two out (directly to the meter). On many of these there are adjustments on the back of the module that can be used to recalibrate the meter. Pain factor: you must remove the module to access these screws. Ease factor: Remove both meter and module. Connect meter to module with temporary jumper wires. Connect module input to a 120 volt ac plug and plug into a wall outlet. Adjust the screws to read exactly 60 Hz, the screws do interact. Since you won't run on 50 Hz there is little need to adjust for that frequency.
 

James Vick

New member
6
0
0
Location
Fullerton, Ca.
MEP004AAS Generator

No! Don't throw it out...100% of the engine system, and about 95% of the electrical system are interchangeable with the 60hz sets. The 400hz sets are needed for parts to keep the 60hz ones running!

Sorry for your luck...but you're not the first to make that mistake. The 400hz/60hz question is one that a LOT of people ask.
Peter
A friend of mine was able to rewire thru the current transformers per one of the wiring diagrams that came with the unit and we now have 50 htz. However, we can't get it to 60htz. On the wiring diagram, it shows an S10 switch. Anyone know where it might be? We can't find it.

Thanks, Jim
 

sewerzuk

Member
524
10
18
Location
Seaside, OR
Peter
A friend of mine was able to rewire thru the current transformers per one of the wiring diagrams that came with the unit and we now have 50 htz. However, we can't get it to 60htz. On the wiring diagram, it shows an S10 switch. Anyone know where it might be? We can't find it.

Thanks, Jim
Frequency is controlled by engine RPM. Faster the engine turns, the higher the frequency.
But...didn't you determine that you had a 400hz unit? If so, then it could not have been re-wired to produce 50hz...not without changing the entire generator head itself. The current transformers are only for measuring current though the generator's leads to drive meters and automatic trips. They have no effect on the frequency that the set produces.
To answer your question, S10 only exists if you have a precise 60hz set. It does not exist in 400hz or utility sets. It is part of the automatic governor control circuitry.

edit: on the off chance that we mis-diagnosed your set and you do actually have a precise 60hz generator, the governor control box is an aluminum box on the right side of the generator. S10 is a small toggle switch on the case labelled 50hz/60hz.
 
Last edited:

sewerzuk

Member
524
10
18
Location
Seaside, OR
Ok - that sounds good - I'll see what I can come up with for adjustments - so what is the story with the frequency adjustment knob if it really doesn't make any adjustment to the engine RPM and generator frequency output?

Also what would be a good droop setting to start with - I gather the farther in the knob is the less responsive the set is to adjusting to rapid changes in load?

Matt
1-2hz droop from zero to full load is normal. I'm sure there's a spec for it but that will be close enough. If you go for too little droop, you will experience hunting and surging, too little droop and the frequency will drop off too much as the set is loaded.

The frequency knob is present on all generator sets, but it isn't actually wired to anything on the utility grade sets. On precise sets, it controls the electronic governor (does a better job of controlling frequency than the mechanical governor does). I'm sure the manufacturer just did that for parts interchangeability and ease of manufacturing...but it sure results in a lot of confused MEP owners!
 

sewerzuk

Member
524
10
18
Location
Seaside, OR
Looking behind the instrument panel I don't see any other adjustments - the meter itself is stamped "sealed - do not open" and I don't know what all I can to with the frequency transducer box mounted behind the instruments on the bulkhead...

How would I make a coarse adjustment to the frequency panel meter indication?

Matt
Coarse adjustment is accomplished inside that black box that I described in an earlier post; most of them are labelled "frequency transducer" on the top of the case (but some are not).
Completely removing it and wiring to household current and adjusting for 60hz as PeterD describes is a good method. I have always done it inside of the set with the engine running at known 60hz.
Some of the frequency transducers do not have adjustment pots; if you remove yours and do not find adjustments on the bottom, you have one of the non-adjustable ones. You either need to purchase a new one ($250 from TRC) or a surplus one. Or, you can retrofit a $20 digital meter off of ebay...
 
276
22
18
Location
Hobart, WA
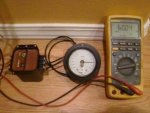
Well - I took the meter and the transducer out of the control cubical and made a little rig to run it off shore power and tuned the meter to show 60 Hz along with the fluke...

Everything back installed and run - the set now hits 60 Hz right along with the fluke so that issue is solved...

Only thing is now when I measure the voltage I am reading 138-139 volts at the 120 outlet and the set claims to be producing 240 - between any two of the main buss lugs I am getting 256 - 257 volts while the instrument panel reads 240 - the needle cam on the face of the gauge doesn't have enough sweep to correct the reading - any thoughts on how to raise the indicated value?

Matt
 

Attachments

Last edited:

1800 Diesel

Member
768
26
18
Location
Santa Rosa County, FL
Calling decodeme2 & sewerzuk for assist!

So, I need to follow the directions in post # 40 below, not as in the video?..

"I cut the buss bar that connected T10, T11, and T12 together and ran the jumper from T12 to T3, I created a floating neutral inside of all of those components. This explains the strange readings I was getting on the voltmeter, and was likely the biggest reason for the large voltage droop. I moved the lead (X12EG16N) from its original position on T12 to T13, restoring the neutral."

Or, do i do both?..?..(X12EG16N) is the jumper lead? Or the factory labeled cable?
Sorry about all the jestions, maybe someone else had the same question./..

...thanks again for your time with this..
Kevin..
Hi Kevin,

I am setting up to do the single phase conversion on an MEP004A. Sewerzuk's video states to connect the jumper wire from [by description] the T12 ("right rear" of the board where the copper bus bar section has been removed) to # T2. In your post you stated that you connected the jumper to T3. I didn't read each & every post, but I assume you were doing something different for your unit or what?

Also, the unit I have (76 Libby) has the bus bar mounted to the underside of the board which will make it somewhat difficult to access for removal & cutting, but it's not impossible. I saw another post with the same condition. So, if I understand sewerzuk's video and other comments on this thread, I'll be removing & cutting the bus bar between T11 & T12, reinstalling the bar & then connecting the jumper wire between T12 & T2. After that I'll be continuing with the other wiring changes for proper instrumentation function.


Thanks to anyone who wants to weigh in with clarification. I don't want to fry our future home backup generator! :)
 
Last edited:

sewerzuk

Member
524
10
18
Location
Seaside, OR
Hi Kevin,

I am setting up to do the single phase conversion on an MEP004A. Sewerzuk's video states to connect the jumper wire from [by description] the T12 ("right rear" of the board where the copper bus bar section has been removed) to # T2. In you post you stated that you connected the jumper to T3. I didn't read each & every post, but I assume you were doing something different for your unit or what?

Also, the unit I have (76 Libby) has the bus bar mounted to the underside of the board which will make it somewhat difficult to access for removal & cutting, but it's not impossible. I saw another post with the same condition. So, if I understand sewerzuk's video and other comments on this thread, I'll be removing & cutting the bus bar between T11 & T12, reinstalling the bar & then connecting the jumper wire between T12 & T2. After that I'll be continuing with the other wiring changes for proper instrumentation function.


Thanks to anyone who wants to weigh in with clarification. I don't want to fry our future home backup generator! :)
Actually, he was quoting me when discussing the jumper...and it was actually my typo (see post number 40). My post should have read " cut the buss bar that connected T10, T11, and T12 together and ran the jumper from T12 to T2"
I would correct it, but it appears that I cannot edit a post that old. So, don't connect a jumper to T3!

It seems that a majority of the MEP's have their buss bars on the bottom of the reconnection board. Most people leave the bar riveted on the underside of the board, and cut it in place with a dremel.
 

1800 Diesel

Member
768
26
18
Location
Santa Rosa County, FL
Actually, he was quoting me when discussing the jumper...and it was actually my typo (see post number 40). My post should have read " cut the buss bar that connected T10, T11, and T12 together and ran the jumper from T12 to T2"
I would correct it, but it appears that I cannot edit a post that old. So, don't connect a jumper to T3!

It seems that a majority of the MEP's have their buss bars on the bottom of the reconnection board. Most people leave the bar riveted on the underside of the board, and cut it in place with a dremel.
Thanks for the clarification--that's what I figured but just wanted to sure. Now I've reached a minor "all-stop". Got the bus bar off & cut between T11 & T12...reinstalled bus bar, reconnected T13 wire, T10 wire and then began looking at T11 for the original wire connection & then to connect the two "new" wires from T8 & from T12. When I looked at the T8 terminal there are two wires connected--an ~10 gauge size with a small band labeled "8" and then a smaller (maybe 16 or 18 gauge) labeled as per video (X8A16B). By process of elimination I will assume the ~10 gauge wire (with the #8-marked band) is wire # X8HH16B. Please advise if that's a safe bet. Haven't looked at T12 to T11 wire move...doing one change at a time....thanks...

BTW, wrt the bus bar cutting, I went ahead & drilled out the 3 brass rivets, removed the bar & made the cut in the shop, away from the wiring. My air cutoff tool has a 4" dia blade--figured I'd cut a few wires in the process so played it safe... :-D

Update--calling it a day here but didn't want folks to panic based on my confusion related to the wire change from T8 to T11...I had mistakenly moved the original T8 wire to T11, thinking it was the wire #X8HH16B--this wire had gotten lost in the birds nest under the board. Anyway, I located wire X8HH16B & connected it to T11. Also restored the "8" wire back to its proper connection at T8.

So as a final check on the new configuration of the wiring as per instructions, here is what the terminals affected have connected:

T2-- now has the newly installed 6 gauge jumper wire plus (3) existing wires (2 ~10 ga & 1~ 16 ga), for a total of 4 wires connected.

T3-- now has XA16B plus the (3) existing wires (2 ~ 10 ga & 1~ 16 ga), for a total of 4 wires connected.

T8-- now has it's original ~10 ga wire connected. One wire only on this terminal.

T11-- now has it's original ~10 ga wire connected, plus "new" wires X8HH16B & X12EG16N, for a total of 3 wires connected.

T12-- now has the newly installed 6 gauge jumper wire plus it's original ~10 ga wire connected, for a total on 2 wires connected.

Hopefully all this makes sense to anyone reading it and familiar with the mod. Won't actually attempt a light-off until Friday p.m.....if anyone sees anything fishy in my summary, please send up a flare! :neutral:
 
Last edited:

1800 Diesel

Member
768
26
18
Location
Santa Rosa County, FL
Well...the resistors and terminal board showed up on Friday. I dove into the project this afternoon...pretty simple little mod...under an hour to make all of the connections. It didn't work :doh:

Well..the theory was sound, anyway. Its just that my resistor values were WAY off. I still don't know why. They were dropping about 1.8v under full load...which is almost exactly the amount I was aiming for (which means that my math was correct). But, for some reason, that didn't change the meter readings or trip setpoint. Obviously, there is something at play in that circuit that I didn't grasp...

I had a pile of 1 watt resistors with varying values from various projects, so I just began swapping them in to see what would happen. A 1 watt resistor dissipating 7 watts lasts for about 15 seconds before it burns up. Fortunately, resistors are inexpensive and I had a lot of them. The 50 ohm resistors I had were the closest to what I need; they seemed to drop the meter readings about 20%. I need a little more than that...so I ordered some 10 watt 75 ohm resistors. The waiting game resumes....hopefully they'll be here by next weekend. That should be just enough time to clear all of the crispy electronic smell out of my shop [thumbzup]

Unfortunately, I couldn't test to make sure that the 50 ohm resistor also dropped the overload setpoint because they don't last long enough. I will have to verify that after I get the new batch of resistors...
Sewerzuk--Just successfully (no smoke or stray sparks :) ) completed my first phase conversion on an MEP004A. I would like to continue with the current transformer mod but can't seem to locate the post that contains the final configuration of the resistors. I see where you noted 38-40 Ohm resistors would work but I believe you had 50 Ohm resistors on hand. Can you advise what resistor size provides the nearest-to-correct meter readings and the highest/safest continuous KW capacity? Also, in a previous post you mentioned a video upload (with CT mod details), but was unable to locate this on YT. Final question--besides the resistor installation and the L1 & L3 wire size increase, are any other mods required to provide for the 15-17 (or 18?) KW output?

In closing, let me join in with the many members on the SS aux forum to thank you for your hard work in developing & sharing the phase conversion process. Your persistence, knowledge of theory & technical knowledge of the MEP generator systems is quite impressive. Your generous offerings of valuable time & experiences provide an asset to the SS site with few equals. I've worked for 30 years helping to build US Navy ships and would take you on my team any day over a degreed engineer "with an attitude"--these fellows rarely had hands-on experience, but their heads were large.....In contrast, your command of the subject matter, unselfish offerings of assistance and sharing of knowledge--all serve to show your character & credibility....thanks again for all you've done....enough said... If you're ever in the FL panhandle, drop me a note and a steak dinner is on me.
 
Last edited:

sewerzuk

Member
524
10
18
Location
Seaside, OR
Sewerzuk--Just successfully (no smoke or stray sparks :) ) completed my first phase conversion on an MEP004A. I would like to continue with the current transformer mod but can't seem to locate the post that contains the final configuration of the resistors. I see where you noted 38-40 Ohm resistors would work but I believe you had 50 Ohm resistors on hand. Can you advise what resistor size provides the nearest-to-correct meter readings and the highest/safest continuous KW capacity? Also, in a previous post you mentioned a video upload (with CT mod details), but was unable to locate this on YT. Final question--besides the resistor installation and the L1 & L3 wire size increase, are any other mods required to provide for the 15-17 (or 18?) KW output?

In closing, let me join in with the many members on the SS aux forum to thank you for your hard work in developing & sharing the phase conversion process. Your persistence, knowledge of theory & technical knowledge of the MEP generator systems is quite impressive. Your generous offerings of valuable time & experiences provide a asset to the SS site with few equals. I've worked for 30 years helping to build US Navy ships and would take you on my team any day over a degreed engineer "with an attitude"--these fellows rarely had hands-on experience, but their heads were large.....In contrast, your command of the subject matter, unselfish offerings of assistance and sharing of knowledge--all serve to show your character & credibility....thanks again for all you've done....enough said... If you're ever in the FL panhandle, drop me a note and a steak dinner is on me.
Glad you were able to complete the conversion!
I never did get a video made of the CT mod/resistor placement. But, I don't really feel like one is necessary. The procedure is fairly simple; you just place 3 resistors across the 3 CT outputs.
Anything between 38-50 ohms would work fine. The higher the resistance, the higher the meters will read (and the trips will happen sooner).
38 ohms would be the ideal resistance value, making the meters read perfectly accurately...if you can't source a 38 ohm resistor then go for one resistance value higher (don't go lower; this would actually make the meters show lower % current than is actually flowing, and the trips will not happen soon enough).
The post where I discuss this (and show a picture) is here:
http://www.steelsoldiers.com/showth...single-phase&p=1064322&viewfull=1#post1064322
 

1800 Diesel

Member
768
26
18
Location
Santa Rosa County, FL
Glad you were able to complete the conversion!
I never did get a video made of the CT mod/resistor placement. But, I don't really feel like one is necessary. The procedure is fairly simple; you just place 3 resistors across the 3 CT outputs.
Anything between 38-50 ohms would work fine. The higher the resistance, the higher the meters will read (and the trips will happen sooner).
38 ohms would be the ideal resistance value, making the meters read perfectly accurately...if you can't source a 38 ohm resistor then go for one resistance value higher (don't go lower; this would actually make the meters show lower % current than is actually flowing, and the trips will not happen soon enough).
The post where I discuss this (and show a picture) is here:
http://www.steelsoldiers.com/showth...single-phase&p=1064322&viewfull=1#post1064322
I saw that photo but didn't realize there were three resistors installed....now I can see the third green wire you added in the right side of the photo. Thanks again for the assist! :)
 

1800 Diesel

Member
768
26
18
Location
Santa Rosa County, FL
Got it!

I had a few minutes to drop some of those 50 ohm resistors across the secondary side of the CT; it worked out perfectly!

According to the math, a 38 ohm resistor is the ideal size (a 40 ohm would be just about perfect). That would drop the meter readings by about 35%. Since all I had were 50's, that is what I used. They dropped the percent current and percent power meter readings by about 20%; not quite enough, but enough that the trip set point is now around 18kW. So, even though they are still reading a little bit too high, I can pull 18kw all day long in single phase.
I load tested it at 70 amps (almost 17kW) for about 30 minutes with no issues.

I shot some video of the mod; I hope to get a chance to edit and upload it this evening.

This little tweak completes the single phase experiments/modifications. That's it! The set is now an honest 15kW single phase 120/240 generator...
I'm about to order the resistors for the CTs (enough to do several MEP4s) and wanted to clarify the wattage rating needed. I see someone else had 40 ohm 25 watt resistors. You mentioned any size between 38 & 50 ohm but it wasn't clear which wattage rating you ended up with. Also, you mentioned that 38 or 40 ohms would be just right but the results you showed with the 50 ohm seemed to be good also. The 18 KW trip setting looks like a good goal. Would the lower rating resistors (38 or 40) provide the same trip setting? To summarize--which resistor provides the most accurate meter readings along with the 18 KW trip set? Your post #198 seems to say the 38 ohm is the best for meter accuracy, but not sure if that will provide the same trip set of ~18KW...

Last question--in one of your photo sets, you use a terminal board with the resistors mounted remotely and in another post the photo shows the resistors mounted directly across the CT terminals, with no terminal board used. I assume both methods function the same, but does either method provide tangible benefits over the other?

Thanks

PS (edit add): Found a 39 ohm resistor (Digi-Key part # A102140-ND) Add'l description as follows: "RES 39 OHM 25W 5% WW LUG". Would this one serve to provide the accurate meter readings and also the ~18 KW trip?
 
Last edited:

sewerzuk

Member
524
10
18
Location
Seaside, OR
The wattage rating should be 10 watts or more. The resistance rating of 38 ohm will provide 100% accurate meter readings and trip setpoints. A slightly higher resistance value will result in slightly higher meter readings, and slightly lower trip setpoint. The 50 ohm resistors I used resulted in the meters reading a few percent too high, and a trip setpoint of 18kw (slightly too low). Any resistance between 38-50 ohm will be fine...we're only talking about a few percent, and the meters usually are less accurate than that anyway. I would choose the cheapest 10+ watt resistor between 37-50 ohm and go with that.
 
Last edited:
Top
AdBlock Detected

We get it, advertisements are annoying!

Sure, ad-blocking software does a great job at blocking ads, but it also blocks useful features of our website like our supporting vendors. Their ads help keep Steel Soldiers going. Please consider disabling your ad blockers for the site. Thanks!

I've Disabled AdBlock
No Thanks