- 7,522
- 10,551
- 113
- Location
- Papalote, TX
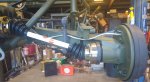
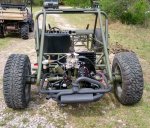
Well the transmission is in and aligned, I had to remove the shift cover and re-install the speedo cable drive adapter, this is a custom mod as the 091 did not have a speedo drive, it is needed because the off road spindle set up does not allow for a speedo drive (the original German design simply drove the speedo from the right front wheel) but most Baja class sand rails were not concerned with speedometers so this had not been seen by many in the off road world.
I also replaced the drive seals and both output flanges, I was lucky to find some factory NOS flanges, they have not been made in many years.

it decided to unthread from the transmission rather than let me remove the speedo cable, and it was held on by a nut on the inside of the transmission.

It is worth noting this is driven 1:1 from the pinion shaft, and the 091 trans has ether a .82 or .89:1 4th gear so this little cable is spinning faster than the crankshaft in 4th gear
and GEEZ it is really LONG, goes all the way to the front end before coming back to the speedo...
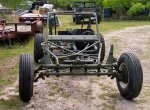
Also this week the replacement tie rod and all the new tie rod ends came in so the front end/steering/suspension other than shocks is complete.
There is a stud on the front of the transmission that is absolutely and unequivocally inaccessible with the sway bar center coupling in place so I did have to remove the sway bars to install the trans, thought it would be a great time to install the speedo cable also, even though it is somewhat accessible from underneath.

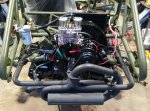
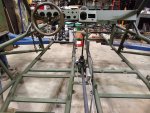
Well now it is on to the engine! Oh yes I did drop all of the rest of the components off at the blaster/primer guy today, all the baskets, skid plates bumpers..
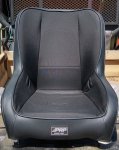
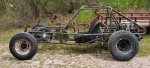
A couple more pics..


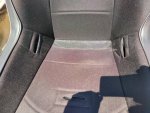
Still a long way to go...
I also replaced the drive seals and both output flanges, I was lucky to find some factory NOS flanges, they have not been made in many years.
it decided to unthread from the transmission rather than let me remove the speedo cable, and it was held on by a nut on the inside of the transmission.
It is worth noting this is driven 1:1 from the pinion shaft, and the 091 trans has ether a .82 or .89:1 4th gear so this little cable is spinning faster than the crankshaft in 4th gear
and GEEZ it is really LONG, goes all the way to the front end before coming back to the speedo...
Also this week the replacement tie rod and all the new tie rod ends came in so the front end/steering/suspension other than shocks is complete.
There is a stud on the front of the transmission that is absolutely and unequivocally inaccessible with the sway bar center coupling in place so I did have to remove the sway bars to install the trans, thought it would be a great time to install the speedo cable also, even though it is somewhat accessible from underneath.
Well now it is on to the engine! Oh yes I did drop all of the rest of the components off at the blaster/primer guy today, all the baskets, skid plates bumpers..
A couple more pics..
Still a long way to go...
Last edited: