• Steel Soldiers now has a few new forums, read more about it at: New Munitions Forums!

  • Microsoft MSN, Live, Hotmail, Outlook email users may not be receiving emails. We are working to resolve this issue. Please add support@steelsoldiers.com to your trusted contacts.


Restoration of M43 by first time MV buyer

Torisco

Active member
Steel Soldiers Supporter
523
42
28
Location
Bishop, California
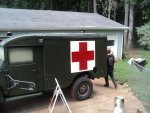
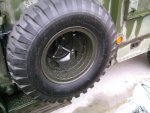
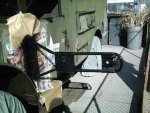
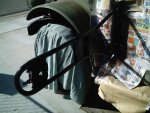
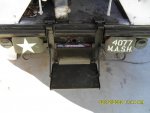
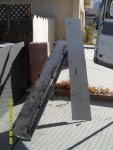
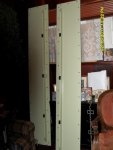
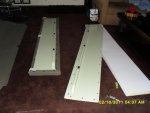
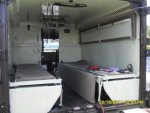
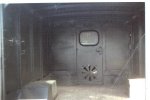
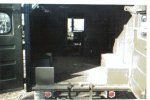
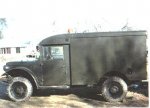
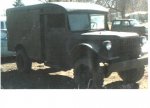
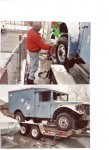
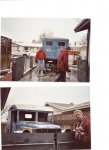
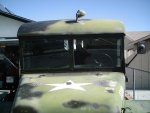
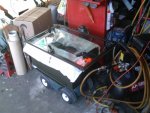
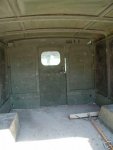
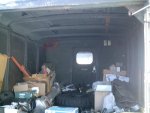
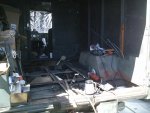
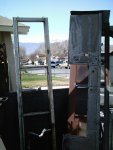
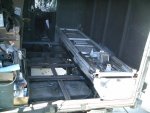
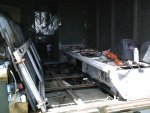
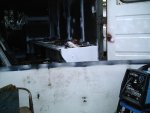
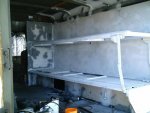
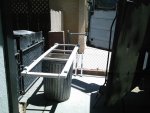
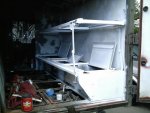
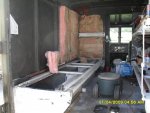
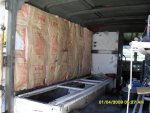
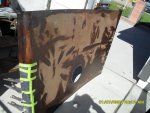
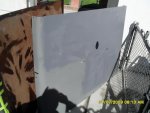
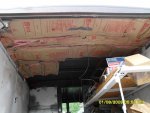
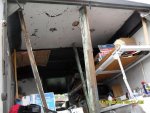
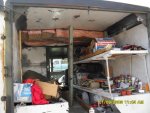
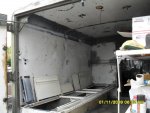
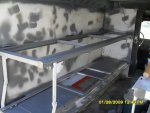
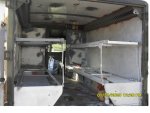
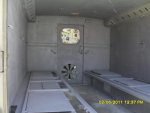
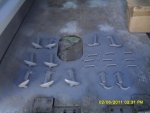
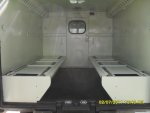
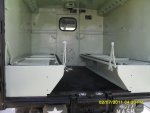
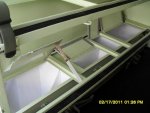
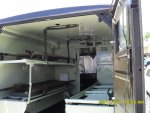
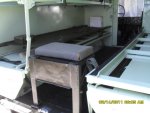
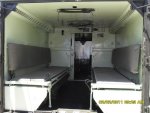
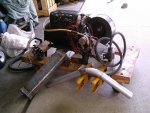
I will be posting the restoration work I jave done on a M43 I purchased. I am about to finish the exterior and thought I would begin this thread for those who want pictures, pictures, pictures.

Its not a deuce (I also bouighta M35A2 that I need to finish) but it sure required a lot of work to get to this point.

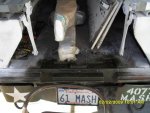
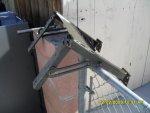
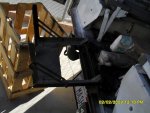
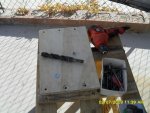
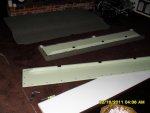
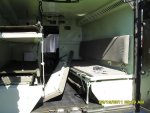
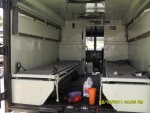
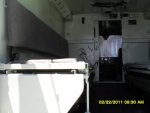
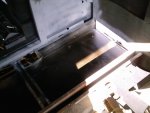
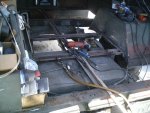
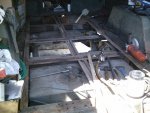
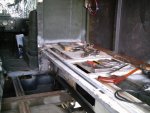
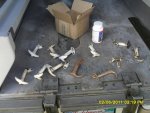
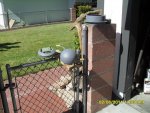
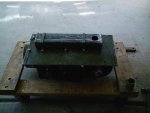
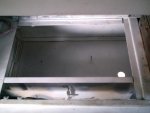
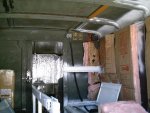
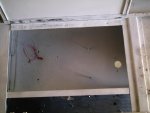
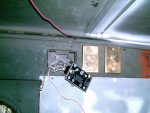
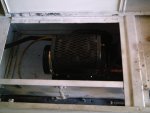
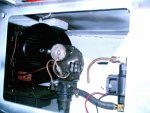
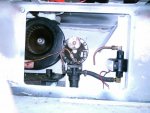
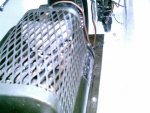
Attached: original purchase (Ft Carson Colorado) photo's and donor vehicle pictures.
 

Attachments

Torisco

Active member
Steel Soldiers Supporter
523
42
28
Location
Bishop, California
I replaced the passenger glass, drivers window rubber insulation, and passenger door glass, frame guides, felty and both doors rubber insulation .

Then this is the back before restoration then loaded with parts and showing the result of installing two new blower fans, new wiring, to the motors, and refurbishing all related parts.

I started by removing all the metal not needed for installing the donor vehicle's passenger side litter rack bottom and floor. (Lots of weld's to grind off) And decided to derust and coat the tool storage cabinet that was exposed by this operation.
 

Attachments

Torisco

Active member
Steel Soldiers Supporter
523
42
28
Location
Bishop, California
After removing all the rear internal oarts and pieces from the donor vehicle I had to re install them (after restoring the parts) in the finish vehicle. This is an example of the passenger side only. This had to be repeated for the drivers side and the entire cab interior as it to had no interior metal skin or insulation and did not have a stable spot light mount or electrical wiring for the spot light, rear heater, solargizer, rear dome lights, etc.
 

Attachments

Torisco

Active member
Steel Soldiers Supporter
523
42
28
Location
Bishop, California
After finishing the base on the drivers side (redid all exposed frame, put in new shocks, new fuel line for rear heater, electric fuel pump, etc) finished insulation.
 

Attachments

Torisco

Active member
Steel Soldiers Supporter
523
42
28
Location
Bishop, California
The vents were derusted and primered and installed. The floor was restored and reinstalled with stainledd steel hardware after the exposed framing was derusted primered and undrcoated. Then the entire back was prepped and primed for the finish color of Sea Foam Green Mil Spec paint.
 

Attachments

Torisco

Active member
Steel Soldiers Supporter
523
42
28
Location
Bishop, California
:grd:

I have far to many pictures since there was so much work involved in restoring all the latches, installing a Southwid personnel heater for the rear compartment, all new compartment wiring, the B/o curtains. the lighting, the tie downs, footman loops, and on and on.

So here is the finished rear compartment. Thanks for looking.
 

Attachments

zout

Well-known member
7,744
154
63
Location
Columbus Georgia
Torisco
Great looking workmanship. You have way more energy than I could ever produce.

You will have a great M43 when you are completed - keep the pics coming in.
 

Torisco

Active member
Steel Soldiers Supporter
523
42
28
Location
Bishop, California
Zout, the patient compartment heater was a chore. Had to make the muffler, mounting base, and exhaust pipe. Had to run fuel line from heater fuel pump to gas tank and wired in a control box and themostat.

I used a 24 volt drop down circuit board to reduce the voltage to 12 VDC for the heater. Incidentally the circuit board also provided the hi and low heater fan speeds needed on the cab under dash heater in front.

The unit was mounted under the dash next to the glove box.
 

Attachments

Seatyger

Member
138
0
16
Location
Ontario
Brother you have the persistence of a Pit Bull that refuses to let go of the Trespasser's leg! Nicely done. Looks clean and surgical from the photos. I can only imagine the hours and 'Not meant for Children's ears' expletives of encouragement!

Great job and thanks for keeping us informed with your progress.
 

Gunfreak25

Well-known member
1,561
620
113
Location
Yuma, AZ
No, it's not an early deuce. But great work nonetheless, glad you posted it. :D 
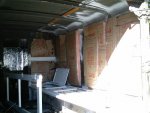
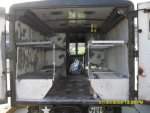
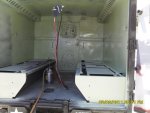
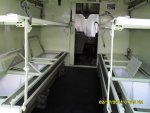
I want to own an M43 someday being a MASH freak. I'll bet it's a lot of work tearing out the internals. People think it's just a sheetmetal box with nuts and bolts. Lots more to them that that.
 

papabear

GA Mafia Imperial 1SG
13,508
2,383
113
Location
Columbus, Georgia
[B said:
zout[/B];940343]Torisco
Great looking workmanship. You have way more energy than I could ever produce.

You will have a great M43 when you are completed - keep the pics coming in.
Don't let that ole nut chasin squirrel fool ya.
Look on Zouts thread about Coming Attraction Project Number 6.

You are doing an outstanding job Torisco and thanks for sharing your work/pics with us.

Just be careful that some ole grizzled Grunt don't sneak up on ya and steal your truck when you ain't lookin!:evil:
 

Attachments

zout

Well-known member
7,744
154
63
Location
Columbus Georgia
:not worthy:


Still keeping an eye on your built - keep the pics rolling in as you get time to work on it as you see fit.

Just as a side note and for what ever info - there is a really good source that served in these 43 and he advised to never fire up the heater unless I had a death wish. I will take his words as written in stone on the 3rd page of the commandments. It was very intersting listening to him descibe items.

You can tell when someone is bold face lying when telling a story cause their eyes do not look upwards when telling a story - it has been described as the video play back part of your brain is in your forehead area - they look up as they play back the experiences. I have found that to be true. Folks say I walk with head in the clouds.

What is next in plan for your build ????

Just so you know - the Camo crew threw surface rust and fake paint on it to make it look like I really did something before bringing it here. Once washed off it was a breeze.:beer:
 

Torisco

Active member
Steel Soldiers Supporter
523
42
28
Location
Bishop, California
Tire carrier and rear step weld and repair

The tire carrier was missing a chunk of metal thet formed the "O" for the locking pin and the locking lever bar was worn out. Welded two peices of metal to these areas and reshaped the hole to fit the locking pin, New spring, hinge mounting bolts, etc.

Rear step was mangled with no wood at all. Straightened out bent up step, made new wooden step, reweded broken hinge, painted and finished step.
 

Attachments

Torisco

Active member
Steel Soldiers Supporter
523
42
28
Location
Bishop, California
Pics of rear step work

The step was later covered with the same rubber flooring as in the patient compartment. The bottom of the step also had velcro strips attached to hold the step seat cushion when in the up right doors closed position.
 

Attachments

Torisco

Active member
Steel Soldiers Supporter
523
42
28
Location
Bishop, California
Rear step in upright position.

Rear cushion and backrest work included repair backrest boards, sand, primer, paint, install new snaps on backrest board for cover and install all new covers with pre cut foam pieces.
 

Attachments

Top
AdBlock Detected

We get it, advertisements are annoying!

Sure, ad-blocking software does a great job at blocking ads, but it also blocks useful features of our website like our supporting vendors. Their ads help keep Steel Soldiers going. Please consider disabling your ad blockers for the site. Thanks!

I've Disabled AdBlock
No Thanks