• Steel Soldiers now has a few new forums, read more about it at: New Munitions Forums!

  • Microsoft MSN, Live, Hotmail, Outlook email users may not be receiving emails. We are working to resolve this issue. Please add support@steelsoldiers.com to your trusted contacts.


Seabee forklift

Oldfart

Active member
1,063
26
38
Location
Centennial,CO
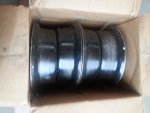
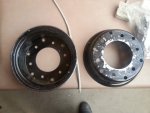
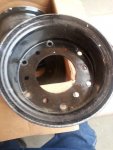
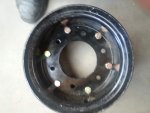
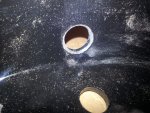
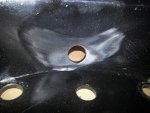
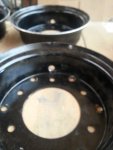
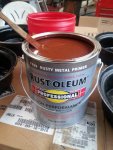
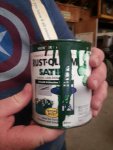
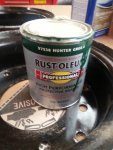
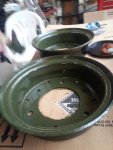
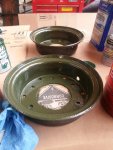
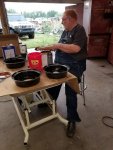
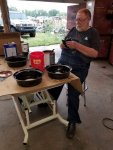
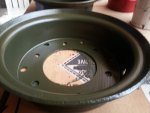
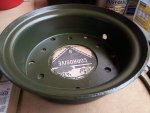
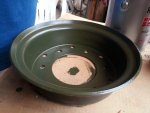
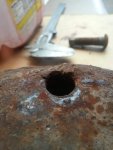
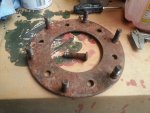
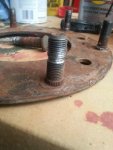
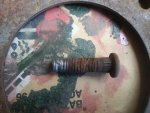
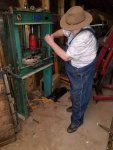
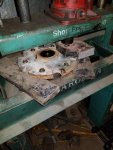
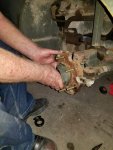
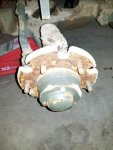
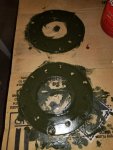
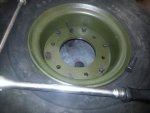
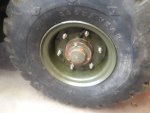
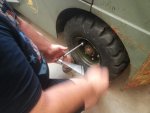
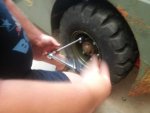
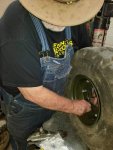
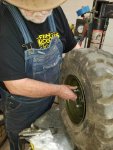
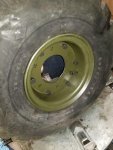
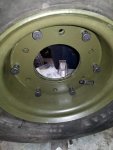
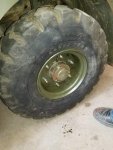
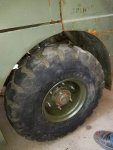
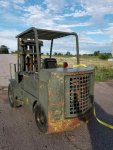
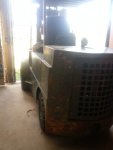
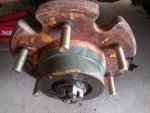
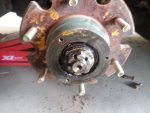
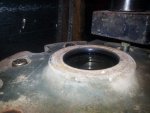
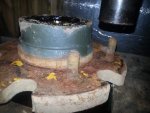
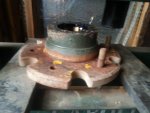
Up date to our forklift wheel replacement. ~~~ I have searched at length for either a new or used steer wheel for our Seabees forklift. There are not many forklift models among all the manufacturers who use 10" steer wheels. Among all those that do use that size the only used wheels I could find were all 5 hole bolt circles and our unit is 6 hole. None of the many forklift parts houses I contacted had any information on Allis Chalmers forklifts as far back as 1978. In what I hope is the end, I found a small manufacturer of custom and special wheels in Virginia who actually had specifications for the wheel I needed. After some back and forth communication I was able to order up their part no. W20751 which is a 10" x 5.5" two piece wheel with a 6 hole bolt circle on a 7.125" diameter and a 5.0" pilot hole. ~~ Given the difficulty in finding a wheel and the possibility the other steer wheel may have cracks or otherwise been abused at the same time as the wheel we wanted to replace, I ordered up two wheels. The price was $74 each wheel and $15 each to ship them. They are in transit and I have tracking numbers to follow them. Subject to the quality of what I receive, I think I can recommend Donald Coulthard and his firm Hub & Wheels of Emory, 28435 Blaine St., Meadowview, VA 24361. His firm is not limited to small forklift wheels or just wheels as they also manufacture presses as well as larger industrial wheels. Once I actually placed an order it took less than 3 days to get an invoice and have my new wheels shipped. Not bad considering the promise at order was two week delivery. I will post photos of the wheels when I get them delivered and the black paint changed to Olive Drab.
 

Oldfart

Active member
1,063
26
38
Location
Centennial,CO
My son sent me a cell phone "movie" he took when we fired up the forklift engine while it was still on the trailer. I should explain that we had to drag the forklift on our skid steer trailer with a winch we have attached to the trailer. The flat tire and #12,500 pound weight of the forklift was more than our little winch could handle so the surplus facility helped by using their larger Wiggins off road fork lift to push. Between two we got it on our trailer. The Wiggins was spinning tires in the process. Because of the difficulty getting loaded we decided to try to air up or repair the flat steer tire and get it running while still on the trailer. Our thinking was it would be easier to drive off than drag it off. We were able to get the flat tire wheel off only to discover it was a nasty repair. We proceeded to air up the tube out side the tire and found it seemed to hold air. Re-assembled the wheel and tire with the tube valve stem aligned to where we could get an air hose on it. After getting the forklift standing on all 4 corners, we proceeded to the engine. Gas was badly lacquered and we were told by the surplus facility that they tried to start it when they picked it up in New Mexico, but it would only backfire through the carb. They assumed a bad or stuck valve. We drained the fuel tank and cleaned the fuel line as well as pulled the carb apart to clean out the sludge and check the float and freedom of the needle and seat. We installed a new battery and fresh fuel. The movie is the result.
 

Attachments

Oldfart

Active member
1,063
26
38
Location
Centennial,CO
Got our new wheels today. A day almost two early in fact. Tracking said they would be delivered by end of day tomorrow but they arrived at our farm about 9 am this morning. They look and feel more robust than the repaired wheel. I will measure the thickness when we change the wheels over. I plan on painting the new wheels Olive Drab to match the rest of our forklift tomorrow. I have to run to the parts house for a wheel stud, but best get both wheels off to see if we need anything else. I already picked up a new 7.50 x 10.0 tube with flexible valve stem as well as a tube patch kit. Pretty close to ready to get it back on all fours.
 

Attachments

Oldfart

Active member
1,063
26
38
Location
Centennial,CO
Today I measured the new wheel metal thickness as 3/16th of an inch. I will check the old wheels when we make the change over. The new wheels were manufactured by punching out the bolt circle stud holes as well as the bolt together holes. Same for the valve stem hole. The back side of the wheels had been dressed to remove the flange left by the punch process. However, this was not done for the valve stem holes. Since there was some sharpness to the backside of the punched hole, I dressed those by a stone counter grind and then cleaned off the rest with a finish grinder.

We mix our own Olive Drab paint. There are different shades depending on vintage and service branch and even theater of operation. We found a mix of Rustoleum rusty metal primer and Rustoleum Hunter Green can achieve most of those shades. We tend to paint our stuff sort of like it might have been done in the field for regular use by ordinary troops. This means a pretty flat paint. For those that like a parade ready paint job on the Generals ride you can use a gloss or of the Hunter Green. Satin Hunter green gives something with a little more shine for those parades rather than the blend into the bushes tone of flat paint. For spray painting you can use acetone to thin and harden.

Painted on a cool humid day (unusual for Colorado) so the photos of the painted wheels look wet and glossy, but should darken and go flat by tomorrow.
 

Attachments

Oldfart

Active member
1,063
26
38
Location
Centennial,CO
I stopped at the farm shop today to check the color of the wheel paint. (Photos attached). Found a few thin spots so I did a quick second coat. You can see the effect of the flat Rusty Metal Primer mixed with satin Hunter Green. A straight 50/50 mix is practically a dead on match for most of the WW2 European Theater OD paint color. Raising the percentage of Hunter Green will darken the OD color. Finding flat Hunter Green is difficult, but satin is available at places like Home Depot or Lowes.
 

Attachments

Oldfart

Active member
1,063
26
38
Location
Centennial,CO
It looks great.

Did you come up with the color match by accident, or by design?
I can't remember (happens to us old folks) exactly where I heard about the paint formula. It was either on a Steel Soldiers thread or a thread over on G503. In any case, the discussion was between purists who wanted the exact same paint for their WW2 vehicle restoration and people who wanted a cheaper solution. As I mentioned earlier in this thread, we tend to display our stuff in a way that reflects an ordinary vehicle pulled from the motor pool. Witness my avatar. A 1955 GMC M220 painted white. Many think that it we painted it white to represent a camo paint for artic use. The fact is that it spent the majority if not all of its 55 year career in the Army at the Yuma Proving Grounds. For the majority of the time at Yuma, it was painted white to combat the extreme heat of the desert southwest. While I doubt the original white paint job was all done with a brush, (we found a hand print on the top of the van body where someone had sprayed across his left hand leaving a print) there is massive evidence of brush paint strokes reflecting touch up spots all over the vehicle. ~~ Sorry, got carried away. Back to the OD paint formula. We used to buy rattle cans of "official" OD paint to paint our M37's and M101's. When my daughter (Ghostdriver) brought her M43 back to life she opted to paint it a Vietnam era marine OD. This is a darker, more green color than the WW2 OD. We decided to research mixing our own paint and found the thread about Rustoleum Rusty Metal primer. Being somewhat of an artist among other things, she fiddled with how much green needed to be added to get the right color. (and I think I need to correct something I said earlier in the thread about 50/50 mix. That should be 50%. Meaning one Hunter green to two Rusty Primer.) For the forklift wheels we used table spoons to measure the amounts of Green and Primer and altered the mix until we got the shade we wanted. Mixed a small batch with that ratio and brushed it on. ~~ Frankly one of the best OD paint jobs I have seen was done largely with a short bristled roller.
 

Oldfart

Active member
1,063
26
38
Location
Centennial,CO
Had a pretty long day today working on the Forklift. When we first fired it up, we discovered a bad ignition/start key switch. I went to the local parts store and found the exact same switch in their blister packs of universal key switches. Tried to start the Forklift today and the tumblers would not match up to allow the key to turn. I wound up hot wiring to get it started and backed into our shop. Had to air up the flat tire too before I could move it. Got it jacked up and the steer wheels off with some difficulty. Turns out some of the nuts had stripped and damaged threads on both the nuts and the studs. Almost broke down and cut the studs off. I was looking for my nut splitter when my son announced he had managed to get the last nut removed. We headed to our local parts house for new studs only to learn they did not stock anything in half inch. Tried our local farm implement dealer and he did have 10 in stock that were a quarter of an inch too short. Went by our local trailer dealer who also does repair and they had lots of half inch studs in stock of several lengths. We got enough to re-stud both steer wheels. The wheels go together with a ring that has 6 studs to bolt the halves together and the same ring has 6 holes that fit over the wheel studs. The ring serves as a stiffener for the wheel center. I tried to short cut the stud install by using a hammer to start the stud in the hub and then a nut to finish pulling the stud into the hub. I know better. Pulled the threads on the stud doing that so I did it the right way by pulling the hub and pressing the studs. Now I have to go buy a replacement stud tomorrow. I took some photos of the nasty welded wheel and cobbled up original studs. My son took some photos of me pressing the studs. We discovered both steer wheels were welded back together. Good thing I ordered two wheels made up. The old and new wheels are both 3/16th inch material.
 

Attachments

Oldfart

Active member
1,063
26
38
Location
Centennial,CO
Nice press. [thumbzup]

When you need one that looks might handy.
Had that press a long time. Got it in 1985 and it managed to survive a shop fire. That's the reason for all the black smuges on it. Next to impossible to clean that smoke off. At that time we had taken over the old cinder block chicken house that a handyman renter was using as a carpentry work shop. He was using an old sheepherders stove to heat the building. We poured a concrete pad so we had a place to get off the dirt around 3 sides of the chicken house. What we did not know was that the renter had failed to insulate the chimney stack away from the roof. It finally managed to set the roof on fire. Actually not much damage to the roof, but it created a lot of smoke. We later built a new shop by including the old chicken house as the center part of the north wall and we use the old house now as a Tool Room with some old metal kitchen cabinets for work benches. That's where we keep the mill and drill press along with most of the hand tools. The new part is a 4 bay garage/shop. I say new, but all built back about 1986/87. Not fancy, but sure beats laying out in the dirt trying to work on something.
 

Another Ahab

Well-known member
17,831
4,167
113
Location
Alexandria, VA
Had that press a long time. Got it in 1985 and it managed to survive a shop fire. The new part is a 4 bay garage/shop. I say new, but all built back about 1986/87. Not fancy, but sure beats laying out in the dirt trying to work on something.
It's funny "ain't it?

How what's new all of a sudden - magically!- turns old.

You just keep busy, and then one day you look up and realize, d----, time has been marching on!

:beer:
 

Oldfart

Active member
1,063
26
38
Location
Centennial,CO
Went shopping today for the replacement hub stud along with some more nut so it would all be new. Installed the new 7.50 X 10 tube in the left rear steer tire and assembled the wheel with all new studs and nuts. Mounted the bolt together ring on the outside of the wheel this time for slightly better strength on the wheel center. We did not use the impact wrench or any speed air tools to bolt it all together so as to not damage the nylon lock rings on the lock nuts. We got the forklift with a mix of lock nuts and regular nuts with lock washers. The left rear steer hub was missing a stud (probably from what ever event tore up the wheel). Not sure when the messed up studs and nuts happened, but could have been the same event. We aired the new tube to 15 PSI after we bolted the halves together and then when we had it all secure on the hub we took the pressure to the 100 pounds indicated on the wheel well. The tires are 12 ply nylon rated as 14 ply. The manufacture's max tire pressure rating on that tire is 150 PSI. Sure feels good to have a decent wheel and a tire that will hold air.
 

Attachments

Oldfart

Active member
1,063
26
38
Location
Centennial,CO
Having finished the left steer wheel, we tackled the right steer wheel. It went much faster. Only the outer half of the wheel had been welded. Studs were all OK, but we replaced them anyway. My son exchanged the ring studs in the vise and I used the press to exchange the hub studs. Felt good to get the whole forklift down on the ground. Still had to hot wire the start ignition and then the engine started to run snotty. Attaching some photos of the Right side work.
 

Attachments

Oldfart

Active member
1,063
26
38
Location
Centennial,CO
That suddenly snotty running forklift engine. We think we may have picked something up that is messing with the needle and seat in the carb. First the new ignition switch craps out and now we have a rough running engine. Looks like it will be a while before we get to rebuilding the mast lift cylinders.
 

Attachments

Oldfart

Active member
1,063
26
38
Location
Centennial,CO
It "shore" does look pretty.*


(* A little USN humor there, and I DO mean little). :mrgreen:
I like the humor. Need that when things like new switches crap out and smooth running engines suddenly go rough. Must remember some of the Seabees mottos, like ~~~ "We Build - We Fight" but probably better when bringing an old Seabee Forklift back to life is "Can Do"!
 

Oldfart

Active member
1,063
26
38
Location
Centennial,CO
i'm sorry, Oldfart, but I lost track:

- Were you ever Seabee Navy at one time?
Too young for Korea, and too old for Vietnam. But Vietnam was close. I tried to go with the Air Force so I could be a pilot only to learn I was color blind and deaf in one ear. Turns out not so colorblind or deaf that I could not become a private pilot. Lost my ticket when I had the heart attack. No military service on my own, but I was an Army Air Corps brat. My father served in WW2 and was disable retired as a Captain. I wore military shoes from the base/post exchanges until I had to start buying my own groceries. Same time I got married.
 

Another Ahab

Well-known member
17,831
4,167
113
Location
Alexandria, VA
Too young for Korea, and too old for Vietnam. But Vietnam was close. I tried to go with the Air Force so I could be a pilot only to learn I was color blind and deaf in one ear. Turns out not so colorblind or deaf that I could not become a private pilot. Lost my ticket when I had the heart attack. No military service on my own, but I was an Army Air Corps brat. My father served in WW2 and was disable retired as a Captain. I wore military shoes from the base/post exchanges until I had to start buying my own groceries. Same time I got married.
The old "boondockers", remember them well. :beer:
 
Top
AdBlock Detected

We get it, advertisements are annoying!

Sure, ad-blocking software does a great job at blocking ads, but it also blocks useful features of our website like our supporting vendors. Their ads help keep Steel Soldiers going. Please consider disabling your ad blockers for the site. Thanks!

I've Disabled AdBlock
No Thanks