• Steel Soldiers now has a few new forums, read more about it at: New Munitions Forums!

  • Microsoft MSN, Live, Hotmail, Outlook email users may not be receiving emails. We are working to resolve this issue. Please add support@steelsoldiers.com to your trusted contacts.


Short Airpack Redux

Potluckslammy

Member
52
71
18
Location
Umpire, AR
This is going to be a short write-up about my experience with the short style airpack. First, I want to thank silverstate55 for the already excellent "Teardown & Repair" thread! I, too, looked high and low for some kind of instructions, or at least a parts diagram, to help me with this rebuild, but there is nothing, except here on this forum! Also, let me give thanks for this community of MV enthusiasts, which has proven over and over to be an invaluable resource, and deep well of knowledge!

Now, the reason for this new thread is because I discovered my airpack(s) vary slightly in design where it comes to the air slave cylinder. Along with the photos, a couple tips are to be included to help others on down the line. I'll break it up into a few parts for easy reading. Any questions or suggestions for later editing are welcome!
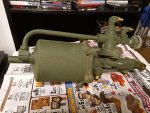
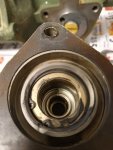
IMG_20220222_182027_855_copy_2000x1500.jpg
The reason for the whole project is because air pressure failed to build on startup, especially during cooler weather. After warm up, or a short drive, the pressure would come up, and stay up, but turning left took a little more effort. Researched suggested the airpack was to blame...so I ordered a kit from fellow member Monkeyboyarmy. Great price, fast shipping, and answered all my questions quickly, and clearly! Thanks Greg!
Starting off, I gave the outside a good wash down with some Simple Green, just scrub and spray, not submerge...dried with an air hose. Outside looked nearly new, a few small spots of surface rust. Internals were very good, also! All except for one, little seal...
 

Potluckslammy

Member
52
71
18
Location
Umpire, AR
IMG_20220225_193044_336_copy_1500x2000.jpg
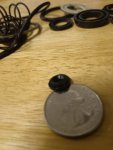
This is the lipped seal that goes on the end of the pushrod. Silverstate55 gives it the name "End Cap Gasket". All the other parts, seals, and internal surfaces looked so good that, had I been lazy in assuming this gasket was also good, and neglected to bang out that little bugger of a roll pin, I would not have discovered the gasket was infact destroyed!
So, the little End Cap Gasket was replaced with the spiffy new one from the kit. Unfortunately, being as the old one was floating around in pieces under the piston, I had no example as to how the new one should be installed. I pushed it into the hole on the end of the pushrod like a stopper, and reassembled it. Not until tearing down the second airpack...yes, there are TWO under there!...did I discover this procedure was incorrect. Wound up having to pull the first one back off...disassemble it, AGAIN...just to reinstall this End Cap Gasket oriented the correct way! A huge pain, but also a learning experience. 😏

There is an internal "lip" machined into the end of the pushrod. And there is a lip on one side of the gasket. So you have to gently manipulate the rubber lip on the gasket with a pick, stick, screwdriver, or some kind of pokey tool, and force it inside the end of the pushrod...without tearing it! I hope my description becomes clear when looking at it, or your gasket wasn't destroyed like mine, because I neglected to take a picture of it once installed. Sorry!
 
Last edited:

Potluckslammy

Member
52
71
18
Location
Umpire, AR
IMG_20220222_185608_715_copy_1500x2000.jpg
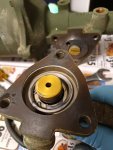
Here comes the discrepancy I encountered, as compared to the example given by silverstate55 in the "Teardown and Repair" thread. The Upper Piston within my Slave Cylinder Housing is actually TWO parts! I'm guessing this is a later model build update, as my M35A3 was remanufactured in 1999. Any knowledgeable comments about this change are welcome!

IMG_20220222_185632_967_copy_1500x2000.jpg
Here you can see the Piston removed, and the Spring remaining in the Removable Cylinder.

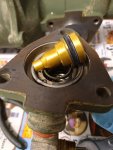
IMG_20220222_185653_889_copy_1500x2000.jpg
It comes right out, and is not under a great deal of spring pressure. Pull it out with your fingers, and then remove the spring.
Take care with the lipped seal on the piston! The seal included in the kit is for the larger Upper Piston used in the earlier models. This smaller seal was NOT included in the kit. Inspect it for wear and tear. Mine looks ok, so it was cleaned, lubed, and reinstalled as-is. Unfortunately, I don't have a suggestion at this time for a replacement if yours is worn or torn. 😥
 
Last edited:

Potluckslammy

Member
52
71
18
Location
Umpire, AR
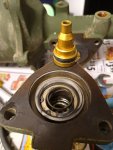
IMG_20220222_185730_141_copy_1500x2000.jpg
This Removable Cylinder is held in with a snap ring. GENTLY AND CAREFULLY remove the snap ring with your trusty snap ring pliers. (You do have snap ring pliers, don't you? 😇) But DO NOT throw it away! This snap ring was NOT included in the kit, evidently because the available kits don't account for the later model build update! You will have to re-use this snap ring...or at least I did. A replacement may be available from any number of sources...but I didn't care to hunt for one. Figured so long as it wasn't bent out of shape it would be fine, considering it's never really under any load.

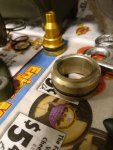
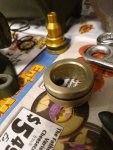
Now, you MAY be able to extract the Cylinder with your fingers by working it back and forth. In reality, a combination of thick grease, tight clearances, thick o-ring, and the snap ring groove, makes this procedure kind of a pain! I discovered using a 90-degree pick to slip under it and CAREFULLY pull outward helped to break the stiction. Care is emphasized here, because you DO NOT want to scratch the cylinder bore of the Slave Cylinder, which is aluminum, or the bore of this Removable Cylinder, which is anodized aluminum. It's very easy to do...ask me how I know...and will interfere with proper sealing, as well as create a wear surface on the seals. Be gentle here!IMG_20220222_202939_731_copy_1500x2000.jpg
IMG_20220222_202948_849_copy_1500x2000.jpg
 
Last edited:

Potluckslammy

Member
52
71
18
Location
Umpire, AR
IMG_20220223_224451_008_copy_1500x2000.jpg
Here's the leftovers from the kit...the "Mystery O-ring", and the lipped seal from the one-piece Upper Piston. I saved these, as well as all the used seals and springs, which were mostly in good shape. Might come in handy...never know when you might need that spare!
 

Potluckslammy

Member
52
71
18
Location
Umpire, AR
IMG_20220225_184921_776_copy_1500x2000.jpgIMG_20220225_184940_664_copy_2000x1500.jpg
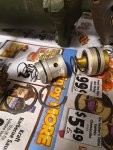
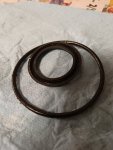
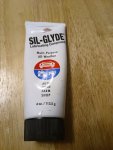
After a thorough cleaning...mostly brake cleaner and a bristle brush, since I don't have a parts cleaner at the moment...all static o-rings and seals were lubricated with SIL-GLYDE Lubricating Compound, available from the local auto parts store.

IMG_20220225_184959_593_copy_2000x1500.jpgIMG_20220225_184950_820_copy_2000x1500.jpg
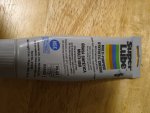
All moving surfaces and seals were lubricated with Super Lube Multi-purpose Synthetic Grease, purchased at HF. It is also a silicone grease, although a slightly lower viscosity than the SIL-GLYDE, and it contains PTFE. Slick stuff!
I chose these products for reassembly because they are non-hardening, not harmful to the rubber seals, and viable for a wide range of operating temperatures. Highly recommend!
 
Last edited:

Potluckslammy

Member
52
71
18
Location
Umpire, AR
Even after rolling around under the truck many times for various reasons, and laying eyes on the driver's side airpack on multiple occasions, I never noticed there was a SECOND one on the passenger side! It never clicked in my head..."Dual Circuit"! And not until reinstalling the driver's side unit late one evening, in the failing light, did my handy head-light happen to shine on the passenger side unit...at which point I realized I was going to get to do this TWICE! But no...just wait...it gets better! I ordered another kit from Monkeyboyarmy...no problemo...great guy...and I had the second assembly apart and clean by the time it arrived in the mail. But remember I said the End Cap Gasket on the first one was installed incorrectly? After pulling it back off to flip that little @#$& over, I actually got to enjoy this repair operation THREE TIMES, in total! WOOHOO! But hey, now I'm good to go! Right? I am good to go now, RIGHT?! 🤪
 

Mullaney

Well-known member
Steel Soldiers Supporter
Supporting Vendor
7,347
19,033
113
Location
Charlotte NC
Even after rolling around under the truck many times for various reasons, and laying eyes on the driver's side airpack on multiple occasions, I never noticed there was a SECOND one on the passenger side! It never clicked in my head..."Dual Circuit"! And not until reinstalling the driver's side unit late one evening, in the failing light, did my handy head-light happen to shine on the passenger side unit...at which point I realized I was going to get to do this TWICE! But no...just wait...it gets better! I ordered another kit from Monkeyboyarmy...no problemo...great guy...and I had the second assembly apart and clean by the time it arrived in the mail. But remember I said the End Cap Gasket on the first one was installed incorrectly? After pulling it back off to flip that little @#$& over, I actually got to enjoy this repair operation THREE TIMES, in total! WOOHOO! But hey, now I'm good to go! Right? I am good to go now, RIGHT?! 🤪
.
@Potluckslammy , That was a really NICE writeup!
Glad you could get the parts you needed from @Monkeyboyarmy .

Pictures are really great too!
 

3rdmdqm

Active member
429
101
43
Location
Woodbine Maryland
This is awesome! Thanks! I just did a complete rebuild of my short style air pack. I have a question and am wondering if I did something that will result in me disassembling the Airpack again or if it should be ok to just let it slide. After completely cleaning everything, I lubed everything with air tool oil after assembly, the inside of the main can, all the seals/o-rings, the shaft, everything. Now I'm wondering if this is going to create an issue with interacting with the DOT5 brake fluid on the hydraulic side or if am I over thinking and worrying about this and it is so minute it doesn't matter. Any advice?
 
  • Like
Reactions: HDN
Top
AdBlock Detected

We get it, advertisements are annoying!

Sure, ad-blocking software does a great job at blocking ads, but it also blocks useful features of our website like our supporting vendors. Their ads help keep Steel Soldiers going. Please consider disabling your ad blockers for the site. Thanks!

I've Disabled AdBlock
No Thanks