-
Steel Soldiers now has a few new forums, read more about it at: New Munitions Forums!
Terminus M1009
- Thread starter cucvrus
- Start date

More options
Who Replied?cucvrus
Well-known member
- 11,478
- 10,506
- 113
- Location
- Jonestown Pennsylvania
It is with a heavy heart and deep sorrow that I must report. At 0800--830 it was raining lightly. It remained overcast and the out look was grim with a 70% chance of rain. At 1500 it was a light rain. All was not lost. I transported the Terminus M1009 to the exhaust shop for an entire front to back replacement of the exhaust system with mufflers. One drive with the loud pipes was all it took to make that decision. I did a lot of other work around the place and am not worried about missing the paint job. I have plenty of time for getting that completed. I want it done for Rausch Creek. Thank you for your support and encouragement. i will not fail you when weather is in my favor. I would have wasted a lot of time if it was wet paint and it rained on it. I had thought about pushing Mr Rusty outside but decided against that. He has his rockers in primer and I do not want rust forming. Thanks for looking.
Last edited:
cucvrus
Well-known member
- 11,478
- 10,506
- 113
- Location
- Jonestown Pennsylvania
No it is NOT. I am only building an OFF ROAD use vehicle. I have entertained the thought of Antique Tags for this only. But I have no intentions to do a full rebuild. Like I said I have this For Sale in the classifieds and it just keeps adding costs to the vehicle. I am not going to let it regress any further back wards so I will make every attempt to do inexpensive repairs and improvements to it. I mean a complete exhaust $450-$500. that is a necessity. I don't see me putting new fenders and the such on this Terminus M1009 as a necessity. This is more or less a resurrection coming from being parked 20ft from a car crusher and being carried by a loader to driving it on the interstate yesterday. I never drove one with open header pipes. Does that have that much of an effect on the engine as far as acceleration power and poor up hill power? That was about to drive me crazy just driving it a 1/2 mile. I had my Son drive it he likes loud things but he even hated the roar and horrible sound with the straight pipes. Another thing was if this vehicle could talk it would have some stories to tell. It had broken tempered glass all over it in the cowl screen and inside from cars being carried over it from the crusher while it sat next to the crusher. That had to put the fear into it. Maybe it will help it self along to avoid that situation again in the near future. I do believe that vehicles have a self worth. And they hold them selves as they are treated and cared for. I don't believe in polishing a turd but if it runs and drives and everything works as intended that is a big bonus in my book. The other stuff will just come along slowly with a bit of effort and hard work on my part. This is my Saturday/Sunday afternoon Football game and kick off has happened. Let the game begin. The true test will be Rausch Creek. The seats are the next thing to be replaced. It has a bech seat from a Chevy truck in it now. I am going back to buckets. 2015 stock buckets from a GM van vinyl seats for this one.
CUCVLOVER
Active member
- 2,352
- 9
- 38
- Location
- west Tennessee, just outside Milan
Did you drive it with a full exhaust front to back just with no Mufflers?
Or just the headers?
Or just the headers?
cucvrus
Well-known member
- 11,478
- 10,506
- 113
- Location
- Jonestown Pennsylvania
Exhaust was broken off at mufflers. It will never be like that again. it is at the shop getting an entire stock exhaust system put back on it. it would not be much of a true off road test if i go and modify the Terminus M1009. I want it stock. I know how well they off road in stock form. No mods needed on my part. i will be doing the bushings on the springs and sway bar. Not this time but afterwards. i want it painted and serviced next and it will be good to go. And i am putting new bucket seats in it. it still has the seat bases under the bench seat and the seat belts are still there. That is coming soon.
CUCVLOVER
Active member
- 2,352
- 9
- 38
- Location
- west Tennessee, just outside Milan
Ok, so the pipes stopped somewhere under the driver seat or just behind. I cut mine there when I got it, they are loud that way and have a raspy sound, but withe full pipes I like it, it doesn't seem any louder than my dad's 454 with duals and some no name Mufflers that don't muffle much.
But I am 17 so I like a loud engine.
Anyway good luck with the build
But I am 17 so I like a loud engine.
Anyway good luck with the build
cucvrus
Well-known member
- 11,478
- 10,506
- 113
- Location
- Jonestown Pennsylvania
Kaiser67M715
Member
- 699
- 26
- 18
- Location
- NH
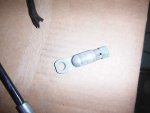
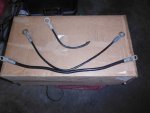
No, copper work hardens, which means eventually the cable will break(from the continual bending of opening and closing the gate). I would go to Home Depot, I am pretty sure they sell coated cable which would work, but actual cables can't be too bad in price can it?View attachment 584831View attachment 584830I have a few of the thread on battery cable ends and decided to make a few tailgate cables for Terminus M1009. I used 2 gauge negative cable. Do you think it will hold up to the bending. I know it is strong I hooked it up and towed a truck with it. What do you think?
cucvrus
Well-known member
- 11,478
- 10,506
- 113
- Location
- Jonestown Pennsylvania
I have new GM ones. I was just thinking outside the box. I doubt that I will have much of an issue with these 2 gauge cables. I will not be opening the rear gate that often. Thank you for your input. I did bend it back and forth for about an hour during a meeting I was in attendance. It was a movie and safety meeting and I also tried steel cable it is stiff and not as easy to bend. i will give it a try once. If it fails I will put the original ones on./ but they are discontinued from GM at this time. i was surprised that the amount of parts that are still available. And many were not available. I was trying to experiment to help out the guys that don't have unlimited funds to spend on the M1009. I have another part I am working on designing that will be a huge help to M1009 owners if I am successful. It was pouring rain tonight so I did not have chance to work on that part. I was just messing around with scrap parts i have around. i like making things out of scrap. Thank you for your response.
cucvrus
Well-known member
- 11,478
- 10,506
- 113
- Location
- Jonestown Pennsylvania
I still did not get Terminus M1009 back from the exhaust shop. I am hopeful for the weekend. I have been doing some design work to get the rear body strength up to par for the Rausch Creek off road adventure. Last time at Rausch creek I had a few issues with motor mounts and the fuel pump. I want to get past that this time. I also had an issue with the right side of the rear body imploding downward and jamming my gate. I think the 50+ lb chain bag behind the spare tire mount did not help. I hit a few huge bumps and I heard them bounce. I got back to camp and the right side of the gate was jammed. The class 3 receiver on the rear of the M1009 is a definite issue and interferes with the approach and decent angles. I put tape on it and did light wheeling and it cut through the tape. Terminus M1009 will not have the class 3 hitch. I removed it and used it on another project I was working on.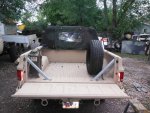 I used my Mule as a template for my design. The braces will be mounted to the back side of the rear corner posts and attach to the rear body mount bolt. I will remove the rear body bolts and put new longer ones in and use a small short reinforcement for the second bolt. That should give it plenty of support and really not interfere with the rear cargo area since the fuel can and spare tire are not allowing the use of the side area any way. what do you think? Any ideas? I am going to run a 4" x1/4" flat bar across the rear floor to attach the angle braces to and add extra support to the floor anchor areas.
 I used my Mule as a template for my design. The braces will be mounted to the back side of the rear corner posts and attach to the rear body mount bolt. I will remove the rear body bolts and put new longer ones in and use a small short reinforcement for the second bolt. That should give it plenty of support and really not interfere with the rear cargo area since the fuel can and spare tire are not allowing the use of the side area any way. what do you think? Any ideas? I am going to run a 4" x1/4" flat bar across the rear floor to attach the angle braces to and add extra support to the floor anchor areas.
the skull
Member
- 289
- 12
- 18
- Location
- mt victory ohio
Man that is looking good!
cucvrus
Well-known member
- 11,478
- 10,506
- 113
- Location
- Jonestown Pennsylvania
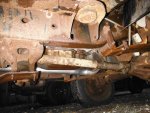
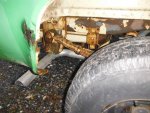
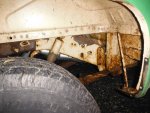
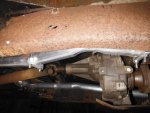 I picked up Terminus M1009 at the exhaust shop today. Much better sound. It still has foul smells coming from the exhaust like it is burning bad fuel. I changed the fuel filter cartridge and it runs much better. It has RED fuel in it BAD BAD. I had them run it back in stock form and stock mufflers except they jumped up to 2 1/2" pipe at my request. I am getting it ready for Rausch Creek in 2 weeks. I have a lot of updates to do so I am going to get started.
cucvrus
Well-known member
- 11,478
- 10,506
- 113
- Location
- Jonestown Pennsylvania
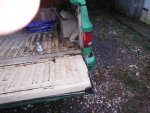
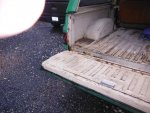 I must tell the truth. The battery cable gate support idea was a failure after I ran it thru the tests. I did not trust to have the gate open and sit on it. I had one fail at the jam nut after about 50 openings. I scrapped
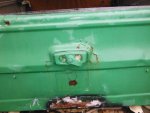
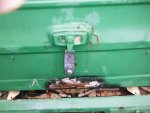
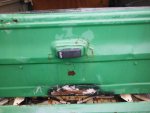 that idea. It was worth the effort and I tried. I just put a set of used cables and guides on that I had in a storage bin.
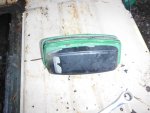
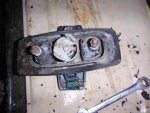
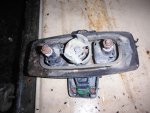 I started to work on repairing the rear gate. Amazing everything still works as designed. A bit sloppy and loose but none the less still functional. I added the crank handle to the driver and then decided to strip the gate out for more repairs and some welding. Check out that crank assembly. That is a true survivor. The lock and clutch are still operational. I will clean it up good paint it and then lube it.
cucvrus
Well-known member
- 11,478
- 10,506
- 113
- Location
- Jonestown Pennsylvania
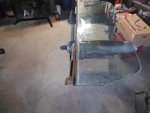
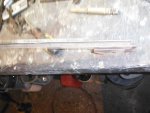
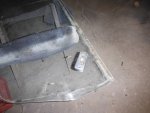
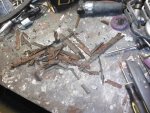
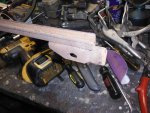
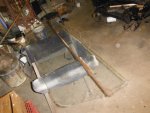
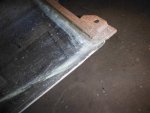
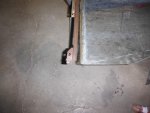
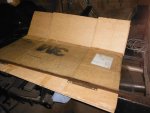
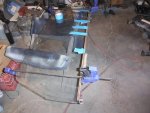
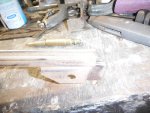 I removed the rear window and then found the sash was bent away from the glass from jamming in the worn out guide tracks. At that point I decided to remove the sash and clean it and get all the rust out of the sash channel. I used the urethane adhesive and clamped it back in place after a straightened the sash. Without the clamps the sash was still pulling away from being bent and twisted. I polished the guides on the end of the sash and I will paint the sash tomorrow after the adhesive drys. I used a small scraper and a wire wheel along with several 2" roloc discs to clean the sash channel. then I heated it good with a torch and dried it well. Washed it with wax and grease remover and the urethane adhesive will last longer then the rubber jam type they used. This gate was full of broken glass as most M1009's have been thru several rear windows during the service time.
cucvrus
Well-known member
- 11,478
- 10,506
- 113
- Location
- Jonestown Pennsylvania
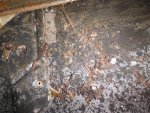
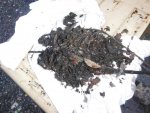
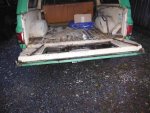
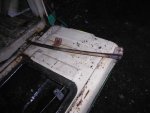
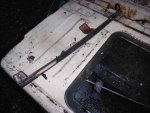 As you can see the rear gates are always a mess inside. I have several pounds of broken glass and dirt inside this one. No wonder they rust out and cause issues. I am going to overhaul this gate over the next week. I removed the side guide tracks and cleaned all the remaining felts from the tracks with the small grinder and the torch. They were nice and clean and I glued some new style channel in the track for a guide. It was an inexpensive repair and saved buying the $100. set of guide tracks.
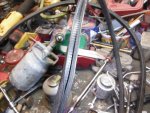
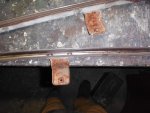
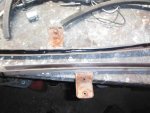
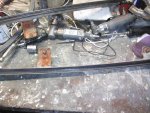 Hopefully this is helpful to someone. I know the gates are an expensive item to repair. I am going to just weld and rebuild this gate. i have some 12 gauge galvaneal panels cut to glue and weld onto the gate. I have a new top piece to weld on to get some strength back into the upper gate assembly
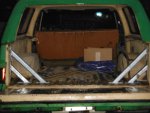
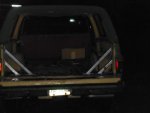 I am also working on getting some strength and reinforcements into the rear gate opening. I want to avoid the imploding rear like a lot of Blazers get from the decaying rear cross member. I would like to make a new rear threshold and cross member out of 1/4" steel tread plate and steel channel. I will work on that. I will be welding this and bolting it together. I will be doing this as a permanent addition to this unit.
cucvrus
Well-known member
- 11,478
- 10,506
- 113
- Location
- Jonestown Pennsylvania
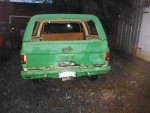
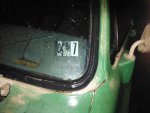 It has been expired from inspection since July 2004. As I expected it has been putting around on a lot for the past 11 years. thus the poor running and excessive smoking during the first 10 miles at 55 + MPH. It cleared up some but the exhaust still has the smell of bad fuel.
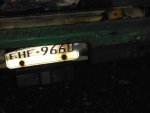
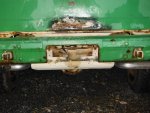 I removed the expired license plate that I have been driving on and removed the license plate bracket. I am going to be returning it to the scrap pile and attaching a pintle hook assembly in the original place. Thank you for looking. I hope I am not boring you. I am having a blast on these projects. this is a low budget build. I did most things with material and parts I have laying around. I really enjoy doing that. Man that rear gate is ugly. I will improve on that. Stay tuned.
Last edited:
CUCVLOVER
Active member
- 2,352
- 9
- 38
- Location
- west Tennessee, just outside Milan
Bored ? NO!!!!!
I like the build.
Did they put catalytic converters in the exhaust?
I like the build.
Did they put catalytic converters in the exhaust?
cucvrus
Well-known member
- 11,478
- 10,506
- 113
- Location
- Jonestown Pennsylvania
No why would they?
CUCVLOVER
Active member
- 2,352
- 9
- 38
- Location
- west Tennessee, just outside Milan
Me and dad where talking about this thread (he isn't a member) and he thought that they might be putting on cats is why the job cost so much. We thought that since they have inspection up there cats might be required or something.No why would they?
That's all
- 114,391members
- 167,269threads
- 2,354,786posts
- 4,151online users

