• Steel Soldiers now has a few new forums, read more about it at: New Munitions Forums!

  • Microsoft MSN, Live, Hotmail, Outlook email users may not be receiving emails. We are working to resolve this issue. Please add support@steelsoldiers.com to your trusted contacts.


UPFINN's Deuce Build

UPFINN

Member
229
1
18
Location
Ishpeming Michigan
Just got back inside awhile ago.

It took me around 8 hours to get one coat of rustoleum primer down on all visible frame and body sheet metal. I ended up using 1 gallon. Does that seem right, too thin? I'm thinking of doing another coat.

Mixing the reducer and cleaning the mess that happened during the process took the most time. I also found out that you should not tip a plastic hvlp gun upside down. The primer got in the air passages and coated everything inside the gun. Since no solvent traveled through the air passages, the primer was baked on from the hot supply air and can not be removed. It still works, but every plastic part inside the gun is red now. I hope there is no contamination issues with pieces flaking off while painting.
 

UPFINN

Member
229
1
18
Location
Ishpeming Michigan
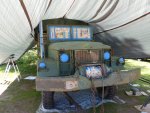
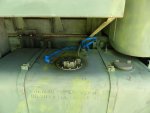
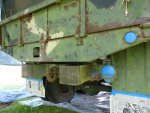
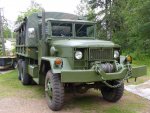
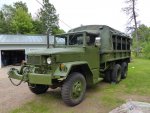
Here is the truck with the first coat of rustoleum rusty metal primer thinned 1 to 3 with acetone. It took one gallon to do a thin event coat over the visible portions of the truck, including frame, under the fenders, and bed outside of the frame. The harbor freight turbine hvlp did a good job. No orange peel put the paint is rough in spots due to sanding and spray sputter from turning the gun upside down. :oops: Today I will shoot the last coat of primer, let it dry over Monday, then spray the alkyd enamel on Tuesday. I hope to be finished on Wednesday. The truck will then be ready for a drive to show off in town before starting the process of servicing the axles, repainting rims, and changing fluids.

In all it should take 2 gallons of primer and 2 of alkyd enamel to paint the visible portions of the truck. I have yet to do inside of the cab, bed, troop seats, and bows. That will be done sometime this summer.

P1090623.jpgP1090624.jpgP1090626.jpg
 

UPFINN

Member
229
1
18
Location
Ishpeming Michigan
The last coat of primer is done! :naner:

It looks good except that I didn't thin it enough and some areas like the hood and side panels are a bit rough. Tomorrow we might get severe thunderstorms. I hope they go south of here so the tent doesn't get destroyed.

If everything works out I should be able to spray the paint on Tuesday.

One thing I am concerned about is it seems the primer is taking a awful long time to dry. Even after 48 hours it was still soft before re coating. I'm hoping it is safe to paint by Tuesday.
 

rustystud

Well-known member
9,071
2,388
113
Location
Woodinville, Washington
The last coat of primer is done! :naner:

It looks good except that I didn't thin it enough and some areas like the hood and side panels are a bit rough. Tomorrow we might get severe thunderstorms. I hope they go south of here so the tent doesn't get destroyed.

If everything works out I should be able to spray the paint on Tuesday.

One thing I am concerned about is it seems the primer is taking a awful long time to dry. Even after 48 hours it was still soft before re coating. I'm hoping it is safe to paint by Tuesday.
I have found that "Rustoleum" rusty metal primer takes a whole lot longer to dry then regular primer does. I had some brackets that took 7 days to fully dry.
 

UPFINN

Member
229
1
18
Location
Ishpeming Michigan
I have found that "Rustoleum" rusty metal primer takes a whole lot longer to dry then regular primer does. I had some brackets that took 7 days to fully dry.
So it probably won't be safe to paint by this Tuesday then?

One thing I am concerned about is that I just discovered I did not thin the primer enough so I got a lot of dry-spray. It is rough like carc now. By the time I figured out the primer was too thick it was too late and I did most of the truck. While experimenting I found spraying the thinner primer over the rough areas smoothed it out a little.

Will dry spraying cause poor adhesion to other layers of primer or paint? I think if I just do a few wet and thin coats of paint over the primer it should level out. I am also going to add a hardener to the alkyd enamel, but was warned it would turn the semi gloss to gloss. Maybe the roughness will balance out the extra gloss. I do not want high gloss.

Due to the slow drying it would take forever to wait to sand the rough areas down.
 

UPFINN

Member
229
1
18
Location
Ishpeming Michigan
Today I decided to fix the rough areas before painting over them. I took a piece of foam pool noodle and attached a sheet of 400 grit sand paper to it. I used it as a block and went over all the rough areas. The primer now has a consistent texture similar to carc.

I dry sanded instead of wet sanding. Wet sanding made a mess. Even with dry sanding the dust would not come off with compressed air, and I had to wipe it off with tack cloth. I don't know if the primer will be dry enough to paint tomorrow, even though I will have waited 40-48 hours. The primer says 24 hours before recoat and today it was still soft enough to gouge and scratch with a finger nail.
 

gimpyrobb

dumpsterlandingfromorbit!
27,785
747
113
Location
Cincy Ohio
If you read past posts about that primer, many folks who didn't wait for it to harden had their paint crack not long after they shot it. It might pay to wait a bit.

Just my 2 cent and going from memory of other posts in the past.
 

Kaiser67M715

Member
699
26
18
Location
NH
Wait till primer gets hard. Sometimes it will crack. Sometimes you can pull the topcoat off in sheets because it didn't stick to the primer. How humid is it where you are?
 

UPFINN

Member
229
1
18
Location
Ishpeming Michigan
Wait till primer gets hard. Sometimes it will crack. Sometimes you can pull the topcoat off in sheets because it didn't stick to the primer. How humid is it where you are?
Our daytime temperatures are around 70F and at night in the 50s and 40s. Humidity during the day is between 40 to 60% and at night 90 to 100% It also rains every other day. Truck is under a tarp so it doesn't get wet.

Today a finger nail can still scratch it, but that is not a good test to see if it is cured because the texture is kind of rough, so you might just be scraping off the bumps.
 
Last edited:

UPFINN

Member
229
1
18
Location
Ishpeming Michigan
This evening the primer still scratched easy. I think it will always be this way. I might try spraying paint on Thursday since today (Wednesday) it is going to rain. I'm thinking I might use a hair drier to heat a spot and see if it hardens up, then I can tell how much longer it needs to go. It is hard to decide what to do when you have never painted a vehicle before and have conflicting advice.

I also started sanding the outside of the rims. I wanted to service each axle one at a time and repaint the rims off the truck, along with painting the axle, but due to the long drying time of the primer and paint it will take a week per axle with the wheels off! That is almost of month of mostly waiting for paint to dry! :shock: It needs to be done by the 4th for the parade so I am just going to paint the outside of the rims. Putting lipstick on a pig :p
 

UPFINN

Member
229
1
18
Location
Ishpeming Michigan
Today I did the first coat of paint. I used all surface alkyd enamel from SW, thinned 4 to 1 with xylene, and hardener from Tractor Supply. I sprayed it with the harbor freight turbine HVLP and the 1.4 nozzle. Paint went on great. Very little orange peel. If only I would have thinned the primer better the surface would be less rough. It takes 1 gallon of paint to do visible portions of the truck body and frame.

The color very closely matches the troop seats and the cargo cover.

Had a few issues with runs. The paint is a lot thinner than the primer so I had to be more careful. Unfortunately there was also a giant flying ant hatch this evening and one flew right onto the engine bay side panel right after I sprayed. The ant flopped around stuck to the paint and made a big messy spot. When I tried to remove the ant it started coming apart aua. The paint got all scratched and lumped up in the spot so I had to brush it and spray more, then it started to run a little. The spot isn't noticeable from far away but it is up close.

Tomorrow I will spray the final coat and take pictures.
 

UPFINN

Member
229
1
18
Location
Ishpeming Michigan
Today was too wet to do anything.

I will have to do the last coat on Tuesday or Wednesday. My only concern is that the paint will harden up by then and I will have to sand it for the top coat to stick. Did anyone have this problem with oil based enamel?
 

UPFINN

Member
229
1
18
Location
Ishpeming Michigan
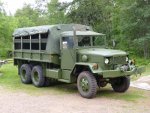
Took longer than I thought.

After I got the tarp off and the sunlight hit it, I could see some thin spots, so I touched them up. The thin spots are gone but now there is a white halo around the touch ups. Because under the tarp the light was diffused, I could not get enough light/glare to see any thin spots during the last coat. The hood looks pretty bad.

I did remove the masking tape, and it said easy to remove for 14 days. I am just near the end of the time limit and that was correct. The tape was a real pain in the a$$ to remove. It is like the solvent in the paint glued it to the windows and lights.

I am going to have to sand the rough spots in the paint with 400 grit sanding blocks, then do a nice even coat in the sun so I can see that I got everything. Since I removed the masking I will have to hold cardboard over the windows. I do not need to paint around any lights or windows, just need to block over spray. Before I sand I will have to let the paint bake in the sun for probably at least a week. It is too soft and just gums up the sand paper.
 
Top