army70deuce
Member
- 106
- 3
- 18
- Location
- Anderson, SC
I completed my power steering install on my 1970 M35A2 a while ago and am finally going to post my updated install instructions. The instructions that come with the kit are pretty good but I hit a few stumbling places on the way so I figured I'd make it easier for the next guy.
Instructions from Waterloo Specialties found here
http://www.waterloospecialties.com/WS_PowerSteering_20120516_01.pdf
First here are some basic tools you're going to need, I'm listing them so you won't be making the multiple trips to the hardware store like I did.
A good drill, corded 1/2 chuck
One 5/8 drill bit, the harder the better $15, expensive but get the black oxide or carbide, you have a lot of thick metal to drill through, do it in stages and let it cool.
A normal set of drill bits for metal.
1 1/2 inch hole saw. (can go a little larger, check size against install manual)
A grinder, can get a dewalt for $50 at ACE (was on sale)
Extension cord
two small cheap bolt (explanation to follow)
small sledge hammer, heavy with short handle
pitman arm puller (auto parts store about $15)(get the anti seize to go with it)
Full set of wrenches
Full set of sockets (impact if you have them)
You'll need a 1 1/2 socket for the steering wheel (I'm pretty sure that's the size)
You'll need a 1 1/4 socket for something else (can't remember but those are the only two you'll need besides a standard socket set)
straight hacksaw, the one with the small handle and blade, shaped like a knife
set of screw drivers
C-clamps, a four and a six inch will work, more is always better.
You do not need a hole punch set, I'll explain why later.
A large bucket, forget the 5 gallon buckets they sell for $5 at ACE, get the large 12-16 gallon colored yard bucket for $3-4 with rope handles, this is for draining the radiator, big opening so you won't make a mess and will hold the 8 gallons of antifreeze, I saved mine and put it back in later using a 32 ounce cup to dip and pour.
First step, read both the install manual and this all the way through and make a shopping list. I'm sure I've forgotten something off the list above and will mention it later.
Now find a power steering box, best bet is a auto salvage yard that deals with semi trucks and school buses. You need the Saginaw Model 710 steering box, part #7830389. Mine cost around $250 not counting the drive
Now you can order the kit, makes life a lot easier, the kit comes with the bolts for the steering box, found this out after I had gone and picked up the grade 8s from ACE. Steelsoldier members get a pretty good discount.
Ok now to install.
REMOVE THE FENDER - I didn't do this till the end and it would have made my life so much easier. You have to disconnect the turn signal lights first, then get a buddy the fender is heavy and bulky.
Turn your wheels to the left, this way the shaft that comes off the hub will not be directly over the axle, this will make taking the current steering linkage off a lot easier.
You do NOT have to take the wheel off at all.
USE PROPPER PPE, EYE Pro, and when using the grinder, hearing protection. Gloves aren't a bad idea either.
At this point you had better have it parked where you want it because it is time to make it inoperable.
Take off the grill, drain the radiator and then remove it, FYI I had one with a winch and that does make this more complicated.
You only need to remove one bolt on the top (red X) and two on the bottom of the radiator, then the two hoses to remove it.
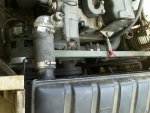
Remove the Fan
Take the plate off where the pump is going, clean off the old gasket, put the new gasket and recommended sealant (see install instructions) and mount the pump, easiest part of the process.
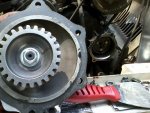
Take your pitman arm puller and use it to get the linkage off (where the long shaft connects to the shaft off the hub, this is why the wheels are turned, don't know real name or area) You’ll notice from the pictures that I didn’t have the wheels turned, ended up having to use a grinder and do some cutting. Don’t make my mistake, turn your wheels.
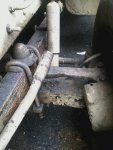
remove castle nut, Apply anti seize, tighten it down with a socket and give it a hard knock with the sledge, you will be hitting upward. Tighten more and repeat until it comes out.
Now that's done it is time to ruin your pitman arm puller.
Use the c-clamps or vice to hold the pitman arm puller then use the grinder to shorten the jaws (make the opening bigger) so that it will fit over the pitman arm which has a large splined shaft.
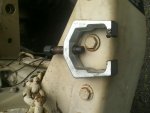
Remove the castle nut, then use the pitman arm (once cooled) to pull off the pitman arm. Same as before anti-seize already on it, tighten smack, and repeat
Move to the cab
Take out the horn removing the few screws and disconnecting the wire. Then get the 1 1/2 socket and put it on an impact, I tried using a breaker bar and it would not budge. It took me 2 quick bursts of the impact (yes you should use a impact socket if you have it, I didn't and the socket held up fine, I was wearing eye pro.) Take the steering wheel off, loosen up the bracket that holds the steering wheel to the dash and proceed to the steering box in the engine compartment. Disconnect the shaft from the box, pretty simple, and pull it out through the firewall.
Now comes the worst part of this install. Getting the steering box out. If you have a winch, disconnect the PTO drive shaft from the winch by removing the u-bolts at the winch and then let that end drop down and pull it out past the bumper, should just slide out.
Now when I called and asked about the steering box I was told some people disconnect the engine from the transmission and jack it up an inch and remove the engine mount bolts and shift it a few inches to the passenger side. I DID NOT DO THIS.
You can remove most of the bolts that hold the two halves of the steering box together with out any issues. For the other two it takes some time, effort, and four letter words. To get the one at the top rear (near cab) you need to take a cheap 9/16 box wrench and grind the back side flush with the handle (remove the bulge) that way it will fit between the steering box and the injector pump so you can losen the bolt. you might have to losen the bolts holding the steering box to the frame a little so you can pull the top of the steering box away from the IP to get the wrench in there.....it is a tight fit, hence making it thinner. also go under the engine so you can get the other PITA bolt lose, (also located near the rear) and then use a screw driver to pry the two pieces apart, FYI fluid will drain out.
Here is where the hack saw comes in. There is not room to remove those last two bolts, there's stuff in the way, so you have to take the hack saw and cut the bolt in half in the gap between the two halves of the steering box....it will take a while, I'd say use a sawzaw but I don't think it will fit.
Once the bolts are cut you can get under the truck and remove the half near the engine, then completely remove the frame mounting bolts and pull the box out. You might have to disconnect some copper lines to move them out of the way to get it out.
Now comes the easy part, haha.
They say to drill the rivets out that hold the old reinforcing plate on...yeah no. use a grinder and cut into the side of the rivet head removing the top.
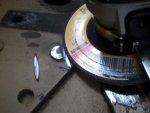
You can see the faint outline of the rivet now take your drill and use a bit smaller than that circle and drill in half inch. Oh make sure you punch a start for your drill.
skip using a punch for driving out the rivet, instead get the small bolt I told you to buy earlier and put it in the hole, so that the head is sticking out a bit (no matter what length bolt you got just drill a little shallower than the length of the bolt, also buy a longer one). Now that the bolt is resting in the hole, should be a good fit depending on drill bit size and bolt size used. Grab the sledge with both hands and wrack the crap out of it. Hit it until it starts pushing the rivet out. Those rivets have been in there 40 years they don't want to come out. Once it's started use the longer bolt. Repeat process with each rivet. The few cheap bolts are cheaper and easier to use than a punch that you'd have to hold, and one hand sledge work isn't enough force.
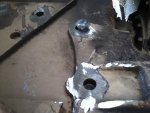
At this point you can pretty much follow the instructions provided. Use the C-clamps to hold the new support/reinforcing brackets in place and drill accordingly.
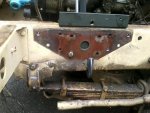
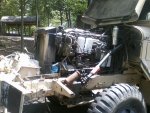
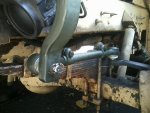
Before reinstalling the fan and radiator you have to cut a section of the fan shroud away so that there is a place for your power steering pump to fit. I did this with a cutting wheel attached to my air compressor, if you don’t have an air compressor you can buy a cutting wheel for your grinder. The measurements provided are pretty close, I’d go just a hair farther towards the middle, before putting the fan on get your buddy to help you set it in place before assembly and check your clearances.
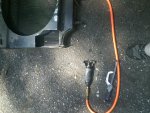
I have more pictures to fill in some of the gaps in the take down, especially with the steering box removal, I just need to find them. Instructions will be updated accordingly.
The deuce can now be steered from full left to full right and back, at a standstill from outside the cab with 2 fingers, I know that’s cheating but it makes it a whole lot more user friendly.
Instructions from Waterloo Specialties found here
http://www.waterloospecialties.com/WS_PowerSteering_20120516_01.pdf
First here are some basic tools you're going to need, I'm listing them so you won't be making the multiple trips to the hardware store like I did.
A good drill, corded 1/2 chuck
One 5/8 drill bit, the harder the better $15, expensive but get the black oxide or carbide, you have a lot of thick metal to drill through, do it in stages and let it cool.
A normal set of drill bits for metal.
1 1/2 inch hole saw. (can go a little larger, check size against install manual)
A grinder, can get a dewalt for $50 at ACE (was on sale)
Extension cord
two small cheap bolt (explanation to follow)
small sledge hammer, heavy with short handle
pitman arm puller (auto parts store about $15)(get the anti seize to go with it)
Full set of wrenches
Full set of sockets (impact if you have them)
You'll need a 1 1/2 socket for the steering wheel (I'm pretty sure that's the size)
You'll need a 1 1/4 socket for something else (can't remember but those are the only two you'll need besides a standard socket set)
straight hacksaw, the one with the small handle and blade, shaped like a knife
set of screw drivers
C-clamps, a four and a six inch will work, more is always better.
You do not need a hole punch set, I'll explain why later.
A large bucket, forget the 5 gallon buckets they sell for $5 at ACE, get the large 12-16 gallon colored yard bucket for $3-4 with rope handles, this is for draining the radiator, big opening so you won't make a mess and will hold the 8 gallons of antifreeze, I saved mine and put it back in later using a 32 ounce cup to dip and pour.
First step, read both the install manual and this all the way through and make a shopping list. I'm sure I've forgotten something off the list above and will mention it later.
Now find a power steering box, best bet is a auto salvage yard that deals with semi trucks and school buses. You need the Saginaw Model 710 steering box, part #7830389. Mine cost around $250 not counting the drive
Now you can order the kit, makes life a lot easier, the kit comes with the bolts for the steering box, found this out after I had gone and picked up the grade 8s from ACE. Steelsoldier members get a pretty good discount.
Ok now to install.
REMOVE THE FENDER - I didn't do this till the end and it would have made my life so much easier. You have to disconnect the turn signal lights first, then get a buddy the fender is heavy and bulky.
Turn your wheels to the left, this way the shaft that comes off the hub will not be directly over the axle, this will make taking the current steering linkage off a lot easier.
You do NOT have to take the wheel off at all.
USE PROPPER PPE, EYE Pro, and when using the grinder, hearing protection. Gloves aren't a bad idea either.
At this point you had better have it parked where you want it because it is time to make it inoperable.
Take off the grill, drain the radiator and then remove it, FYI I had one with a winch and that does make this more complicated.
You only need to remove one bolt on the top (red X) and two on the bottom of the radiator, then the two hoses to remove it.

Remove the Fan
Take the plate off where the pump is going, clean off the old gasket, put the new gasket and recommended sealant (see install instructions) and mount the pump, easiest part of the process.

Take your pitman arm puller and use it to get the linkage off (where the long shaft connects to the shaft off the hub, this is why the wheels are turned, don't know real name or area) You’ll notice from the pictures that I didn’t have the wheels turned, ended up having to use a grinder and do some cutting. Don’t make my mistake, turn your wheels.

remove castle nut, Apply anti seize, tighten it down with a socket and give it a hard knock with the sledge, you will be hitting upward. Tighten more and repeat until it comes out.
Now that's done it is time to ruin your pitman arm puller.
Use the c-clamps or vice to hold the pitman arm puller then use the grinder to shorten the jaws (make the opening bigger) so that it will fit over the pitman arm which has a large splined shaft.

Remove the castle nut, then use the pitman arm (once cooled) to pull off the pitman arm. Same as before anti-seize already on it, tighten smack, and repeat
Move to the cab
Take out the horn removing the few screws and disconnecting the wire. Then get the 1 1/2 socket and put it on an impact, I tried using a breaker bar and it would not budge. It took me 2 quick bursts of the impact (yes you should use a impact socket if you have it, I didn't and the socket held up fine, I was wearing eye pro.) Take the steering wheel off, loosen up the bracket that holds the steering wheel to the dash and proceed to the steering box in the engine compartment. Disconnect the shaft from the box, pretty simple, and pull it out through the firewall.
Now comes the worst part of this install. Getting the steering box out. If you have a winch, disconnect the PTO drive shaft from the winch by removing the u-bolts at the winch and then let that end drop down and pull it out past the bumper, should just slide out.
Now when I called and asked about the steering box I was told some people disconnect the engine from the transmission and jack it up an inch and remove the engine mount bolts and shift it a few inches to the passenger side. I DID NOT DO THIS.
You can remove most of the bolts that hold the two halves of the steering box together with out any issues. For the other two it takes some time, effort, and four letter words. To get the one at the top rear (near cab) you need to take a cheap 9/16 box wrench and grind the back side flush with the handle (remove the bulge) that way it will fit between the steering box and the injector pump so you can losen the bolt. you might have to losen the bolts holding the steering box to the frame a little so you can pull the top of the steering box away from the IP to get the wrench in there.....it is a tight fit, hence making it thinner. also go under the engine so you can get the other PITA bolt lose, (also located near the rear) and then use a screw driver to pry the two pieces apart, FYI fluid will drain out.
Here is where the hack saw comes in. There is not room to remove those last two bolts, there's stuff in the way, so you have to take the hack saw and cut the bolt in half in the gap between the two halves of the steering box....it will take a while, I'd say use a sawzaw but I don't think it will fit.
Once the bolts are cut you can get under the truck and remove the half near the engine, then completely remove the frame mounting bolts and pull the box out. You might have to disconnect some copper lines to move them out of the way to get it out.
Now comes the easy part, haha.
They say to drill the rivets out that hold the old reinforcing plate on...yeah no. use a grinder and cut into the side of the rivet head removing the top.

You can see the faint outline of the rivet now take your drill and use a bit smaller than that circle and drill in half inch. Oh make sure you punch a start for your drill.
skip using a punch for driving out the rivet, instead get the small bolt I told you to buy earlier and put it in the hole, so that the head is sticking out a bit (no matter what length bolt you got just drill a little shallower than the length of the bolt, also buy a longer one). Now that the bolt is resting in the hole, should be a good fit depending on drill bit size and bolt size used. Grab the sledge with both hands and wrack the crap out of it. Hit it until it starts pushing the rivet out. Those rivets have been in there 40 years they don't want to come out. Once it's started use the longer bolt. Repeat process with each rivet. The few cheap bolts are cheaper and easier to use than a punch that you'd have to hold, and one hand sledge work isn't enough force.

At this point you can pretty much follow the instructions provided. Use the C-clamps to hold the new support/reinforcing brackets in place and drill accordingly.


Before reinstalling the fan and radiator you have to cut a section of the fan shroud away so that there is a place for your power steering pump to fit. I did this with a cutting wheel attached to my air compressor, if you don’t have an air compressor you can buy a cutting wheel for your grinder. The measurements provided are pretty close, I’d go just a hair farther towards the middle, before putting the fan on get your buddy to help you set it in place before assembly and check your clearances.

I have more pictures to fill in some of the gaps in the take down, especially with the steering box removal, I just need to find them. Instructions will be updated accordingly.
The deuce can now be steered from full left to full right and back, at a standstill from outside the cab with 2 fingers, I know that’s cheating but it makes it a whole lot more user friendly.
Last edited:


