

- 134
- 15
- 18
- Location
- Battle Ground/WA
I experienced that same issue on a 1980 K-5 Blazer, the mechanic at the front end shop had to torque the pinch bolt on the Pitman Arm way past the specified torque, he didn't even use a torque wrench, just wailed away with an impact, the "clunk" never came back and that was over 30 years ago.
Today I finally found a vibration rattle that has bugged me for a long time, well since I got my M1009 in 2011. There were lots of rattles that have been resolved but this last one I just couldn't find, although since I have replaced both alternators over the years, I am sure it was my fault. I was crawling around under the front to the engine trying to find the source of an oil leak and saw this. As you can see the flange nut has backed off almost all the way on the drivers side alternator bracket, but since this little truck "likes me" it held on to the nut and rattled annoyingly, like my dog barking at the door to be let in, until I finally saw it and tightened it back up, I get lucky a lot that way, LOL.
Today I finally found a vibration rattle that has bugged me for a long time, well since I got my M1009 in 2011. There were lots of rattles that have been resolved but this last one I just couldn't find, although since I have replaced both alternators over the years, I am sure it was my fault. I was crawling around under the front to the engine trying to find the source of an oil leak and saw this.
As you can see the flange nut has backed off almost all the way on the drivers side alternator bracket, but since this little truck "likes me" it held on to the nut and rattled annoyingly, like my dog barking at the door to be let in, until I finally saw it and tightened it back up, I get lucky a lot that way, LOL.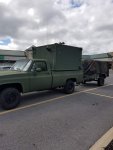


.jpg")
.jpg")


 While this may be common knowledge, I wanted to share it for all the people like me that didn't already know this trick.


