• Steel Soldiers now has a few new forums, read more about it at: New Munitions Forums!

  • Microsoft MSN, Live, Hotmail, Outlook email users may not be receiving emails. We are working to resolve this issue. Please add support@steelsoldiers.com to your trusted contacts.


What have you done to your CUCV today/lately - Part 2

Evil Dr. Porkchop

Well-known member
Supporting Vendor
1,952
269
83
Location
Colchester, VT
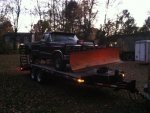
Earlier this week I picked up a very rotten 85 Ford with an 8' Fisher Speedcast plow. The truck frame is completely broken in half on the passenger side:shock:, but the plow works pretty good.
image.jpg
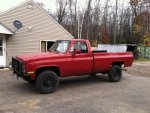
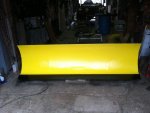
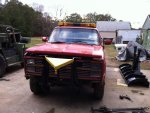
The last few days my brother and I have been fixing up the plow and getting it ready for an m1028. I already had the push plates for a Chevy from another parts truck and most of the other parts are the same from the Ford. I've got to get a couple longer hoses made up but hopefully it will be semi-functional in the next week. The truck itself needs a bunch of work but I've got most of the parts for it and the frame/springs/axles are in great shape.
image.jpgimage.jpgimage.jpg
 

Assel

Member
197
7
16
Location
Germany Schwarzwald-Baar
Today I changed the oil in the front differential. The cover didn't even have a gasket on it just lots of silicone rubber. After i got the oil out I cleaned up the cover a little. It didn't have any chunks of metal on the magnet or anything.
I put permetex on the cover, then the correct gasket from NAPA, then sealer again. I held the cover up and got a bolt in it, then I put the rest of the bolts in and tight. Filling the oil was a little difficult. I ended up cutting down a flex filter and using a cut up bottle for the flange. Then I had to cut down another bottle to use to put the oil in because I couldn't get the jug up there.
This is the permetex I used.
http://www.permatex.com/products-2/...on-form-a-gasket--no--3-sealant-liquid-detail
Then I greased the steering, and the knuckles. I need to get the stuff and grease the front drive shaft and also the rear.
Hey, When I did differential Fluid on my ´09 I had so scratch about 2 hrs with a ceran-field scratcher to remove some sort of silicone (they used the same to seal the transmission etc.) also no metal pieces etc. in it but some metal "dust" ...I just put in the gasket and tightened it up crosswise... and heres a tip for filling the fluid up: use a syringe !...you know the real big ones..which hold about half a litre or more. I found mine in a small lawn-mover oilchange kit for ~10€ , put some plastic hose on it and you can pull out the diff-fluid from its bottle and inject it nice & easy into the diff..no spilling around or anything.

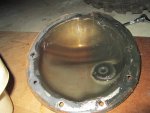
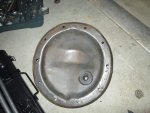
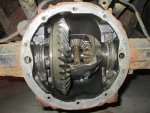
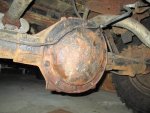
here are some pictures of my rear diff IMG_2255.jpgIMG_2257.jpgIMG_2261.jpgIMG_2262.jpg
 

NovacaineFix

Member
662
1
18
Location
San Diego, California
Wow that looks NICE. What's that on top of the bracket? A pump for priming?

I have the same spin-on filter, minus the primer.
I know this may sound stupid, but I was wondering, does the primer serve a good purpose?
If this is installed prior to the pump, I can see the use of the primer, but if it is installed after the pump??

Again, I can see the purpose if you had an electric pump installed further back on the vehicle, pushing fuel up to the filter.

No offense, not trying to say it's useless, I would probably still put on one on mine as a just in case deal, but I was curious.
 

phil2968

Active member
2,591
17
38
Location
Lakeland, Florida
Hey, When I did differential Fluid on my ´09 I had so scratch about 2 hrs with a ceran-field scratcher to remove some sort of silicone (they used the same to seal the transmission etc.) also no metal pieces etc. in it but some metal "dust" ...I just put in the gasket and tightened it up crosswise... and heres a tip for filling the fluid up: use a syringe !...you know the real big ones..which hold about half a litre or more. I found mine in a small lawn-mover oilchange kit for ~10€ , put some plastic hose on it and you can pull out the diff-fluid from its bottle and inject it nice & easy into the diff..no spilling around or anything.

here are some pictures of my rear diff View attachment 592623View attachment 592624View attachment 592625View attachment 592626
Where is the GOV locker gone? Did you swap in an open carrier?
 

Assel

Member
197
7
16
Location
Germany Schwarzwald-Baar
I guess it was broken and someone removed it, was my first thought when I opend it aswell....since I dont do real hard offroading I dont really care...with proper load in the back (tools etc. its no problem until you really need to flex...) maybe oneday I get a lift & M1008 axles :p
 

NovacaineFix

Member
662
1
18
Location
San Diego, California
Finally got to putting my new radiator in my 1009, Yay!

The 1st one I bought had a slight crush on the radiator core, returned that one and got another. This one seems to be in much better shape.
Along with the radiator, replaced both upper and lower radiator hoses, both heater core hoses and the water pump by-pass hose. Added in some cooling system sealer due to the fact that I was getting a lot of rust in the cooling system and felt that sealing it may [hopefully] reduce the amount of rust. I am hoping that it is just the springs within the lower radiator hose that were the cause and not the block and heads, we'll see.

Anyway, had no issues with the oil cooler or trans cooler lines as mentioned by others, they both went in with little to no effort, but I can see where it may cause some issues for others.
These are the oil cooler lines and you can see that they are starting to mushroom out slightly. If you tighten these too tight, it will mushroom out more and cause a extremely tight fit when installing them into a new radiator, some had stated that they have had to shave the protruding ends down for a better fit.
20151107_120319.jpg20151107_120311.jpg
Also make sure that you use new O-rings when changing these out, don't use standard black O-rings as the oil will deteriorate them very quickly, use O-rings designed for use with oils. On the cheap Harbor Freight has an assortment of HNBR O-rings for just a few bucks, they are perfect to use with oil lines.
20151108_105301.jpg

My radiator was purchased from Carquest part #432098 (cost was about $350) and came with the extra brass fittings, but were not needed. Also purchased was a new low coolant sensor [part # BWD-S8018], I had to replace mine since I accidentally melted mine, didn't know it was just plastic, oops!
BTW, you'll need to take the allen screw plug out of the top port of the radiator for use of the heater core line, the main brass lug is 1" and the allen plug was 6mm.
For the low coolant sensor, you'll also have to remove the square drive plug, make sure you use thread sealer when installing the new sensor, or it may leak.
20151108_104234.jpg20151107_115834.jpg20151107_115827.jpg

The one thing that kind of drives me a bit nutty on this radiator is, Why are the oil cooler lines flipped? The oil cooler lines come out of the driver's side of the block, but yet the connections are on the passenger side of the radiator, The tranny cooler lines come out of the passenger side of the trans, but yet the cooler line connections at the radiator are on the driver's side. All other GM radiators I have ever seen have the tranny cooler lines on the passenger side. My wifes 92 GMC Yukon has the lines on the correct side, oil on the driver's and tranny on the passenger.
I don't know, maybe someone had the paper flipped over when they designed this one.

Either way, the radiator is in, no leaks and runs very well. If you are in need of a radiator, try this one. I believe it is still manufactured by Vista Pro, just re-branded by Carquest, but not 100% sure.
 
Last edited:

seansilverado

New member
17
0
1
Location
Omagh UK
Installed a new cold advance sensor today , running nicely in the colder mornings , also did the resistor bypass, I have a manual glow plug switch installed & I notice the hand on the charging gauge doesn't go into the yellow as far as it used to is this normal?
 

CUCVLOVER

Active member
I messed with the truck some more today.

Today I added some lights. The single oval light was ok but not enough. I had planned on adding read lights for a while but since dad bought a new Chevy 3500 with light in the mirrors I could not let him have all the fun.
So I popped a hole in part of the head ache rack and used the lights mounting bracket to hold each light. I wired the lights in to toggle switch. So the two led lights and the center on come on at the same time. The lights are just led work lights from tractor supply. They have 5 led bulbs apiece.KIMG1078.jpg

Then I put some new valve stem caps on. KIMG1076.jpg
The black and chrome looks nice with the black wheels and chrome lug nuts.

Then I put some new door lock handles on. KIMG1080.jpg
I had to drill the holes out and tap them to make them work. I don't remember what the tap size was. The chrome actually doesn't look bad.

Then I did a little decorating to the front of the truck.KIMG1081.jpg
Do you guys think the chain will ride like that?

Also I put a new sticker on the truck.KIMG1075.jpg
I know its not the correct sticker but its ok.
 

cucvrus

Well-known member
11,277
9,613
113
Location
Jonestown Pennsylvania
I added a few tie rings to the ceiling beams in my barn / garage. It makes it a lot nicer to remove and install truck beds and cabs. I just use ratchet straps and it works like a dream. a CUCV truck bed might weigh about 600 lbs. That is 4 straps at 150 lbs each. Easy to lift and easier on the back. I was going to put a motor hook in before but decided to go with an H beam instead of trusting the 100 year old beam. It is in good shape but I want top keep it that way. I have the M101 hanging from the ceiling at this time. I will let it hang around a while. At least until Tuesday when I get back from a trip I am going on. I am taking my Mule on a long trip. I never trusted to go further than 100 miles away before. I will report back. Going North. I put a 110 inverter in the Mule today so I could take my house XM radio with me.
 

gottaluvit

Active member
I added a few tie rings to the ceiling beams in my barn / garage. It makes it a lot nicer to remove and install truck beds and cabs. I just use ratchet straps and it works like a dream. a CUCV truck bed might weigh about 600 lbs. That is 4 straps at 150 lbs each. Easy to lift and easier on the back. I was going to put a motor hook in before but decided to go with an H beam instead of trusting the 100 year old beam. It is in good shape but I want top keep it that way. I have the M101 hanging from the ceiling at this time. I will let it hang around a while. At least until Tuesday when I get back from a trip I am going on. I am taking my Mule on a long trip. I never trusted to go further than 100 miles away before. I will report back. Going North. I put a 110 inverter in the Mule today so I could take my house XM radio with me.
Radio? I thought that Detroit 6.2 was music!
 

Keith_J

Well-known member
3,657
1,313
113
Location
Schertz TX
Yuck. Still have the rear axle on the 1031 disconnected..weather moved in delaying the spring re-arching project with new shocks. Tomorrow the ground should be dry enough to pull the right spring, drag them to town for re-arching and then reinstall tomorrow. The rear bumper at the frame ends is on jack stands with a 50 ton jack under the bumper. All resting on 3/4" plywood. While it is secure, the rain makes it nasty.
 

rsh4364

Active member
1,372
15
38
Location
greensprings ,ohio
Its nice to see MV restorations,but its almost more fun seeing how individuals put there spin on what a MV should be,and how they modify to suit their needs.
 
Last edited:

max1008

New member
337
3
0
Location
Blue Bell, PA
removed the in-tank fuel sock. It keeps clogging every 4-6 months. Its a napa fuel sending unit, ive had problems with it ever since I installed it. So i pulled it off and i am searching for a good in-line fuel filter to go before the fuel pump.
 
Top
AdBlock Detected

We get it, advertisements are annoying!

Sure, ad-blocking software does a great job at blocking ads, but it also blocks useful features of our website like our supporting vendors. Their ads help keep Steel Soldiers going. Please consider disabling your ad blockers for the site. Thanks!

I've Disabled AdBlock
No Thanks