• Steel Soldiers now has a few new forums, read more about it at: New Munitions Forums!

  • Microsoft MSN, Live, Hotmail, Outlook email users may not be receiving emails. We are working to resolve this issue. Please add support@steelsoldiers.com to your trusted contacts.


What have you done to your CUCV today/lately - Part 2

thz71

Member
159
0
16
Location
Waverly ia.
Deleted this crap


In favor of this

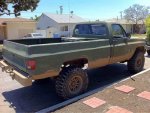
Half the exhaust out

Rims and tires on
shackle angle (very happy with it
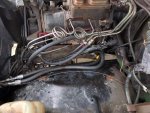
Ran a new passenger side front hard brake line and a reward rear hard brake line, then worked for an hour or more on bleeding the brakes still nowhere near where I want them but I have no leaks yet so that good.
 

tim292stro

Well-known member
2,118
39
48
Location
S.F. Bay Area/California
If you plan on running that truck empty on the street, you may want to put the proportioning valve you took out back in. Without it, your rear brakes may lock up sooner than they should (of course with bigger tires you may be able to "get away with it"). 2cents

Getting closer [thumbzup]
 

german m1008

Well-known member
Steel Soldiers Supporter
883
1,302
93
Location
Rhein-Main Area, Germany
Agreed with tim292stro!
Anyone of the PO, of my M1008, has the rear proportioning valve removed!?!
It's a Safety thing!
When the streets are wet or something else, hard breaking is hazardous.
Think twice ;-)
But, it's on you.
 

cucvrus

Well-known member
11,290
9,670
113
Location
Jonestown Pennsylvania
I have replaced several of the rear valves on trucks at owners requests for that exact reason. Snow and ice braking is treacherous with out it. i have an M1028A2 with a salt spreader in the back. When it was empty it would lock all the time. The arm had rusted from the valve and stuck. It is fixed now. I kept several of the valves with the arm attached from parts trucks I came across in my travels. Good to have spare parts.
 

thz71

Member
159
0
16
Location
Waverly ia.
If you plan on running that truck empty on the street, you may want to put the proportioning valve you took out back in. Without it, your rear brakes may lock up sooner than they should (of course with bigger tires you may be able to "get away with it"). 2cents

Getting closer [thumbzup]
The flat bed is alot heavier than the original bed. I'm going to be running 36s or 38s. If it is a problem I'll put a normal prop valve in. I'm also not running a sway bar it has a big cam and not much vacuum. it's not going to be driven on the street much. It's a toy I have plenty of other trucks if it turns out to not be very streetable.
 

Chaski

Active member
684
55
28
Location
Burney/CA
The flat bed is alot heavier than the original bed. I'm going to be running 36s or 38s. If it is a problem I'll put a normal prop valve in. I'm also not running a sway bar it has a big cam and not much vacuum. it's not going to be driven on the street much. It's a toy I have plenty of other trucks if it turns out to not be very streetable.
To further flog the dead horse...


Here is a GM TSB on the subject:


GMC NUMBER: 88-T-151

GROUP: 5 - Brakes

DATE: August, 1988

CORPORATE NUMBER: 865010R
SUBJECT: REAR BRAKE SENSITIVITY - HEIGHT SENSING VALVE REMOVAL

MODELS: 1984-86 C/K 3500 AND 1987-88 R/V 3500

THIS BULLETIN IS A REVISION OF TRUCK SERVICE BULLETIN 85-B-79, DATED MAY, 1985, UPDATING FOR MODEL YEARS 1984-1988.
1984-1986 C/K 3500 and 1987-1988 R/V 3500 series trucks are equipped with a rear suspension height sensing device that optimizes the brake proportioning valve setting for the load the vehicle is carrying. The height sensing system adjusts the brake balance in vehicles subjected to a range of loading conditions. Occasionally, vehicle modifications by body builders or owners influence the height sensing device. If a vehicle has had rear suspension modifications that affect its trim height or the spring rate, and the driver comments about the brake modulation characteristics of the vehicle, it is recommended that the height sensing system be removed and the brake system be revised as described below:

Parts listed below are currently available from GMSPO.

1. Detach rear brake hose from lever and bracket assembly. Reference Figure No. 1.

2. Remove lever assembly and bracket from axle.

3. Install rear brake hose bracket (P/N 348978) and spacer (P/N 2355099) with a 3/8-16 x 1.38 bolt (P/N 358000 - shorter bolt removed in Step No. 2) in the upper cover hole. Reference Figure No. 2. Use Loctite 75 or equivalent on the bolt threads.

4. Attach brake hose to bracket with bolt from original installation.

5. Install a 3/8-16 x 1-3/4 bolt (P/N 9439637 - longer bolt removed in Step No. 2) through spacer P/N 14055556 (removed in Step No. 2) in remaining axle cover attaching hole. Use Loctite 75 on bolt threads or equivalent.

6. Disconnect brake pipes from height sensing valve and brake hose, and discard short brake pipe. Reference Figure No. 1.

7. Remove and discard height sensing valve, bracket, and bolts.

8. Carefully reposition the rear brake pipe, and connect it to the rear brake hose.

9. Bleed and test brake system per Section 5 of the appropriate Light Duty Service Manual.


Original link: http://67-72chevytrucks.com/vboard/showthread.php?t=582800
 
Last edited:

shotty

Active member
211
55
28
Location
Northern VA :(
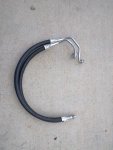
Took the oil cooler lines down to a hydraulic shop and had them install new rubber hose. They had to cut and weld new fittings on the metal fittings to work with their crimps I guess, so they did that, installed some nice goodyear rubber hose, and then I guess they hit the fittings and tube with either silver paint or possibly one of those anti-rust zinc sprays. Not what I would have done but whatever, they cleaned the tube and it's all pretty now. I have new rubber lines that don't leak and it was (slightly) less than buying some replacement assemblies. $86 out the door and I was able to put my truck back together in one day. The supply line was a bit longer than it was before but it still works fine, so I'm pretty happy as long as it doesn't start leaking.

IMG_20160106_140524.jpgIMG_20160106_145040.jpg
 

True Knight

Active member
668
170
43
Location
San Pedro, CA
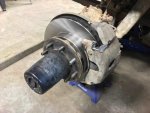
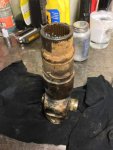
Replaced the front rotors, greased everything that could be greased, which for me includes the front suspension bushings. Took apart the front driveshaft and re-greased it. There wasn't much left to lubricate it other than some rusty water! I installed a grease fitting on it so I can keep it greased more easily from now on.

ImageUploadedByTapatalk1452229090.578703.jpgImageUploadedByTapatalk1452229102.662747.jpg
 

gottaluvit

Active member
Put the humvee tires back on that was on the truck when I got it. I think I need new kingpin bushings, as it drove very good with 31s on it, but not very well at all with the 37s. I felt some front end wobble on turns especially. Gotta hope for another somewhat warm day with no rain now.
 

True Knight

Active member
668
170
43
Location
San Pedro, CA
Put the humvee tires back on that was on the truck when I got it. I think I need new kingpin bushings, as it drove very good with 31s on it, but not very well at all with the 37s. I felt some front end wobble on turns especially. Gotta hope for another somewhat warm day with no rain now.
If they are worn they will need to be replaced, however when I switched to 37's it still had death wobble (all new suspension and kingpin bushings, new kingpin springs, new steering stabilizer). I found that the larger, heavier tires required more kingpin spring pressure to control the load. A single, large 1/8" thick washer under each kingpin spring fixed the problem. (2 washers per side was too much pressure and didn't allow the steering to move freely.)
 

gottaluvit

Active member
If they are worn they will need to be replaced, however when I switched to 37's it still had death wobble (all new suspension and kingpin bushings, new kingpin springs, new steering stabilizer). I found that the larger, heavier tires required more kingpin spring pressure to control the load. A single, large 1/8" thick washer under each kingpin spring fixed the problem. (2 washers per side was too much pressure and didn't allow the steering to move freely.)
Thank you very much. Great to hear this from someone who went through the same issue recently. I remember reading where you mentioned the washer but hadn't realized it took just that after everything else you had done.
 

cucvrus

Well-known member
11,290
9,670
113
Location
Jonestown Pennsylvania
What I did to my CUCV today by CUCVRUS. I bought it. A 1987 M1028. I did not get it home yet and I will post pictures once I do. I think the 1987 models are far and few. I only ever had 2 of them and this was 1 of them. The owner I sold it to passed away and the wife wanted it out of there. It is not perfect but it did fire right up and drive to a friends place till I get done with a few major projects I am working on here at my place. My other CUCV's have not moved in the past 6 days. To cold and I don't feel like putting any stress into them or myself. They would all start but I like the opportunity for a change of pace. Drive something different during the winter when I can. This 1987 M1028 has an odd paint job just black and green. It came from FITG a couple years back along with 4 others I bought at the time. It was used hard while the older gentlemen had it. He was a wood cutter. I replaced the back window in it twice while he owned it.
 

True Knight

Active member
668
170
43
Location
San Pedro, CA
Thank you very much. Great to hear this from someone who went through the same issue recently. I remember reading where you mentioned the washer but hadn't realized it took just that after everything else you had done.
Yup. No problem! And I had never had any death wobble until after installing 37's. So if worn parts aren't the problem the washer will fix it.
 

Recovry4x4

LLM/Member 785
Super Moderator
Steel Soldiers Supporter
34,014
1,814
113
Location
GA Mountains
Had the underdash starter relay stick on one of the trucks. Was able to get both negative cable off before any smoke escaped. Dumped the factory relay in favor of the one Devilman96 used in his CUCV build back in 2009. Works great again.
 

True Knight

Active member
668
170
43
Location
San Pedro, CA
How deep of water do you plan on going thru?
That deep?
Pretty much. Ha ha.
ImageUploadedByTapatalk1452455060.032129.jpg
ImageUploadedByTapatalk1452455386.169445.jpg

That is a good call. Might as well run your differential vents just as high.
Yup, they are both run up high. Straight from the military auction the front diff vent was run up by the top of the coolant overflow. And I ran the rear diff vent up to above and behind the driver side tail light a few years ago.
 
Last edited:
Top
AdBlock Detected

We get it, advertisements are annoying!

Sure, ad-blocking software does a great job at blocking ads, but it also blocks useful features of our website like our supporting vendors. Their ads help keep Steel Soldiers going. Please consider disabling your ad blockers for the site. Thanks!

I've Disabled AdBlock
No Thanks