• Steel Soldiers now has a few new forums, read more about it at: New Munitions Forums!

  • Microsoft MSN, Live, Hotmail, Outlook email users may not be receiving emails. We are working to resolve this issue. Please add support@steelsoldiers.com to your trusted contacts.


What have you done to your CUCV today/lately - Part 2

gottaluvit

Active member
Pretty much. Ha ha.
View attachment 602774
View attachment 602776


Yup, they are both run up high. Straight from the military auction the front diff vent was run up by the top of the coolant overflow. And I ran the rear diff vent up to above and behind the driver side tail light a few years ago.
Nice. All Chevy 4x4s from that era did that with the front but the rear was just up to the bottom of the bed. I never moved any but never went over the rockers either. I think I will move mine now as this beast beats civy Chevy's hands down and I have caught myself taking it further than I ever have with a truck, and I want it to last.
 

ltcray

Member
Had to pull the power steering pump bracket out today- while tracking down a really bad rattle (found it....), discovered the bracket was broken in two places. Power steering pump was just about ready to fall out. Also found a really bad booger weld where some nut thought he knew how to weld. Ended up grinding out all of the old weld, and starting over. Love my Lincoln Precision 185 TIG welder. BTW.... I've found the best way to tension the PS belt is to use a crow bar. Hook the fork under the edge of the PS bracket on the drivers side, and rest the heel of the bar on the frame. The trick is to grab the edge of the bracket with the center of the split in the fork. That way you're less likely to ding the PS reservoir. When you pull, the PS pump will rotate properly and you can tighten down all the bolts while maintaining tension with the bar.
 
Last edited:

NovacaineFix

Member
662
1
18
Location
San Diego, California
That's a good way.

THX383.jpg
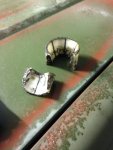
I use the Thexton tool #THX383. It is supposed to make things easier. I guess it would if you had an extra hand or 2, which I do not.
It works kind of like your method, it hooks to the lip of the bracket and you use a breaker bar to apply the leverage.
This all sounds good, except that while applying the leverage to keep the belt tight, you are just about out of room to apply more tension and the tool wants to keep slipping off of the bracket.

I have found, through many trials and many errors, that I use an old jack handle, slip it over the ratchet or breaker bar and apply tension. Then I zap it tight with a high torque air ratchet before either the bar slips or the ratchet comes loose.

Many profane words have come out of my mouth when "trying" to adjust the tightness of my PS belt.

After all this, it always seems to be too loose, belt is flapping slightly, but no squeals from it, even under load.

Words of Wisdom: Never lose that hose protector on the top hose or many leaks will come your way!
 

cucvrus

Well-known member
11,279
9,624
113
Location
Jonestown Pennsylvania
Had to pull the power steering pump bracket out today- while tracking down a really bad rattle (found it....), discovered the bracket was broken in two places. Power steering pump was just about ready to fall out. Also found a really bad booger weld where some nut thought he knew how to weld. Ended up grinding out all of the old weld, and starting over. Love my Lincoln Precision 185 TIG welder. BTW.... I've found the best way to tension the PS belt is to use a crow bar. Hook the fork under the edge of the PS bracket on the drivers side, and rest the heel of the bar on the frame. When you pull, the PS pump will rotate properly and you can tighten down all the bolts while maintaining tension with the bar.
Good save on the power steering pump bracket. At this point it would be wise to all. You will need to fix that broken bracket. they are not getting any easier to find. They are out of the system unless someone has a secret stash somewhere. I thought of asking to get some power steering pump brackets made up at a fabrication shop. But I don't need any and the set up cost on a few would be a killer. I don't feel making them would be a problem. But making a few gets expensive. Good fix. good Luck. I hope you have both the brackets in place on the bottom of the pump. That relieves a lot of that tension.
 

cucvrus

Well-known member
11,279
9,624
113
Location
Jonestown Pennsylvania
I spread 6 ton of antiskid and 3 tons of salt already this AM. The CUCV was flawless. Worked well. I drove it out on the highway to get more salt. It drove well after I laid the hammer down and burned out the last years build up from being driven under 25 MPH. It sure puts out the smoke the first mile or so. It needs to get a new exhaust system. It is to loud. I have a hard time hearing the spreader working. We had an ice storm last night and I spread salt and antiskid on all the drives and walkways. I tried the rear camera on the spreader. Hard to see salt and fine stone on a back up camera. Mirror works best. Have a great day.
 

True Knight

Active member
667
170
43
Location
San Pedro, CA
Anybody know where to get these little check valves. I'd like to do this as well.
Yup. Off of vehicles at the junkyard.

P.S. They don't really have anything to them. The plastic top piece is similar to a chimney topper. Air flows freely in and out, it's just there to keep stuff from falling in the hose.
 
Last edited:

cucvrus

Well-known member
11,279
9,624
113
Location
Jonestown Pennsylvania
I put a couple on trucks that I routed the vent line up high and put an inline gas filter in. A clear one and pushed a plastic Christmas tree in the end just to cap it off. As long as it was in the hole it did not have to be tight. It was just that a place to vent. Sort of like it was originally. Inexpensive fix.
 

UNIMOG-GUY

Active member
233
11
28
Location
Blacksburg, VA
Well, I want to put new kingpin bushings in anyway as I doubt it's ever been done. The washer is going in during assembly.
I had the awful death wobble on my 1028 and just replaced the broken plastic bushing with the Reid Racing Bronze Kingpin bushings from ORD. No more death wobble which was increased when the snow plow was on the front of the truck. I couldn't drive faster than 25mph from job to job.
 

Attachments

Last edited:

tonkasal

New member
23
0
0
Location
Atlanta / GA
I started getting some belt squeal and found out the two lower bolts on the driver side alternator were missing. Now I wonder if they were ever there when I bought the truck. I couldn't find the bolt specs on the TM's or SS, so after some deduced logic and measuring, I found the 3/8"-16 x 1-1/2 Hex Washer heads from ACE are the perfect fit. I topped off all fluids and ordered some stencils from epay.
 

cucvrus

Well-known member
11,279
9,624
113
Location
Jonestown Pennsylvania
I started getting some belt squeal and found out the two lower bolts on the driver side alternator were missing. Now I wonder if they were ever there when I bought the truck. I couldn't find the bolt specs on the TM's or SS, so after some deduced logic and measuring, I found the 3/8"-16 x 1-1/2 Hex Washer heads from ACE are the perfect fit. I topped off all fluids and ordered some stencils from epay.
Not to rain on your parade. The 3/8" bolts are NOT correct. The bolts you need are METRIC M10 X 1.5 pitch. You are being tricked into thinking you have the right bolts. They may get tight but they are not really tight. They are not properly meshed in the threads. Change it NOW to avoid further damage. I seen this on CUCV starter bolts before. They fit but a so close they jam in the threads. Just trying to HELP YOU. Metric is what you need. M10 X 1.5.
 

Another Ahab

Well-known member
17,825
4,157
113
Location
Alexandria, VA
Not to rain on your parade. The 3/8" bolts are NOT correct. The bolts you need are METRIC M10 X 1.5 pitch. You are being tricked into thinking you have the right bolts. They may get tight but they are not really tight. They are not properly meshed in the threads. Change it NOW to avoid further damage. I seen this on CUCV starter bolts before. They fit but a so close they jam in the threads. Just trying to HELP YOU. Metric is what you need. M10 X 1.5.
The vehicle is GMC though, right; but it's built with metric components?
 

cucvrus

Well-known member
11,279
9,624
113
Location
Jonestown Pennsylvania
Yes the bolts that enter the engine block/cylinder heads and all the brackets on the CUCV 6.2 Diesel are all metric with the exception of the bell housing bolts. The bell bolts to the rear of the block are all standard 3/8" then we move to the transmission and that is all mixed with metric and standard. The pan bolts are M8 Metric. I don't build them I just work on them. no explanation needed for me. Also the alternators have metric bolts and nuts on them. If they are stock. Some just get the entire toolbox out.
 
Top
AdBlock Detected

We get it, advertisements are annoying!

Sure, ad-blocking software does a great job at blocking ads, but it also blocks useful features of our website like our supporting vendors. Their ads help keep Steel Soldiers going. Please consider disabling your ad blockers for the site. Thanks!

I've Disabled AdBlock
No Thanks