• Steel Soldiers now has a few new forums, read more about it at: New Munitions Forums!

  • Microsoft MSN, Live, Hotmail, Outlook email users may not be receiving emails. We are working to resolve this issue. Please add support@steelsoldiers.com to your trusted contacts.


Winch mounting plates

Hard Head

Member
Steel Soldiers Supporter
540
21
18
Location
Greenville SC
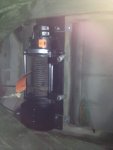
Well ****! I get a call from my MIL this afternoon, telling me there's some wood box on the doorstep of my house. "I don't know what it is but I can't move it!" :whistle:

The packaging alone was pretty enough to take a picture of! I feel like I need to save the box like I just smoked a good cigar!

This is gonna be a fun evening!

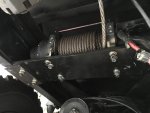
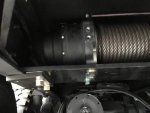
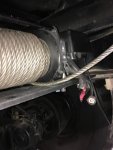
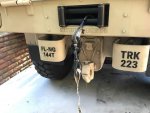
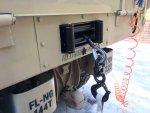
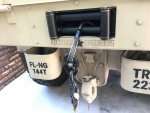
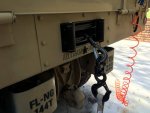
View attachment 635789 View attachment 635792 View attachment 635793
If you want to recess the fairlead let me know! If not, you are good to go! I will email you the instructions. Just updating for the recessing frame adapter.
 

Hard Head

Member
Steel Soldiers Supporter
540
21
18
Location
Greenville SC
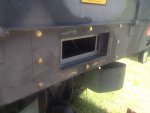
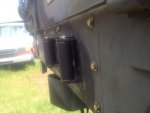
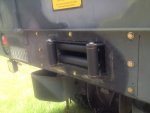
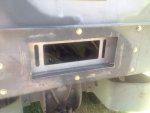
Well I got the rear fairlead installed on a 923A2 today. I am cutting some more stuff for the rear kit. I am making a cover plate and some star washers that will make it look cool with our new DBA "Militia Engineering"

Here is the drawing for the Stars and Cover plate. The cover plate is optional. If you decide to make the hole a little larger you can and cover any mistakes in cutting!

cover_plate.jpgstar_washers.jpg

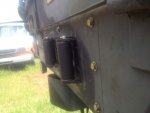
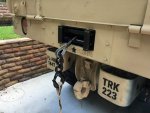
Fairlead plate mounted.jpgfairlead side view.jpgfairlead inserted.jpg

I will take some more pictures once the cover plate and stars are added. I just have to get this done. I got in 200 feet of tubing to cut and weld for the "shadow box" I will also make a tag bracket to snap on the fairlead since I don't want to permanently mount tags on my truck! Since I am going to use a cover plate I will paint the area under the logo with a flat white and also the stars for the bolts in the middle. If you don;t want a cover plate put some painters tape on where you are cutting so the jig saw will not mark up your paint!
 

Attachments

Last edited:

Hard Head

Member
Steel Soldiers Supporter
540
21
18
Location
Greenville SC
There is about 1/64" between the fairlead and the fully dropped tailgate! I had a dent in the bottom of the frame that caused me to set the fairlead frame to the top of the cross member inside. Since it works about 1/4" above center I am just centering the cover plate. I will make the cover plate thinner to save shipping costs. 1/4" is not required.
 

TwistedOaks

Member
Steel Soldiers Supporter
204
8
18
Location
Odessa, Florida
That was not easy. Until I went and spent $89 on a transmission jack. Feels pretty substantial, but did I get it right is the question. I know I'm an early adopter.

IMG_4645.jpgIMG_4644.jpgIMG_4643.jpg
 

Hard Head

Member
Steel Soldiers Supporter
540
21
18
Location
Greenville SC
Are you missing the current overload ring for your winch? Call me tomorrow and we will get you going!
 
Last edited:

Hard Head

Member
Steel Soldiers Supporter
540
21
18
Location
Greenville SC
I mount directly over where you mounted on the very top channel under the bed. The winch turns upside down. The mounting plate goes against the cross member just under the actual bed floor. It is not easy to get it there I know. It is as high as I could put it to keep it safe and snug. I use a lift table. If you want to use the lower channel we will need to use a different spacer.
 

TwistedOaks

Member
Steel Soldiers Supporter
204
8
18
Location
Odessa, Florida
Are you missing the current overload ring for your winch? Call me tomorrow and we will get you going!
Nah - I took it off to avoid crushing it when I was lifting in place. Doing the electrical tonight. I've got 150 250 and 300 amp circuit breakers, I know the max amp is 300@ full load. I've also setup a disconnect switch. Does the Overload Ring act as a breaker? I was thinking that I might as well put one in regardless (accidental hot wire damage or something).
 

TwistedOaks

Member
Steel Soldiers Supporter
204
8
18
Location
Odessa, Florida
I mount directly over where you mounted on the very top channel under the bed. The winch turns upside down. The mounting plate goes against the cross member just under the actual bed floor. It is not easy to get it there I know. It is as high as I could put it to keep it safe and snug. I use a lift table. If you want to use the lower channel we will need to use a different spacer.
I thought about that, but was concerned that the wood runners could get compressed with a load in the bed and give the potential to shift the mount plate. Also didn't look like the bolts would be long enough to make it to the wedge plates. I agree, I like the idea of getting it up even higher, not to mention I was a little confused about getting to the release pin. But I really like where it is for wiring, since I can run a straight shot to the new tool/bin battery box on the passenger side. Now that I say that, I guess I don't need to reverse the orientation, just flip it, and move the guide plate/springs to the opposite side?
 

Hard Head

Member
Steel Soldiers Supporter
540
21
18
Location
Greenville SC
I thought about that, but was concerned that the wood runners could get compressed with a load in the bed and give the potential to shift the mount plate. Also didn't look like the bolts would be long enough to make it to the wedge plates. I agree, I like the idea of getting it up even higher, not to mention I was a little confused about getting to the release pin. But I really like where it is for wiring, since I can run a straight shot to the new tool/bin battery box on the passenger side. Now that I say that, I guess I don't need to reverse the orientation, just flip it, and move the guide plate/springs to the opposite side?
I have used 2 - 2x4's about 33" long to hold the winch as I jack the winch up one frame at a time. I just put the winch on the mount and keep it parallel to the frame. when you get high enough slide in a 2x4 and lower on it. Then raise the jack and do it again. It helps to have a helper to keep things balanced when you do this. All you have to do is just rotate everything length wise 180. You don't have to change anything on the winch. Call me on my cell 864-517-2707. I am supposed to get my steel today so I will be cutting everything today.
 

Hard Head

Member
Steel Soldiers Supporter
540
21
18
Location
Greenville SC
Yes it is an amp meter probe for over current. It only allows you to winch out if you overload to reduce tension on the winch cable. You cannot winch in until you reset the winch with the disconnect switch.
 

Hard Head

Member
Steel Soldiers Supporter
540
21
18
Location
Greenville SC
After playing dodge ball with the pentle hitch I decided to make an easier way to get the winch up and in place in the rear of the truck. You can move the winch back against the second cargo bed cross member. I am going to make the spacer 2" longer and add an additional hole so you can drill one 3/8" hole to tie the plate via the spacer to the cross member. This will facilitate a faster and easier installation using this mounting position. I just make a bunch of 7 gauge spacers that have to be redone! I will get another sheet and cut 64 more Monday. I haven't tried removing the rear bumpers to try mounting the winch above the pentle. I will let you all know it that is possible. Anyway I wanted to give a heads up. Any changes such as the spacer change will be sent out free of charge. I also designed several cover plates. I will post a picture of them shortly. I wanted one with 3 punisher cutouts to cover my rear marker lights under the winch. I can also just make the plate use the standard markers or round ones. I would really like feedback on this. I know several guys that use icon 360's on the rear right where the fairlead is positions to go. I can can make the plate accept them if I know the dimensions. I don't own any eye con lights. If anyone wants to send me the dimensions of the rear light bar that would be great!

Pic showing the new spacer tied to cross member
new spacer.jpg

Winch mounted behind and above pintle hitch. Got some rust to fix! This is as high as you can get a winch under the truck. Nice and attached to the cargo bed. You need a helper to stabilize the winch during a lift this high. The winch is very protected in this mounting position. You will practically have to bury the rear tires to make ground contact with the winch. It is even with the rear cross member.
IMG_2600.jpg
 

Attachments

Last edited:

Hard Head

Member
Steel Soldiers Supporter
540
21
18
Location
Greenville SC
I have an idea for mounting a front winch utilizing more of the existing space on the 939. It is not easy and will be somewhat time consuming. It may still require a very slight extension of around 2 inches to clear the bumper. I hate to cut bumpers! Anyway I would remove the hood support channel and make plates (mounting and clamping) to do both jobs. The winch would still hang down some below the frame since the plate would have to be located at the same height as the existing hood channel. I estimate the span plate would need to be around an inch thick to hold the hood and winch. If anyone wants to fund this I will be happy to give it a try. I would also want a protection plate designed to go under it. Otherwise I have a front extension kit that extends the bumper about 8 inches. I may shorten this an inch to keep it tighter. There are always trade offs in everything we do. I am also making two storage bins to go behind the existing bumper when extended to make it a 10" deep bumper. They will replace the 4 gussets we now use and make a wrap around box. The stock bumper will resemble the maxxpro bumper but have storage doors on the back.
 

TwistedOaks

Member
Steel Soldiers Supporter
204
8
18
Location
Odessa, Florida
You pointed that at me, didn't you? Let's do this! So you have a link for the current one? I'm liking the idea of toolboxes. I've got no problem being a patron of the metal arts.

I have an idea for mounting a front winch utilizing more of the existing space on the 939. It is not easy and will be somewhat time consuming. It may still require a very slight extension of around 2 inches to clear the bumper. I hate to cut bumpers! Anyway I would remove the hood support channel and make plates (mounting and clamping) to do both jobs. The winch would still hang down some below the frame since the plate would have to be located at the same height as the existing hood channel. I estimate the span plate would need to be around an inch thick to hold the hood and winch. If anyone wants to fund this I will be happy to give it a try. I would also want a protection plate designed to go under it. Otherwise I have a front extension kit that extends the bumper about 8 inches. I may shorten this an inch to keep it tighter. There are always trade offs in everything we do. I am also making two storage bins to go behind the existing bumper when extended to make it a 10" deep bumper. They will replace the 4 gussets we now use and make a wrap around box. The stock bumper will resemble the maxxpro bumper but have storage doors on the back.
 

Hard Head

Member
Steel Soldiers Supporter
540
21
18
Location
Greenville SC
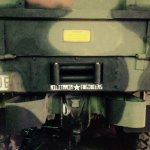
I wish I had a nicer paint job on the truck but this is what the recessed fairlead looks like now. Very functional and I even covered the dent in the back of the truck. I put 2 pieces of reflective tape behind the lettering and it is hard to capture with flash!
FullSizeRender.jpg
 

TwistedOaks

Member
Steel Soldiers Supporter
204
8
18
Location
Odessa, Florida
Meh, Don't worry about it HH, I'll get you some quality pics and a video install shortly. We'll throw a little 686 Desert Sand at it and see if it photographs better. ;)
I wish I had a nicer paint job on the truck but this is what the recessed fairlead looks like now. Very functional and I even covered the dent in the back of the truck. I put 2 pieces of reflective tape behind the lettering and it is hard to capture with flash!
View attachment 638404
 
Top
AdBlock Detected

We get it, advertisements are annoying!

Sure, ad-blocking software does a great job at blocking ads, but it also blocks useful features of our website like our supporting vendors. Their ads help keep Steel Soldiers going. Please consider disabling your ad blockers for the site. Thanks!

I've Disabled AdBlock
No Thanks